Ford Mustang (1999-2004) Service Manual: Throttle Body
Removal
WARNING: Do not smoke or carry lighted tobacco or open flame of any type when working on or near any fuel related components. Highly flammable mixtures are always present and can ignite. Failure to follow these instructions can result in personal injury.
CAUTION: The throttle body bore and plate area have a special coating and cannot be cleaned.
1. Remove the air intake scoop bracket. For additional information, refer to Section.
2. Remove the air cleaner outlet tube. For additional information, refer to Section.
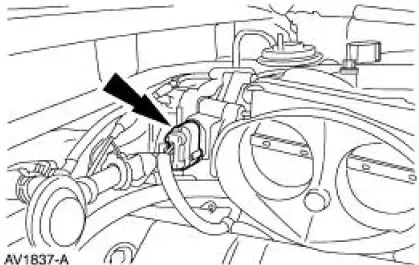
3. Disconnect the throttle position (TP) sensor electrical connector.
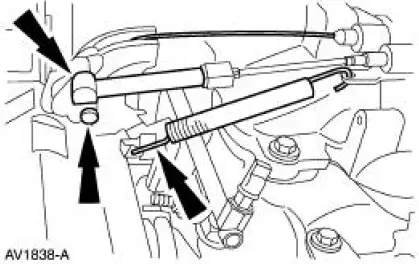
4. Disconnect the accelerator controls.
- Disconnect the accelerator cable.
- Disconnect the speed control cable.
- Disconnect the return spring.
5. NOTE: Discard the throttle body gasket after removing the throttle body.
Remove the throttle body.
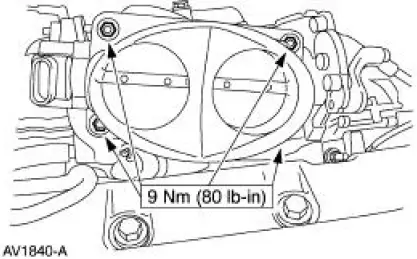
- Remove the four bolts.
Installation
1. NOTE: Install a new throttle body gasket.
To install, reverse the removal procedure.
 Fuel Charging and Controls
The fuel injection supply manifold (9F792):
delivers fuel to the fuel injector.
receives fuel from the fuel supply line.
The throttle body:
controls air supply to the upper intake manifold by po ...
 Fuel Injectors
Removal
WARNING: Do not smoke or carry lighted tobacco or open flame of any
type when
working on or near any fuel related components. Highly flammable mixtures are
always present
and can ignite. Fai ...
Other materials:
Crankshaft Runout
Special Tool(s)
Dial Indicator Gauge with
Holding Fixture
100-002 (TOOL-4201-C) or
equivalent
1. NOTE: Crankshaft main bearing journals must be within
specifications before checking runout.
Use the Dial Indicator Gauge with Holding Fixtur ...
Idle Air Control (IAC) Valve - 3.8L
Removal
1. Disconnect the battery ground cable. For additional information,
refer to Section.
2. NOTE: Discard the idle air control (IAC) valve gasket.
Remove the IAC valve.
Disconnect the connector.
Remove the two bolts, the IAC valve and ...
Inspection and Verification
1. Verify the customer concern by operating the system.
2. Visually inspect for obvious signs of mechanical or electrical damage.
Visual Inspection Chart
Mechanical
Electrical
Power window
regulator
Window run
weatherstrip
Do ...
