Ford Mustang (1999-2004) Service Manual: Flywheel Ring Gear
Removal
1. Remove the flywheel.
2. WARNING: This procedure should be carried out only by a correctly equipped and experienced acetylene torch operator. Tongs must be used or asbestos gloves worn when handling the heated flywheel ring gear. Failure to follow these instructions can result in personal injury.
CAUTION: Tap the flywheel ring gear evenly to prevent binding.
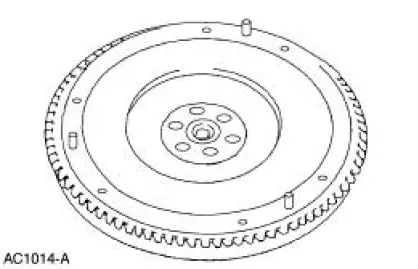
Remove the flywheel ring gear from the flywheel.
- Evenly heat the flywheel ring gear with an acetylene torch and use a brass drift to drive the flywheel ring gear off the flywheel.
Installation
1. WARNING: This procedure should be carried out only by a properly equipped and experienced acetylene torch operator. Tongs must be used or asbestos gloves worn when handling the heated flywheel ring gear. Failure to follow these instructions can result in personal injury.
CAUTION: Do not heat the flywheel ring gear beyond 261C (500F). Use heatindicating crayons to prevent overheating.
CAUTION: Keep the torch moving to prevent hot spots.
Evenly heat the flywheel ring gear with an acetylene torch.
- Install the flywheel ring gear with the bevel on the flywheel ring gear facing the rear of the flywheel.
- Use a brass drift to tap the flywheel ring gear into position, reheat as necessary.
2. Install the flywheel.
 Pilot Bearing
Special Tool(s)
Puller with Slide Hammer
308-001 (T58L-101-B)
1. Remove the clutch disc and the clutch pressure plate. For additional
information, refer to Disc
and Pressure Plate-3.8 ...
 Clutch Controls
General Specifications
Torque Specifications
...
Other materials:
Reporting safety defects (U.S. only)
If you believe that your vehicle has
a defect which could cause a crash
or could cause injury or death, you
should immediately inform the
National Highway Traffic Safety
Administration (NHTSA) in addition to notifying Ford Motor Company.
If NHTSA receives si ...
Pinpoint Tests
PINPOINT TEST A: THE ENGINE DOES NOT CRANK AND THE
RELAY DOES CLICK
Test Step
Result / Action to Take
A1 CHECK THE VOLTAGE TO THE STARTER RELAY
YesGO to A2 .
No
REPAIR circuit 1050 (LG/VT) for an open. TEST the
system for normal operation. ...
Lock Cylinder - Door
Removal
1. NOTE: Individual lock cylinders are repaired by discarding the
inoperative cylinder and building
a new lock cylinder using the appropriate lock repair package. The lock
repair package includes
a detailed instruction sheet to build the ne ...
