Ford Mustang (1999-2004) Service Manual: Installation
CAUTION: Electronic modules are sensitive to static electrical charges. If exposed to these charges, damage may result.
1. NOTE: Two technicians are necessary to carry out this step.
Install the instrument panel.
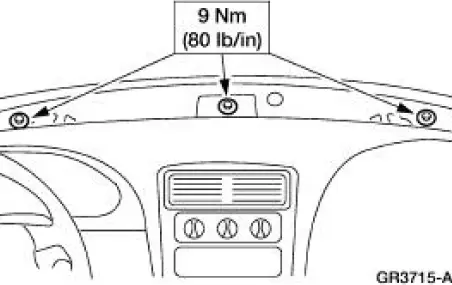
2. Install the upper instrument panel support bolts.
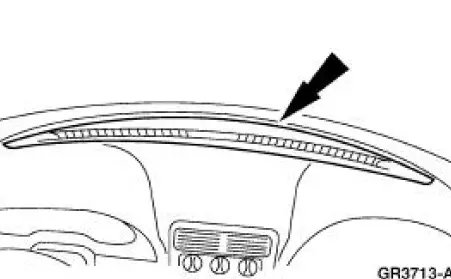
3. Install the instrument panel defroster grille.
4. Install the RH instrument panel support bolt.
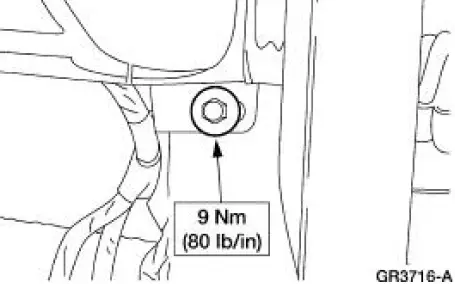
5. Install the LH instrument panel support bolt and nut.
6. Install the four center instrument panel support bolts.
7. NOTE: This step is being carried out through the audio unit opening.
Install the temperature control cable to the blend door.
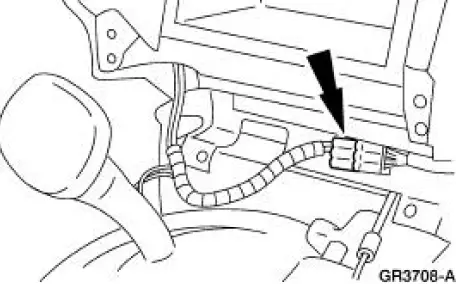
8. If equipped, connect the shifter assembly electrical connector.
9. Install the audio unit. For additional information, refer to Section.
10. If equipped, connect the shift interlock assembly to the selector lever.
1. Position the shift interlock assembly.
2. Connect the shift interlock cable.
3. Install the R-clip.
4. Install the screw.
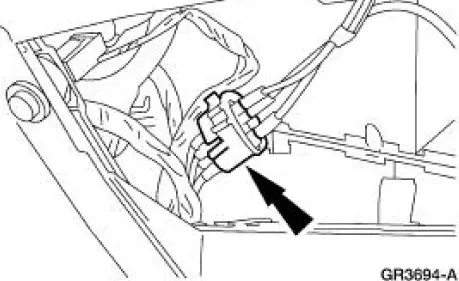
11. Connect the ECS module electrical connector.
1. Connect the ECS module electrical connector.
2. Engage the locking tab.
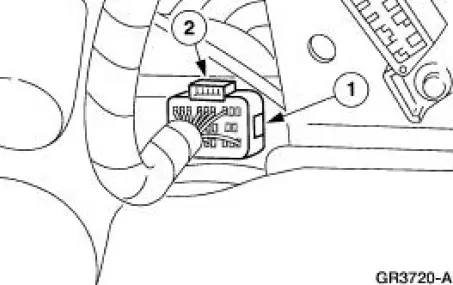
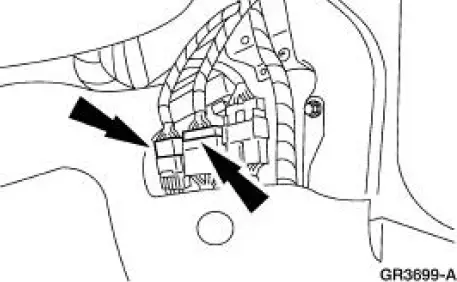
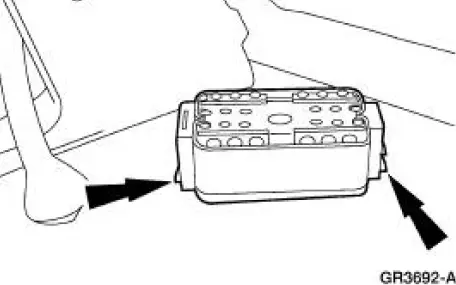
12. Connect the GEM electrical connectors.
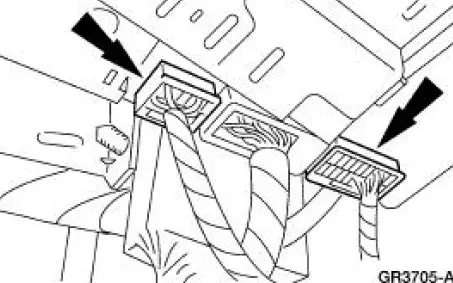
13. Connect the LH main wiring harness electrical connectors.
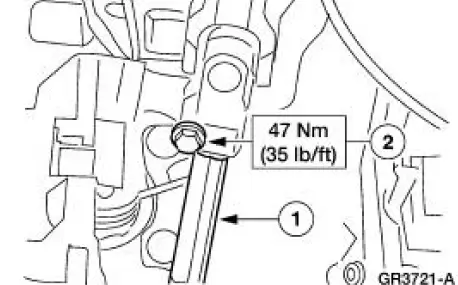
14. Connect the intermediate shaft to the steering column.
1. Connect the intermediate shaft to the steering column.
2. Install the pinch bolt.
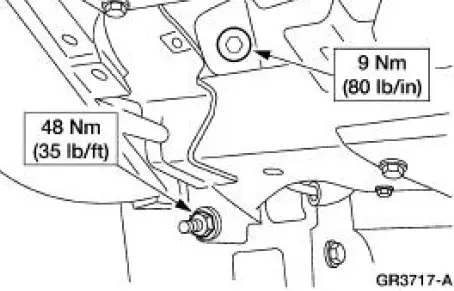
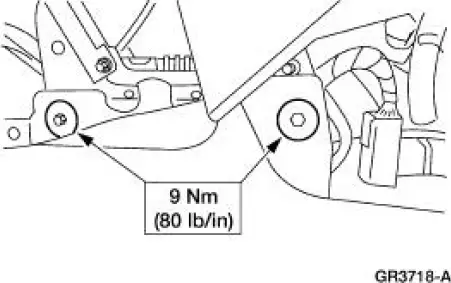
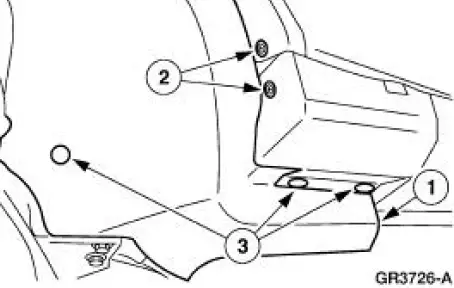
15. Install the instrument panel reinforcement.
1. Position the instrument panel reinforcement.
2. Install the screws.
16. Install the instrument panel steering column cover.
1. Position the instrument panel steering column cover.
2. Install the screws.
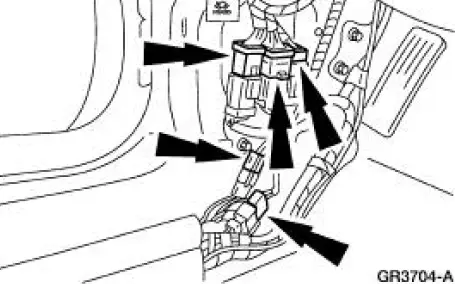
17. Connect climate control wiring harness connector.

18. Connect the RH main harness electrical connectors.
19. Install the LH and RH door weatherstrips.
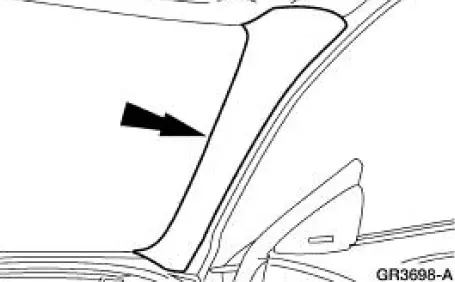
20. Install the LH and RH windshield side garnish mouldings.
- If equipped with a convertible top, install the pin-type retainers.
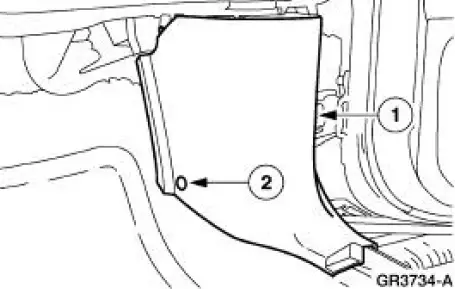
21. Install the LH and RH A-pillar lower trim panels.
1. Position the LH and RH A-pillar lower trim panels.
2. Install the pin-type retainers.
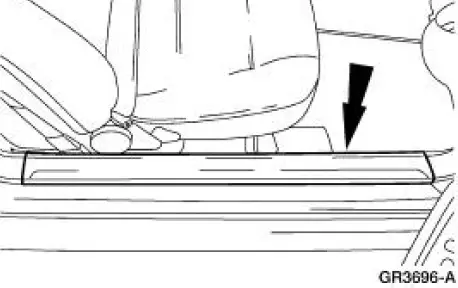
22. Install the LH and RH scuff plates.
23. Open the glove compartment.
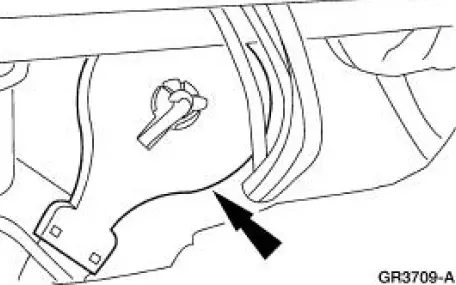
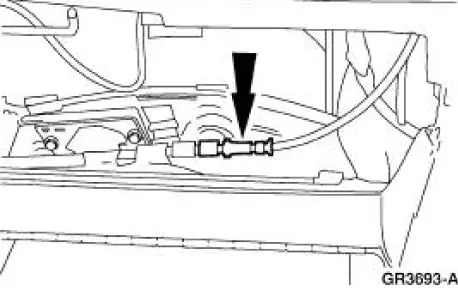
24. Connect the antenna in-line connector.
25. Install the upper RH instrument panel support bolt.
26. Connect the climate control vacuum harness connector.
27. Install the floor console. For additional information, refer to Floor Console in this section.
28. Remove the LH front wheel and tire assembly. For additional information, refer to Section.
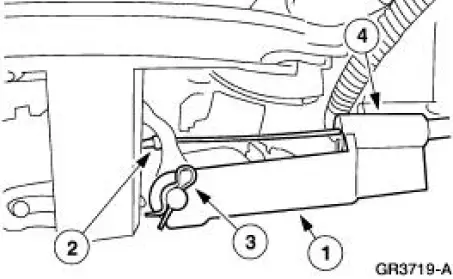
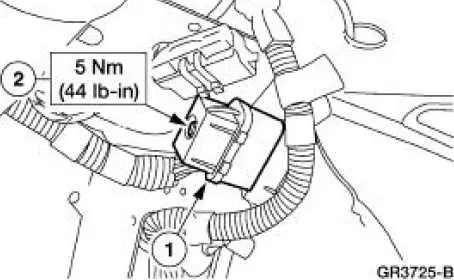
29. Insert the bulkhead electrical connector into the dash panel.
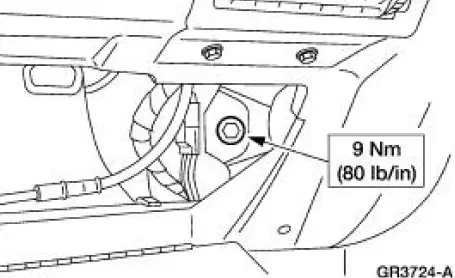
30. Connect the bulkhead electrical connector.
1. Connect the bulkhead electrical connector.
2. Tighten the bolt.
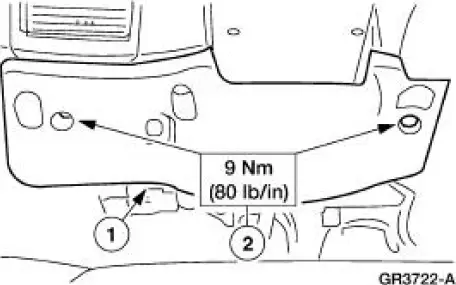
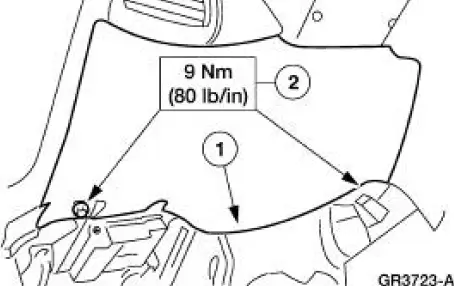
31. Install the LH front splash shield.
1. Position the LH front splash shield.
2. Install the screws.
3. Install the pin-type retainers.
32. Install the LH front wheel and tire assembly. For additional information, refer to Section.
33. Install the passenger air bag module. For additional information, refer to Section.
34. Install the driver air bag module. For additional information, refer to Section.
 Removal
CAUTION: Electronic modules are sensitive to static electrical
charges. If exposed to
these charges, damage may result.
1. Remove the driver air bag module. For additional information,
refer ...
 Instrument Panel - Center Finish Panel
Removal and Installation
All vehicles
1. Disconnect the battery ground cable. For additional information,
refer to Section.
Vehicles with automatic transmission
2. Place the selector lever ...
Other materials:
Safety Precautions
WARNING: Never run the engine with one wheel off the ground, for
example, when
changing a tire. The wheel(s) resting on the ground could cause the vehicle to
move.
WARNING: The tire and wheel must always be correctly matched. It is very
important to
determ ...
Fuel Charging Wiring Harness
Removal and Installation
WARNING: Do not smoke or carry lighted tobacco or open flame of any
type when
working on or near any fuel related components. Highly flammable mixtures are
always present
and can ignite. Failure to follow these instructions can resul ...
Installation
1. Install a new upper intake manifold gasket.
2. NOTE: Refer to the location note made during removal and make sure
the bolts are installed in
the correct locations.
Install the upper intake manifold. Tighten the bolts in two stages in the
sequence shown ...
