Ford Mustang (1999-2004) Service Manual: Trim Panel - Door
Removal
All vehicles
1. CAUTION: Use a shop towel or similar material between the tool and the front door trim panel or damage to the front door trim panel may occur.
Position the window regulator switch plate (14527) aside.
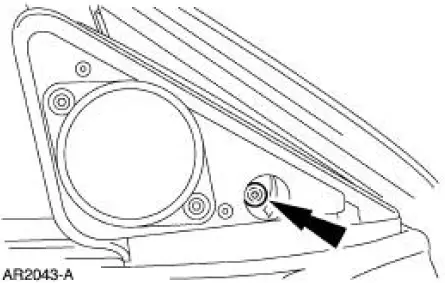
1. Pull at the service notch.
2. Lift to release the clip at the rear edge.
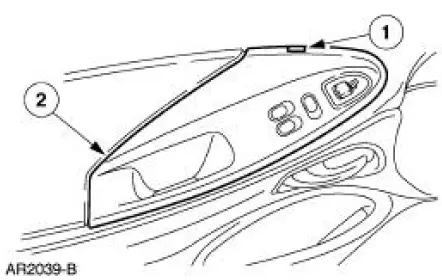
2. Remove the window regulator switch plate.
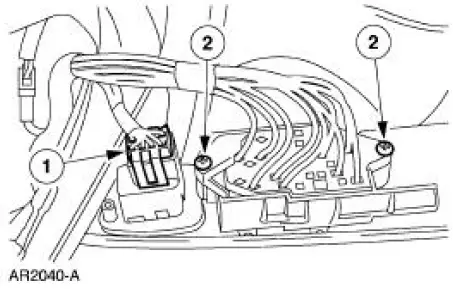
1. Disconnect the power mirror electrical connector.
2. Remove the screws and the window regulator switch plate.
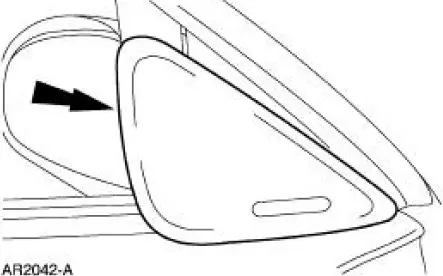
3. Remove the door latch release handle cup (22634).
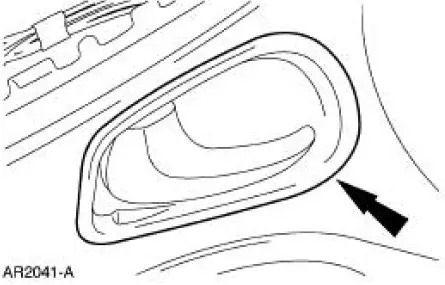
4. Remove the cover.
Vehicles with Mach 460 Premium Sound System
5. Remove the screw and the speaker.
- Disconnect the electrical connector.
All vehicles
6. Remove the screws.
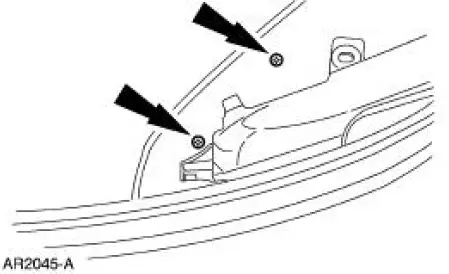
7. Remove the door trim panel (23942).
1. Remove the pin-type retainer.
2. Lift up the door trim panel to remove.

Installation
1. To install, reverse the removal procedure.
 Interior Trim and Ornamentation
General Specifications
Torque Specifications
Interior Trim
The interior trim consists of:
A-pillar lower trim panels
door trim panels
headliner (coupe)
package tray trim panel (coup ...
 Trim Panel - Quarter, Coupe
Removal and Installation
1. Remove the upper quarter trim panel. For additional information,
refer to Trim Panel-Upper
Quarter in this section.
2. Remove the scuff plate.
3. Remove the pin ...
Other materials:
Rear Drive Axle/Differential - Ford 8.8-Inch Ring Gear
General Specifications
Torque Specifications
Description
Nm
lb-ft
lb-in
Bolt retaining the differential pinion shaft to the
differential case
30
22
-
Bolt retaining the driveshaft yoke to the pinion flange
112
83
-
...
Exhaust Manifold RH
Removal and Installation
1. Disconnect the battery negative cable. For additional information,
refer to Section.
2. Remove the air cleaner outlet pipe. For additional information, refer to
Section.
3. Disconnect the differential pressure feedback exha ...
Valve Springs
Special Tool(s)
Compressor, Valve Spring
303-163 (T81P-6513-A)
Material
Removal
1. Remove the LH and the RH valve covers. For additional information,
refer to Valve Cover-LH
and Valve Cover RH in this section.
2. Rotate the crankshaft un ...
