Ford Mustang (1999-2004) Service Manual: Connect
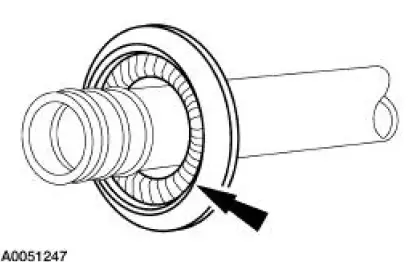
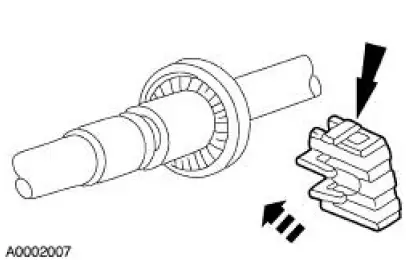
1. Install the A/C tube lock coupling spring.
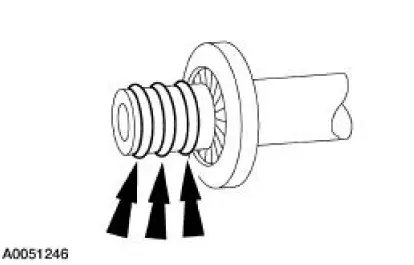
2. Lubricate the inside of the coupling with PAG Refrigerant Compressor Oil (R-134a Systems) or equivalent.
3. CAUTION: Use only the new O-ring seals. The use of any O-ring seals other than those specified in the Ford Master Parts Catalog may result in intermittent leakage during vehicle operation.
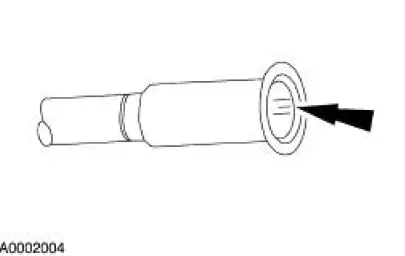
Install the O-ring seals.
- Lubricate the O-ring seals with PAG Refrigerant Compressor Oil (R-134a Systems) or equivalent.
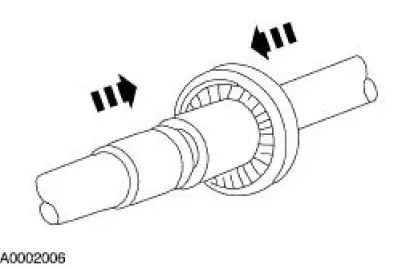
4. Connect the spring lock coupling fittings with a twisting motion until the A/C tube lock coupling spring snaps over the flared end of the female fitting.
5. Install the A/C tube lock coupling clip.
 Cleaning
1. Fabricate a cleaning tool from a 1/8 inch diameter brazing rod.
2. Cut an abrasive pad from maroon colored 3M Scotch Brite with the
dimensions corresponding
to the coupling size.
3. Assemble th ...
 Heater Hose Coupling
Special Tool(s)
Remover, Heater Hose Inlet
Tube
412-042 (T85T-18539-AH)
Disconnect Tool, Heater Hose
412-127
Material
Item
Specification
MERPOL
-
ESE-M ...
Other materials:
Accelerator Cable - 4.6L (2V)
Removal and Installation
1. Push the accelerator cable nylon bushing out of the accelerator pedal and
shaft arm.
2. Remove the bolts retaining the accelerator cable to the dash panel.
3. Disconnect the accelerator cable from the throttle body by rotating ...
Component Tests
Starter Motor -Voltage Drop Test
WARNING: When servicing starter motor or carrying out other underhood
work in the
vicinity of the starter motor, be aware that the heavy gauge battery input lead
at the starter
solenoid is "electrically hot" at all times. A p ...
Automatic transmission
WARNING: Always set the parking brake fully and make sure
the gearshift is latched in position P. Turn the ignition off and
remove the key whenever you leave your vehicle.
Your vehicle has been designed to improve fuel economy by reducing
fuel usage while coas ...
