
Ford Mustang (1999-2004) Service Manual: Removal
1. Disconnect the battery negative cable.
2. Drain the engine cooling system.
3. Remove the LH exhaust manifold. For additional information, refer to Exhaust Manifold-LH in this section.
4. Remove the lower intake manifold. For additional information, refer to Lower Intake Manifold in this section.
5. Remove the push rods. For additional information, refer to Push Rod in this section.
6. Remove the drive belt.
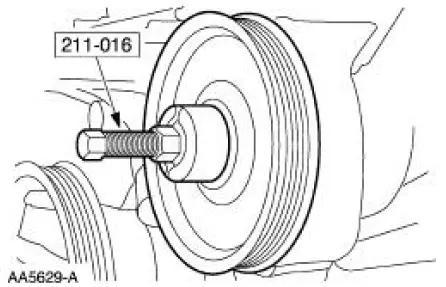
7. Using the special tool, remove the power steering pump pulley.
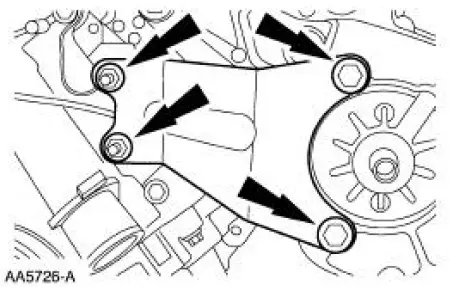
8. Remove the power steering pump bracket.
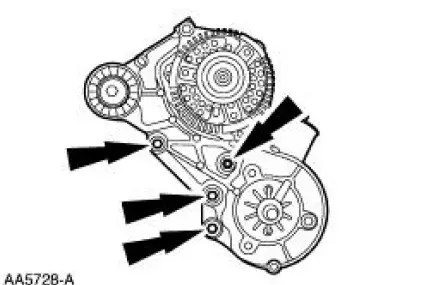
9. Remove the generator bracket.
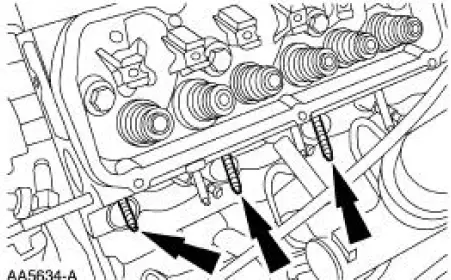
10. Remove the three exhaust manifold studs.
11. NOTE: Discard the cylinder head gasket.
NOTE: Record the location of the long bolts and the short bolts.
Remove the cylinder head. Discard the cylinder head bolts.
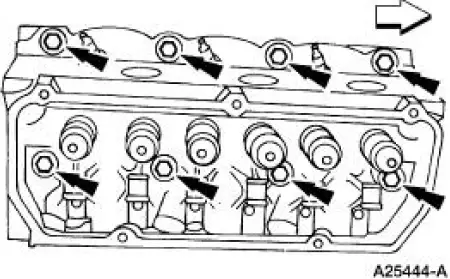
 Cylinder Head LH
Special Tool(s)
Remover, Power Steering
Pump Pulley
211-016 (T69L-10300-B)
Installer, Power Steering Pump
Pulley
211-009
Material
...
 Installation
NOTE: Do not use a fiber disc to clean the surfaces. Fibers from
the disc can get into the oil pan and
oil and clog the oil bypass valve.
1. Clean and inspect the cylinder head for flatness.
2. ...
Other materials:
Paint Codes
The first set of paint code letters/numbers listed indicate the vehicle
primary body color. The second
set of paint code letters/numbers listed (if applicable) indicate a two-tone or
accent body color.
B7 - Zinc Yellow (clear coat)
CX - Dark Shadow Gray ...
Instrument Panel - Center Finish Panel
Removal and Installation
All vehicles
1. Disconnect the battery ground cable. For additional information,
refer to Section.
Vehicles with automatic transmission
2. Place the selector lever in the 1 position.
Vehicles with manual transmission
3. ...
Disassembly
1. Remove the differential assembly from the differential housing. For
additional information, refer
to Differential Case in this section.
2. Remove the 10 bolts.
3. CAUTION: Do not damage the threads in the bolt holes.
Insert a punch in the bolt holes, a ...
