Ford Mustang (1999-2004) Service Manual: Removal
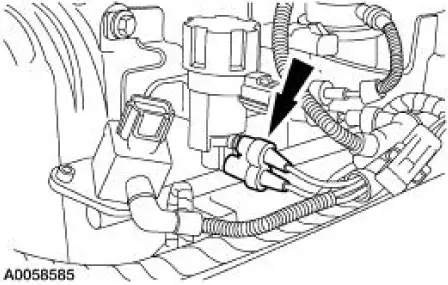
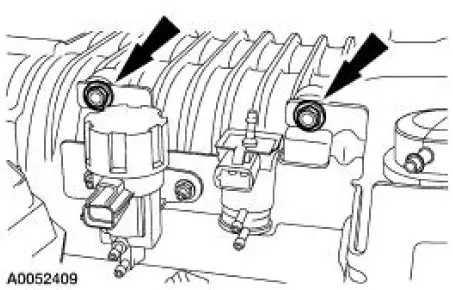
1. Disconnect the electrical connectors from the EGR vacuum regulator solenoid, the supercharger bypass vacuum solenoid, and the differential pressure feedback EGR system.
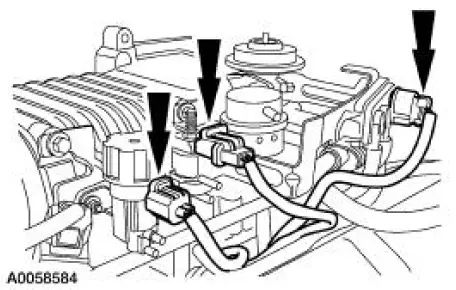
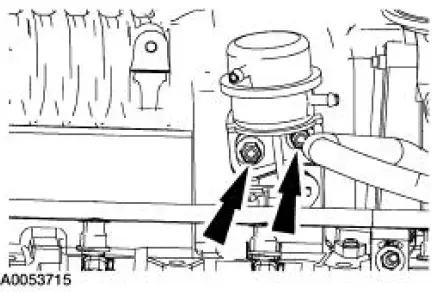
2. Disconnect the vacuum hoses from the differential pressure feedback EGR system.

3. Disconnect the vacuum hoses from the supercharger bypass vacuum solenoid, and the actuator.
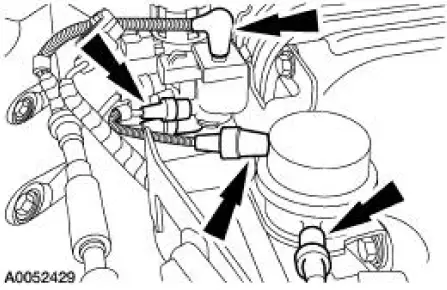
4. Disconnect the vacuum hoses from the EGR vacuum regulator solenoid.
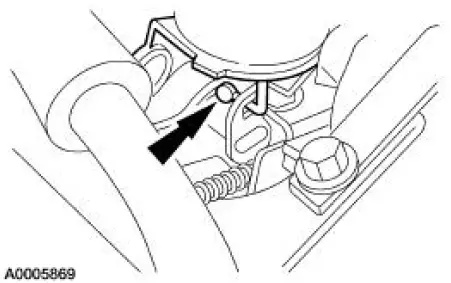
5. Remove the vacuum accessory bracket mounting nut.
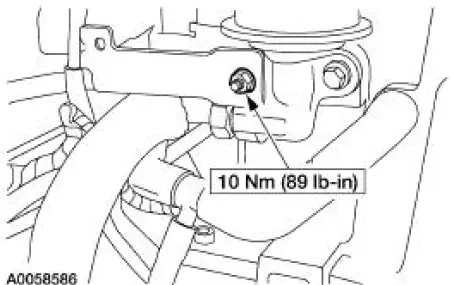
6. Remove the mounting bolts and the vacuum accessory bracket.
7. Remove the actuator mounting bolts.
8. Align the actuator rod with the slot in the actuator linkage, and remove the actuator.

 Installation
1. CAUTION: The actuator adjustment tool included with the
replacement actuator kit
must be used when installing the supercharger bypass vacuum actuator.
Failure to
correctly adjust the actu ...
Other materials:
Anti-Lock Control
Refer to Wiring Diagrams Cell 42 , Anti-Lock Brake for schematic and
connector information.
Special Tool(s)
Worldwide Diagnostic System
(WDS)
418-F224,
New Generation STAR (NGS)
Tester
418-F052, or equivalent scan
tool
73 Digita ...
Charge Air Cooler
Material
Item
Specification
Silicone Gasket and Sealant
F7AZ-19554-EA or equivalent
WSE-M4G323-EA
Removal and Installation
1. Drain the supercharger coolant. For additional information, refer to
Section.
2. Release the fuel pressure. F ...
Pinpoint Tests
PINPOINT TEST A: THE CONTROL ILLUMINATION IS INOPERATIVE
Test Step
Result / Action to Take
A1 CHECK PARKING LAMPS
YesPlace the headlamp switch in the OFF
position.
GO to A2 .
No
REFER to Section.
Place the headlamp switch ...
