Ford Mustang (1999-2004) Service Manual: Accelerator Cable - 3.8L
Removal and Installation
1. Push the accelerator cable nylon bushing out of the accelerator pedal and shaft arm.
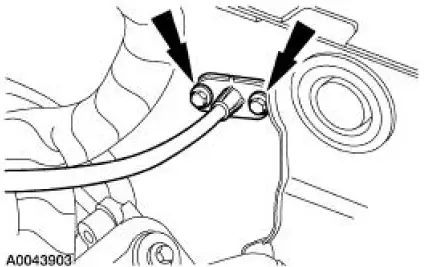
2. Remove the bolts retaining the accelerator cable to the dash panel.
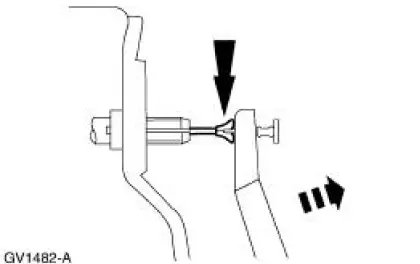
3. Disconnect the accelerator cable from the throttle body by rotating the throttle body full open and aligning the cable with the release slot.
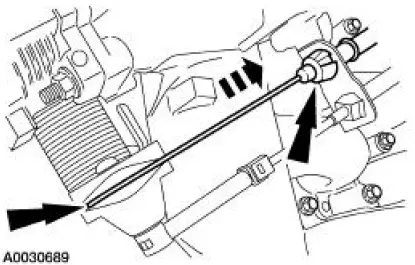
4. Disconnect the accelerator cable from the retaining bracket by compressing the locking tabs and back-feeding the cable through the bracket and out of the engine compartment.
5. To install, reverse the removal procedure.
 Accelerator Pedal and Shaft
Removal and Installation
1. Push the accelerator cable nylon bushing out of the accelerator pedal and
shaft arm.
2. Remove the accelerator pedal and shaft.
Remove the nuts.
Remove the accelerato ...
 Accelerator Cable - 4.6L (2V)
Removal and Installation
1. Push the accelerator cable nylon bushing out of the accelerator pedal and
shaft arm.
2. Remove the bolts retaining the accelerator cable to the dash panel.
3. Disconne ...
Other materials:
Windshield Glass
Special Tool(s)
Rotunda Pneumatic Knife with
Offset Blade
107-R1511 or equivalent
The Pumper
164-R2459 or equivalent
Rotunda Interior Auto Glass
Cut-Out Knife Kit
164-R2450 or equivalent
...
Steering Column Switches
Torque Specifications
Steering Column Switches (DESCRIPTION AND OPERATION)
The steering column switches system consists of the following components:
multifunction switch (13K359)
key release button (manual transmission only) (3F527)
ignition switch (11572 ...
Fuel Tank And Lines (Description and Operation)
WARNING: Do not smoke, carry lighted tobacco or an open flame of any
type when
working on or near any fuel-related component. Highly flammable mixtures are
always present
and may be ignited, possibly resulting in personal injury.
The vehicle utilizes a retur ...
