Ford Mustang (1999-2004) Service Manual: Removal
All vehicles
WARNING: To prevent glass splinters from entering eyes or cutting hands, wear safety glasses and heavy gloves when cutting glass from the vehicle.
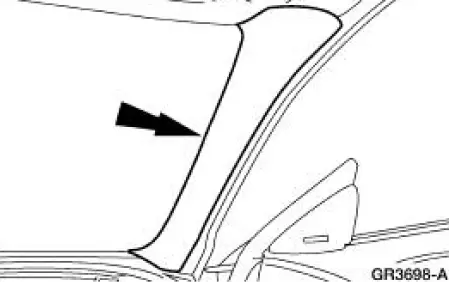
1. Remove the RH and LH windshield side garnish mouldings.
- If equipped with a convertible top, remove the pin-type retainers.
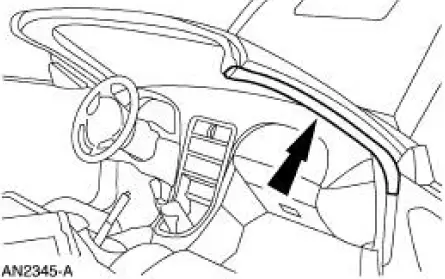
2. Remove the interior rear view mirror.
Convertible
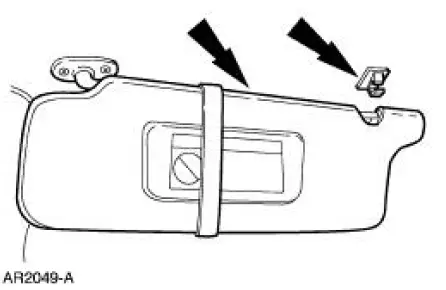
3. Remove the visor trim moulding.
4. Remove the screws and the sun visors.
- Disconnect the electrical connector(s).

5. Remove the weatherstrips.
6. Remove the screws and the weatherstrip retainers.
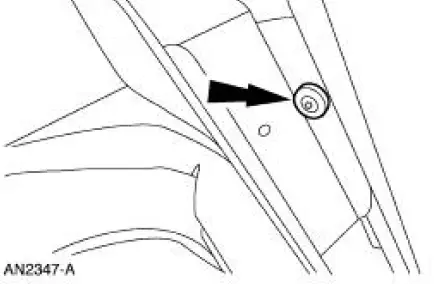
7. Remove the screw and the exterior A-pillar moulding.
Coupe
8. Remove the sun visors and clips
- Remove the screws.
- Remove the clips.
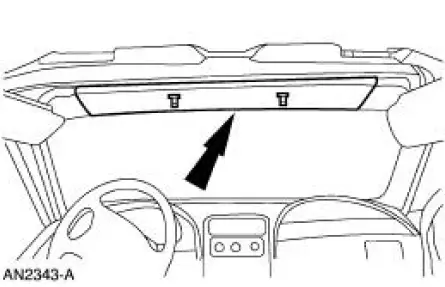
9. Remove the roof side trim moulding. For additional information, refer to Section.
10. Lower the front portion of the headliner.
All vehicles
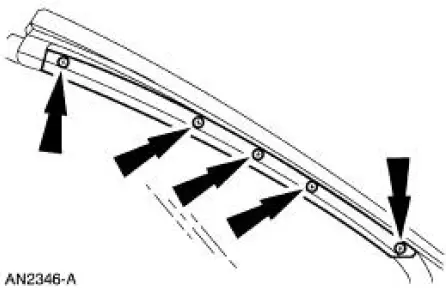
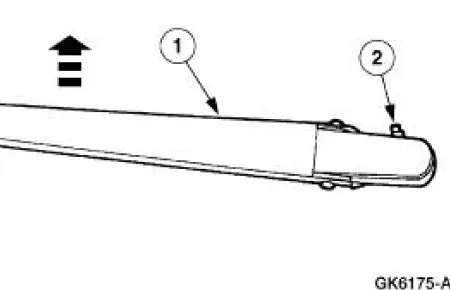
11. Remove the two windshield wiper pivot arms.
1. Raise up on the pivot arms.
2. Release the retainer tabs, and release the windshield wiper pivot arms.
12. Remove the cowl grille weatherstrip.
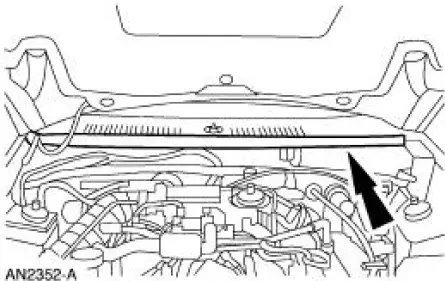
13. Remove the cowl grille.
14. Using a soft brush or vacuum, clean any dirt or foreign material from the pinch weld.
15. CAUTION: Cover the instrument panel to prevent possible damage.
CAUTION: Care must be taken to prevent scratching the pinch weld.
NOTE: Lubricate the existing urethane adhesive with water to aid the special tool while cutting.
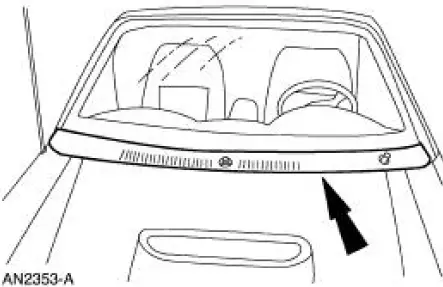
Using the special tool, starting at the top center of the windshield cut the urethane adhesive from the windshield glass and work down the sides.

16. Using the special tool, distance the windshield glass from the body.
17. Using the special tool cut the urethane adhesive and remove the windshield.
18. Using a soft brush or vacuum, remove any dirt or foreign material from the pinch weld.
 Windshield Glass
Special Tool(s)
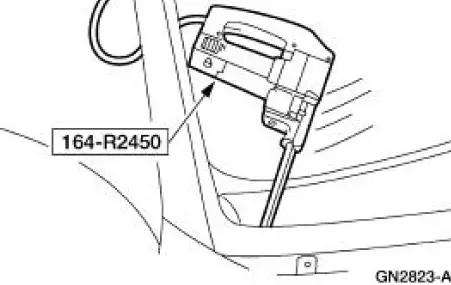
Rotunda Pneumatic Knife with
Offset Blade
107-R1511 or equivalent
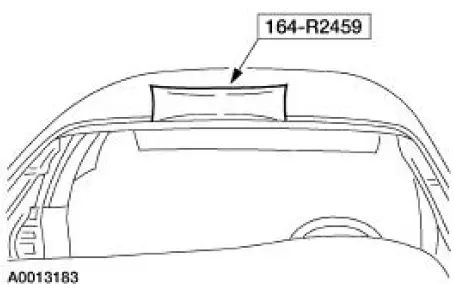
The Pumper
164-R2459 or equivalent
Rotunda Interior Auto Glass
Cut-Out Knif ...
 Installation
All vehicles
CAUTION: After installing the urethane installed windshield,
the vehicle should not be
driven until the urethane adhesive has cured. The curing time at
temperatures above 13C (5 ...
Other materials:
Removal
All vehicles
1. Remove the air intake scoop bracket. For additional information, refer to
Section.
2. Remove the RH valve cover. For additional information, refer to Valve Cover
RH in this section.
3. Remove the Hydro-Boost brake booster. For additional in ...
Component Tests
Ball Joint Inspection
1. Raise and support the vehicle.
2. Prior to performing any inspection of the ball joints, inspect the wheel
bearings.
3. Position a safety stand beneath the front suspension lower arm (3079) to be
tested.
4. While an assistant pul ...
Antenna (Removal and Installation)
Removal
1. Lower the glove compartment by releasing the stops from the
instrument panel.
2. Disconnect the antenna in-line connector
3. Remove the antenna base and cable.
1. Remove the radio antenna base cap.
2. Remove the screws.
3. Re ...
