Ford Mustang (1999-2004) Service Manual: Actuator - Door Lock
Removal
1. Remove the door trim panel (23942). For additional information, refer to Section.
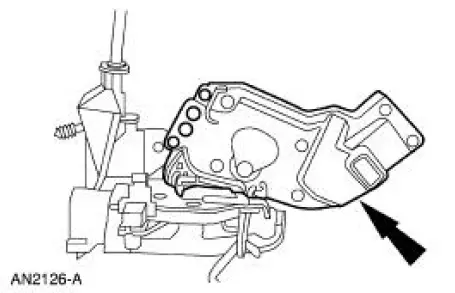
2. Remove the door latch (21812). For additional information, refer to Latch-Door .
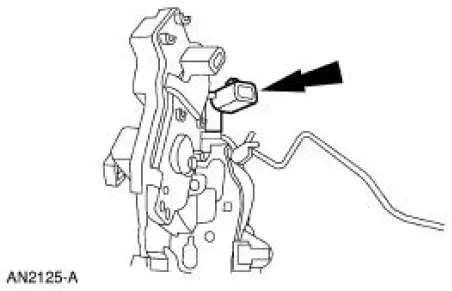
3. Remove the door ajar switch.
- Release the locking tab.
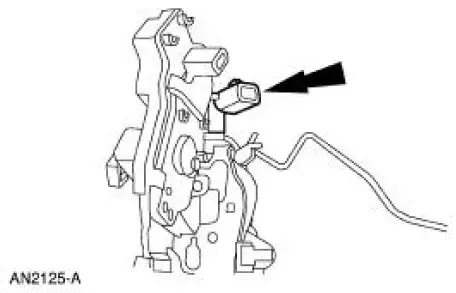
4. Remove the adjunct actuator.
Installation
1. To install, reverse the removal procedure.
Switch -Door Ajar Switch
Removal
1. Remove the door trim panel (23942). For additional information, refer to Section.
2. Remove the door latch (21812). For additional information, refer to Latch-Door .
3. Remove the door ajar switch.
- Release the locking tab.
Installation
1. To install, reverse the removal procedure.
 Lock Cylinder - Luggage Compartment Lid
Removal
1. NOTE: Individual lock cylinders are repaired by discarding the
inoperative cylinder and building
a new lock cylinder using the appropriate lock repair package. The lock
repair pac ...
 Switch - Door Lock
Removal
1. CAUTION: Place a rag between the window regulator switch
plate and the door trim
panel to avoid damaging the door trim panel.
Position the window regulator switch plate (14524) asi ...
Other materials:
Engine Ignition (Description and Operation)
Eight separate ignition coils:
are controlled by the powertrain control module (PCM).
are mounted directly above each spark plug.
are controlled by the powertrain control module for correct firing
sequence.
The spark plug:
changes the high vo ...
Removal
CAUTION: Suspension fasteners are critical parts because they affect
performance of vital
components and systems and their failure can result in major service expense. A
new part with
the same part number must be installed if installation becomes necessary. ...
Pulley - CII Pump
Special Tool(s)
Pump Pulley Installer
211-009 (T65P-3A733-C)
Pump Pulley Remover
211-016 (T69L-10300-B)
Removal
1. Remove the drive belt.
2. Using the special tool, remove the pulley.
Installation
1. Using the special tool, instal ...
