Ford Mustang (1999-2004) Service Manual: Lock Cylinder - Luggage Compartment Lid
Removal
1. NOTE: Individual lock cylinders are repaired by discarding the inoperative cylinder and building a new lock cylinder using the appropriate lock repair package. The lock repair package includes a detailed instruction sheet to build the new lock cylinder to the current key code of the vehicle.
Disconnect the luggage compartment lid lock actuator (432A38) cable.
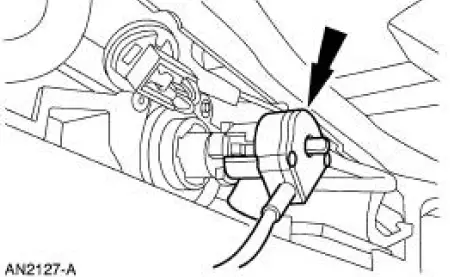
2. Remove the luggage compartment lid lock cylinder (43262).
1. Remove the rivet.
2. Rotate the lock cylinder counterclockwise to remove.
Installation
1. To install, reverse the removal procedure.
Push Button Rod -Door
Removal
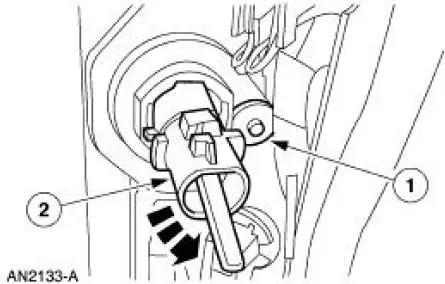
1. Remove the door trim panel (23942). For additional information, refer to Section.
2. Release the push button rod by opening the clip.
Installation
1. To install, reverse the removal procedure.
 Lock Cylinder - Door
Removal
1. NOTE: Individual lock cylinders are repaired by discarding the
inoperative cylinder and building
a new lock cylinder using the appropriate lock repair package. The lock
repair pac ...
 Actuator - Door Lock
Removal
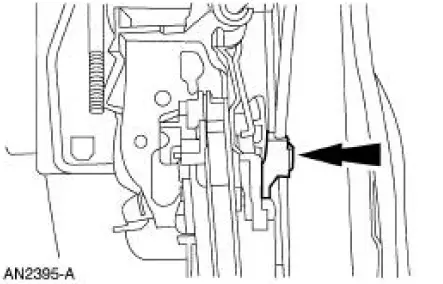
1. Remove the door trim panel (23942). For additional information,
refer to Section.
2. Remove the door latch (21812). For additional information, refer to
Latch-Door .
3. Remove ...
Other materials:
Cylinder Heads (Installation)
Special Tool(s)
Installer, Crankshaft Vibration
Damper
303-102 (T74P-6316-B)
Installer, Front Cover Oil Seal
303-335 (T88T-6701-A)
Holding Tool, Crankshaft
303-448 (T93P-6303-A)
Spreader Bar
303-D089 (D9 ...
Pinpoint Tests
CAUTION: Before removing and installing the GEM or its connectors,
disconnect the battery. Failure to follow this caution will
result in the GEM storing many erroneous DTCs and
may result in the GEM exhibiting erratic operation after installation.
CAUTI ...
Driving Aids
STEERING
Electric Power Steering
WARNING: The electric power steering system has diagnostic
checks that continuously monitor the system to ensure proper
operation. When a system error is detected a steering message will
appear in the information display.
WARNI ...
