
Ford Mustang (1999-2004) Service Manual: Air Conditioning (A/C) Pressure Relief Valve - 3.8L
Material
| Item | Specification |
| PAG Refrigerant Compressor Oil (R-134a Systems) F7AZ-19589-DA (Motorcraft YN- 12-C) | WSH-M1C231- B |
Removal and Installation
1. Recover the refrigerant. For additional information, refer to Section.
2. Unlatch the breather.
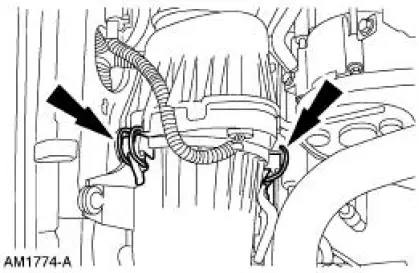
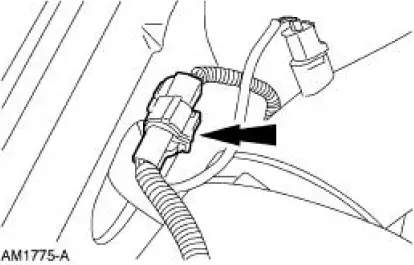
3. Disconnect the mass air flow (MAF) sensor electrical connector.
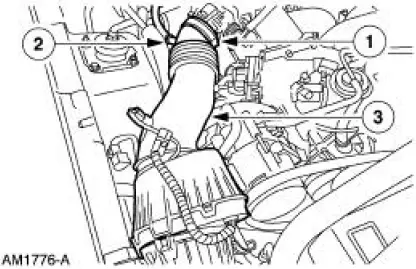
4. Remove the air cleaner outlet tube.
1. Loosen the clamp.
2. Disconnect the crankcase ventilation tube.
3. Remove the air cleaner outlet tube.
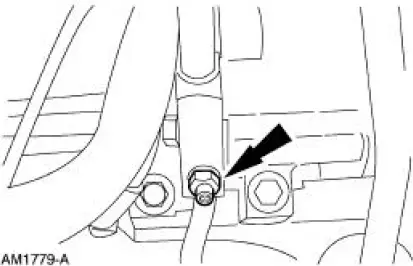
5. Remove the A/C compressor pressure relief valve.
- Discard the O-ring seal.
6. To install, reverse the removal procedure.
- Install a new O-ring seal lubricated in clean PAG oil.
7. Evacuate, leak test and charge the refrigerant system. For additional information, refer to Section.
 Suction Accumulator
Material
Item
Specification
PAG Refrigerant Compressor
Oil (R-134a Systems)
F7AZ-19589-DA (Motorcraft YN-
12-C)
WSH-M1C231-
B
Removal and Installation
1. Recover the refriger ...
 Air Conditioning (A/C) Pressure Relief Valve - 4.6L
Material
Item
Specification
PAG Refrigerant Compressor
Oil (R-134a Systems)
F7AZ-19589-DA (Motorcraft YN-
12-C)
WSH-M1C231-
B
Removal and Installation
NOTE: Installation of a ...
Other materials:
Lamp Assembly - Rear
Removal
1. Position the luggage compartment trim aside.
Remove the two retainers.
2. Remove the four rear lamp nuts.
3. Remove the rear lamp assembly, disconnect the electrical connectors and
replace the bulbs if
necessary.
Installation
1. To ins ...
Engine (Removal)
Special Tool(s)
Special Tool(s)
Support Bracket, Engine
303-639
Spreader Bar
303-D089 (D93P-6001-A3)
Lifting Bracket Set, Engine
303-D074 (D91P-6001-A)
Removal
1. Remove the hood.
2. Remove the battery. For additi ...
Engine Mount RH
Special Tool(s)
Lifting Bracket, Engine
303-D088 (D93P-6001-A2)
Support Bar, Engine
303-290-A
Removal
1. Install the special tool.
2. Install the special tools.
3. Remove the starter. For additional information, refer to Secti ...
