Ford Mustang (1999-2004) Service Manual: Bearings - Inspection
NOTE: If any of the following conditions exist, install a new bearing.
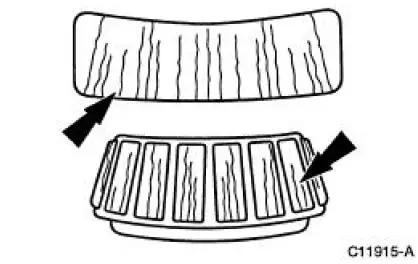
1. Inspect the bearing for a bent cage.
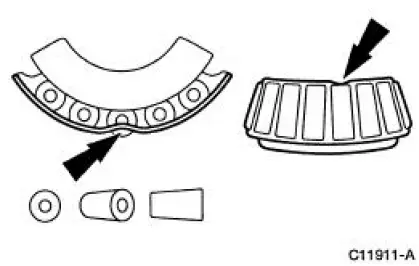
2. Inspect bearings for galling (metal smears on roller ends).
- Galling is caused by overheating, poor lubrication or an overload situation.
- If galling is found, install a new bearing and inspect the seals.
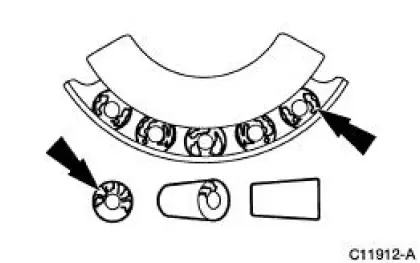
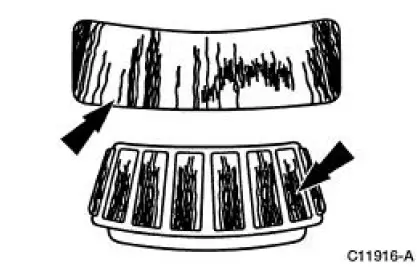
3. Inspect the bearing for brinelling (surface indentations in the raceway).
4. Inspect bearing for cracked inner race.
5. Inspect the bearing and raceway for etching.
- If etching is present, inspect the seals.
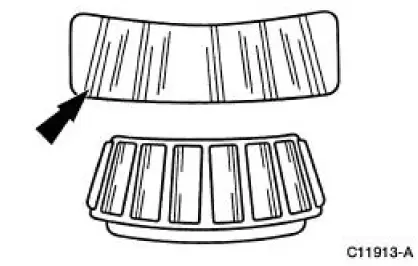
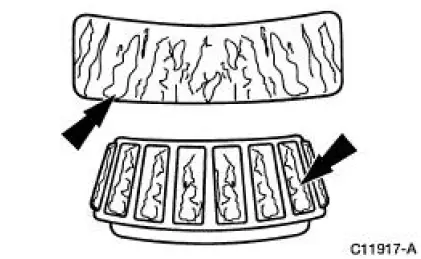
6. Inspect the bearing for heat discoloration (dark blue).
- If heat discoloration is evident, check the bearing and race for loss of temper. Draw a file across the component. If the file cuts the metal, there is a loss of temper.
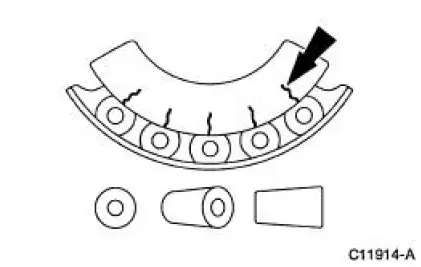
7. Inspect the bearing for fatigue spalling (metal flaking).
 Manual Transmission
The TR3650 five-speed manual transmission features the following:
The fifth speed gear functions as an overdrive gear.
The forward gears are synchronized and helical cut.
The reverse gear oper ...
 Seal
Seal
Special Tool(s)
Installer, Transmission
Extension Housing Oil Seal
308-227 (T94P-7657-A)
Slide Hammer
100-001 (T50T-100-A)
Remover, Bushing
307-001 (TOOL-117 ...
Other materials:
Idle Air Control (IAC) Valve - 3.8L
Removal
1. Disconnect the battery ground cable. For additional information,
refer to Section.
2. NOTE: Discard the idle air control (IAC) valve gasket.
Remove the IAC valve.
Disconnect the connector.
Remove the two bolts, the IAC valve and ...
Module Communications Network
General Specifications
Communications Network
Module Communications Network
...
A/C Compressor Pressure Relief Valve
An A/C compressor pressure relief valve is incorporated into the compressor
A/C manifold and tube to:
relieve unusually high refrigerant system discharge pressure buildups.
For specifications
regarding operating pressure(s), refer to Section.
prevent ...
