Ford Mustang (1999-2004) Service Manual: Bulb - Headlamp
Removal
WARNING: The halogen bulb contains gas under pressure. The bulb may shatter if the glass envelope is scratched or if the bulb is dropped. Handle the bulb only by its base. Grasp the bulb only by its base. Avoid touching the glass envelope.
NOTE: The headlamp bulb should not be removed from the headlamp until just before a replacement bulb is installed. Removing the bulb for an extended period of time may effect headlamp bulb performance. Contaminants may enter the headlamp where they can settle on the lens and reflector.
Never turn on the headlamps with the bulb removed.
1. Remove the headlamp assembly. For additional information, refer to Lamp Assembly- Headlamp .
2. Rotate the headlamp bulb retainer counterclockwise.
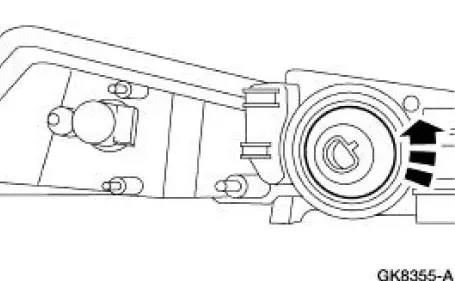
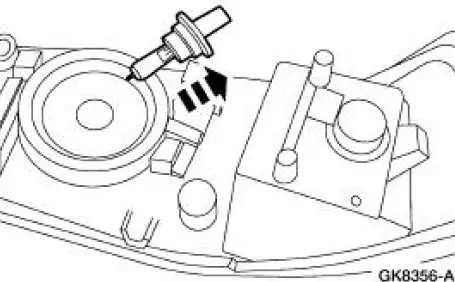
3. Remove the headlamp bulb and retainer.
- Grasp the headlamp bulb by its base and remove the bulb.
Installation
1. WARNING: The halogen bulb contains gas under pressure. The bulb may shatter if the glass envelope is scratched or if the bulb is dropped. Handle the bulb only by its base. Grasp the bulb only by its base. Avoid touching the glass envelope.
To install, reverse the removal procedure.
 Headlamp Adjustment
Headlamp Aiming
1. The headlamp aiming procedure depends on the type of beam pattern the
headlamp is
equipped with. Vehicles may come equipped with visual optical right (VOR),
visual optical lef ...
 Lamp Assembly - Headlamp
Removal
1. NOTE: Make sure that the headlamp switch and the ignition switch are
in the OFF position.
Raise the headlamp retainers.
2. Remove the headlamp assembly.
Disconnect the electrical ...
Other materials:
Rear Subframe
Removal and Installation
CAUTION: Suspension fasteners are critical parts because they affect
performance of vital
components and systems and their failure can result in major service expense. A
new part with
the same part number must be installed if install ...
Valve Cover LH
Material
Item
Specification
Silicone Gasket and Sealant
F7AZ-19554-EA or equivalent
WSE-M4G323-A4
Removal and Installation
1. Position the oil level tube (6754) out of the way.
2. Disconnect the breather tube.
3. Separate the engine wir ...
Idle Air Control (IAC) Valve - Mach I
Removal and Installation
1. Remove the air intake scoop. For additional
information, refer to Section.
2. Disconnect the idle air control (IAC) valve electrical connector.
3. Remove the bolts, the IAC valve and the gasket.
4. NOTE: Install a new ga ...
