Ford Mustang (1999-2004) Service Manual: Cable and Bracket
Removal
1. Raise the vehicle on a hoist. For additional information, refer to Section.
2. Remove the cable shift from the shifter lever and bracket and discard the clip.

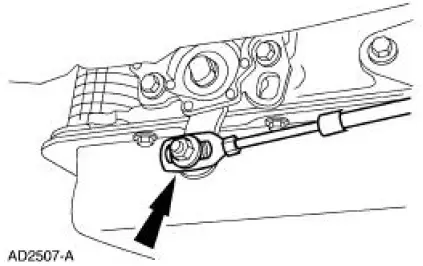
3. Remove the bolt from the cable.
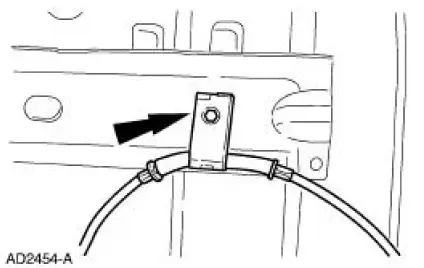
4. Remove the bolt from the cable.
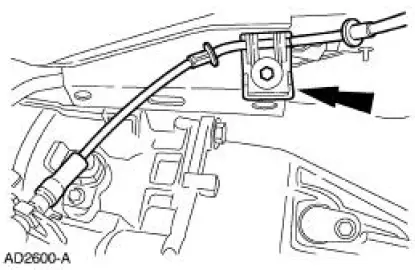
5. Disconnect the transmission range selector lever cable from the TR sensor lever.
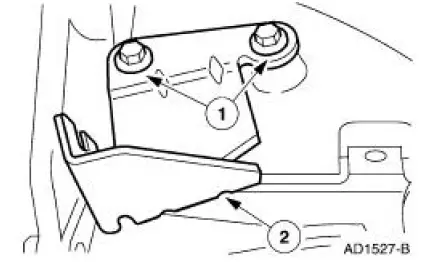
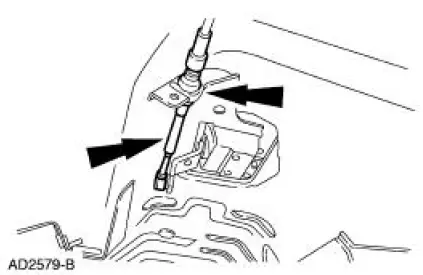
6. Remove the transmission shift cable bracket (7B229) from the transmission.
1. Remove the bolts.
2. Remove the bracket.
Installation
1. NOTE: It is necessary to install a new plastic clip prior to installation.
To install, reverse the removal procedure.
 Brake Shift Interlock Actuator
Removal
1. Remove the shifter top control panel.
2. Disconnect the electrical connectors.
3. Remove the shifter bezel.
4. Remove the bulb from the bezel.
5. Disconnect the electrical connect ...
 Selector Lever
Removal
1. Remove the shifter top control panel.
2. Disconnect the electrical connectors.
3. Remove the shifter bezel.
4. Remove the bulb from the bezel.
5. Disconnect the TCS connector.
6 ...
Other materials:
Installation
1. Install the bushings, if removed.
2. Using the transmission jack, raise the rear axle assembly into position.
3. Install the bolts and nuts.
4. Install the bolts.
5. CAUTION: Align the index-marks.
CAUTION: Install the driveshaft with new bolts. If ...
Removal
1. Remove the differential assembly from the differential housing. For
additional information, refer
to Differential Case in this section.
2. CAUTION: Record the torque necessary to maintain rotation of the drive
pinion gear
through several revolutions prio ...
Principles of Operation
The speed control system is designed to maintain vehicle speed above 48 km/h
(30 mph). After the
ON switch is depressed, depressing the SET/ACCEL switch will activate the speed
control servo. To
increase a set speed, either depress and hold for continuous ac ...
