Ford Mustang (1999-2004) Service Manual: Selector Lever
Removal
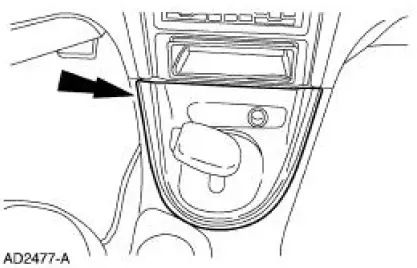
1. Remove the shifter top control panel.
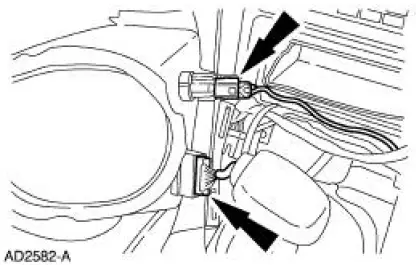
2. Disconnect the electrical connectors.
3. Remove the shifter bezel.
4. Remove the bulb from the bezel.
5. Disconnect the TCS connector.
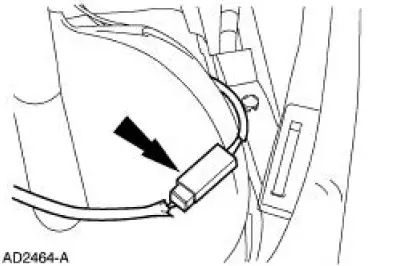
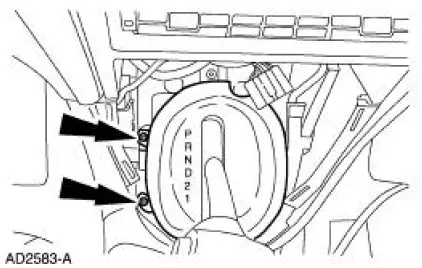
6. CAUTION: Extra force may be needed to lift up on the handle. Do not to pull too far or damage to the overdrive cancel button may result, as the wires may be pulled out of the switch.
Remove the screw and the handle.
7. Raise and support the vehicle. For additional information, refer to Section.
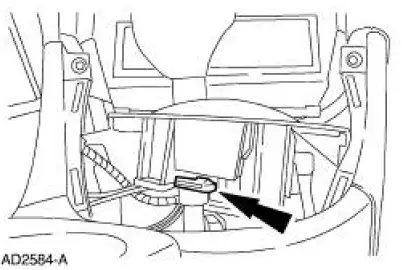
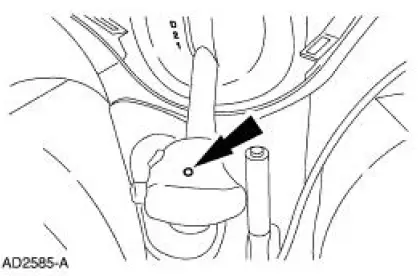
8. Disconnect the shift cable and discard the plastic clip.
9. Lower the vehicle.
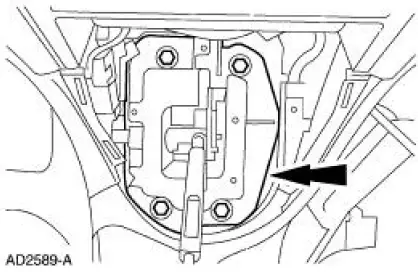
10. Remove the shifter.
Installation
1. NOTE: It is necessary to install a new plastic clip prior to installation.
To install, reverse the removal procedure.
 Cable and Bracket
Removal
1. Raise the vehicle on a hoist. For additional information, refer to
Section.
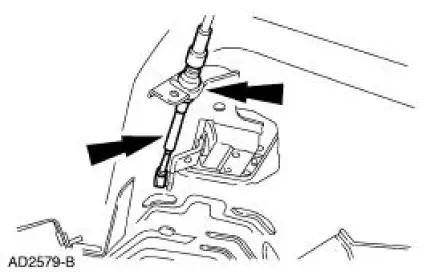
2. Remove the cable shift from the shifter lever and bracket and discard
the clip.
3. Remove the bol ...
 Transmission Control Switch
Removal
1. Remove the shifter top control panel.
2. Disconnect the electrical connectors.
3. Remove the shifter bezel.
4. Remove the bulb from the bezel.
5. Disconnect the TCS connector.
6 ...
Other materials:
Pinpoint Test F: LFC 16/DTC B1888 - Passenger Air Bag Circuit Shorted to
Ground
Normal Operation
The restraints control module (RCM) checks for passenger air bag circuit
shorts to ground by
monitoring the voltage of circuits 607 (LB/OG) and 616 (PK/BK) at pins 6 and
7. If the RCM detects a
short to ground on either of these pins, i ...
Dowels - Flywheel
Removal
1. NOTE: Take care not to damage the flywheel dowel holes or the
surface areas around the
flywheel dowel during removal.
Remove the flywheel dowels by using a drift pin where the flywheel dowel is
installed in an open
hole and a pair of lockin ...
Installation
1. Inspect the pinion flange seal journal for rust, nicks, and scratches
prior to installing the flange.
Polish the seal journal with fine crocus cloth, if necessary.
2. Lubricate the pinion flange splines.
Use SAE 80W-90 Premium Rear Axle Lubricant XY-80 ...
