Ford Mustang (1999-2004) Service Manual: Connecting Rod - Bushing Diameter
1. Measure the inner diameter of the connecting rod bushing, if equipped. Verify the diameter is within specification.
- Refer to the appropriate section in Group for the procedure.
- If out of specification, install new components as necessary. Refer to the appropriate section in Group for the procedure.
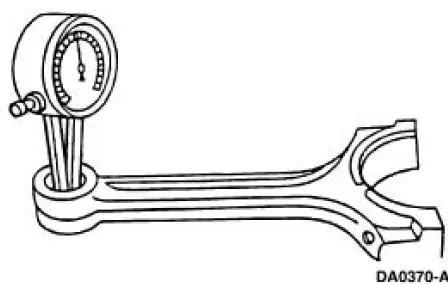
Connecting Rod -Bend
1. Measure the connecting rod bend on a suitable alignment fixture. Follow the instructions of the fixture manufacturer. Verify the bend measurement is within specification.
- Refer to the appropriate section in Group for the procedure.
- If out of specification, install new components as necessary. Refer to the appropriate section in Group for the procedure
 Piston - Pin Diameter
1. Measure the piston pin diameter in two directions at the points shown.
Verify the diameter is
within specification.
Refer to the appropriate section in Group for the procedure.
If out of s ...
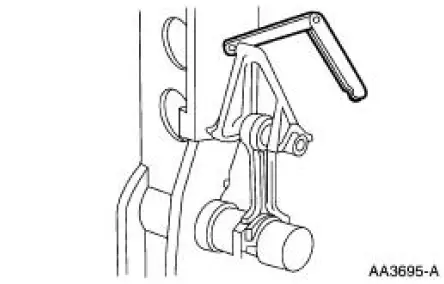
 Connecting Rod - Twist
1. Measure the connecting rod twist on a suitable alignment fixture.
Follow the instructions of the
fixture manufacturer. Verify the measurement is within specification.
Refer to the appropriat ...
Other materials:
Inspection and Verification
Certain axle noise or vibration symptoms are also common to the engine,
transmission, wheel
bearings, tires, and other parts of the vehicle. For this reason, be sure that
the cause of the trouble is
in the axle before disassembling, adjusting or repairing th ...
Satellite radio information
Satellite Radio Channels
Sirius broadcasts a variety of music, news, sports, weather, traffic and
entertainment satellite radio channels. For more information and a
complete list of Sirius satellite radio channels, visit www.siriusxm.com in the
United States, ...
Lock Cylinder - Door
Removal
1. NOTE: Individual lock cylinders are repaired by discarding the
inoperative cylinder and building
a new lock cylinder using the appropriate lock repair package. The lock
repair package includes
a detailed instruction sheet to build the ne ...
