Ford Mustang (1999-2004) Service Manual: Lock Cylinder - Door
Removal
1. NOTE: Individual lock cylinders are repaired by discarding the inoperative cylinder and building a new lock cylinder using the appropriate lock repair package. The lock repair package includes a detailed instruction sheet to build the new lock cylinder to the current key code of the vehicle.
Remove the door trim panel (23942). For additional information, refer to Section.
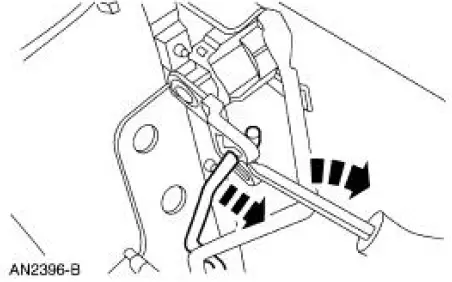
2. Using a screwdriver, release the lock cylinder actuating rod.
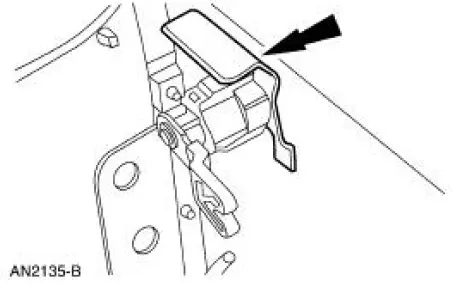
3. Remove the door lock cylinder retainer.
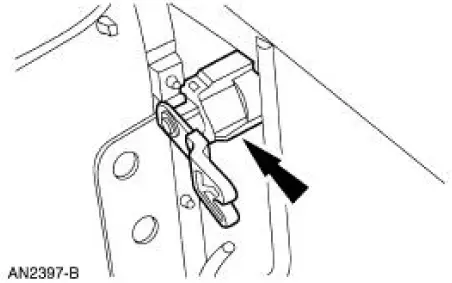
4. Remove the door lock cylinder (21990).
5. If necessary, transfer the lock cylinder arm to the new door lock cylinder (21990).
Installation
1. To install, reverse the removal procedure.
 Ignition Lock Cylinder - Non-Functional
Removal and Installation
1. NOTE: Make sure the front wheels are in the straight-ahead
position.
Disconnect the battery ground cable (14301) and wait at least one minute
to allow the deplet ...
 Lock Cylinder - Luggage Compartment Lid
Removal
1. NOTE: Individual lock cylinders are repaired by discarding the
inoperative cylinder and building
a new lock cylinder using the appropriate lock repair package. The lock
repair pac ...
Other materials:
Disc and Pressure Plate - 3.8L and 4.6L (2V) Engines
Special Tool(s)
Clutch Aligner
308-020 (T74P-7137-K)
Material
Item
Specification
Premium Long Life Grease
XG-1-C
ESA-M1C75-B
1. Remove the transmission.
2. CAUTION: Loosen the bolts evenly to prevent clutch pressure plate
...
Cruise Control
PRINCIPLES OF OPERATION
Cruise control lets you maintain a set speed without keeping your foot
on the accelerator pedal.
USING CRUISE CONTROL
WARNING: Do not use cruise control in heavy traffic, on
winding roads or when the road surface is slippery. This coul ...
Crankshaft Rear Oil Seal
Special Tool(s)
Installer, Crankshaft Rear Oil
Seal
303-518 (T95P-6701-DH)
Remover, Crankshaft Rear Oil
Seal
303-519 (T95P-6701-EH)
Installer, Crankshaft Rear Oil
Seal
303-516 (T95P-6701-BH)
Remover ...
