Ford Mustang (1999-2004) Service Manual: Crankshaft Pulley
Special Tool(s)
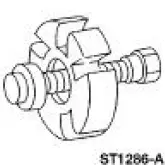 |
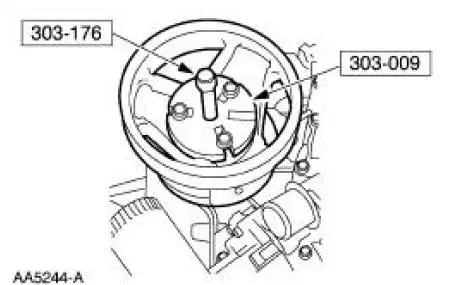
Remover, Crankshaft Vibration Damper 303-009 (T58P-6316-D) |
 |
Remover, Crankshaft Vibration Damper 303-176 (T82L-6316-B) |
 |
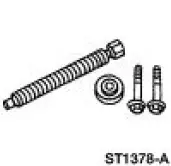
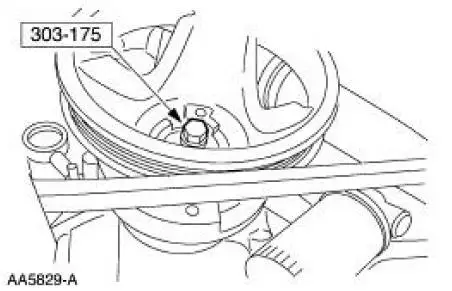
Installer, Crankshaft Damper/Crankshaft Front Oil Seal 303-175 (T82L-6316-A) |
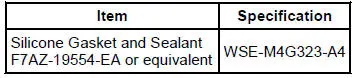
Material
Removal
1. Remove the drive belt (8620). For additional information, refer to Section.
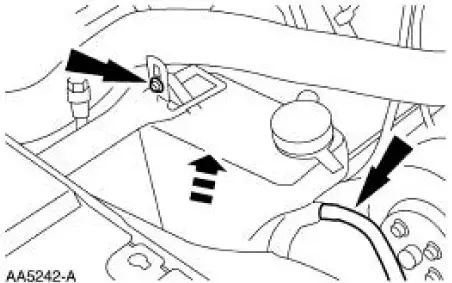
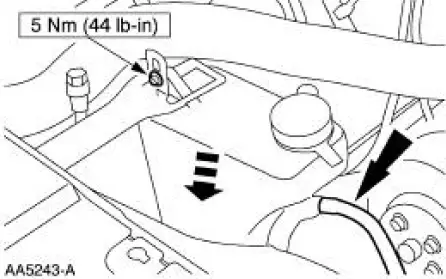
2. Remove the radiator coolant recovery reservoir (8A080).
3. Raise the vehicle on a hoist. For additional information, refer to Section.
4. Remove the crankshaft pulley bolt.
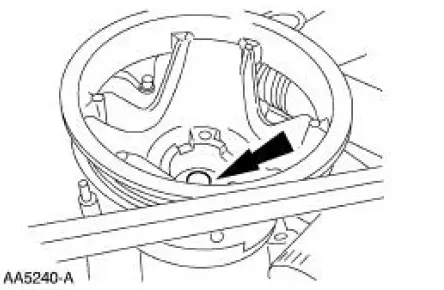
5. Using the special tool, remove the crankshaft pulley (6B321).
Installation
1. Apply a bead of silicone gasket and sealant to the keyway in the crankshaft damper and use the special tool to install the crankshaft pulley.
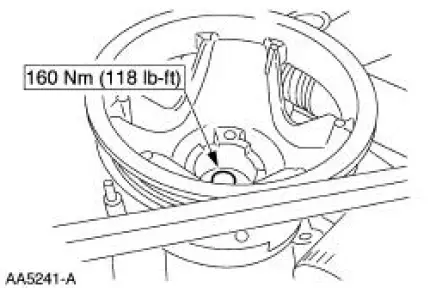
2. Install the crankshaft bolt.
3. Lower the vehicle.
4. Install the radiator coolant recovery reservoir.
5. Install the drive belt. For additional information, refer to Section.
 Valve Cover RH
Removal and Installation
1. Remove the throttle body. For additional information, refer to
Section.
2. Disconnect the crankcase vent hose.
3. Remove the differential feedback exhaust gas recirc ...
 Crankshaft Front Seal
Special Tool(s)
Installer, Front Cover Oil Seal
303-335 (T88T-6701-A)
Installer, Crankshaft Front Oil
Seal
303-474 (T94P-6701-AH)
Remover, Oil Seal
303-409 (T92C-6700 ...
Other materials:
Removal
1. Disconnect the battery ground cable.
2. Remove the air cleaner outlet pipe.
3. Remove the radiator sight shield.
4. Remove the coolant recovery reservoir.
1. Disconnect the hose.
2. Remove the bolts.
3. Remove the coolant recovery reservoir ...
Assembly
1. Carry out the following before reassembling:
Inspect the gears for broken or cracked teeth. Check for unusual wear
patterns.
Inspect the thrust washers for face wear, cracks, scoring and for signs
of heat damage.
Inspect the bearings, bearing cups a ...
Air Conditioning (Description and Operation)
The A/C refrigerant system is a clutch cycling orifice tube type. The system
components are:
A/C compressor (19703)
A/C clutch (2884)
A/C condenser core (19712)
A/C evaporator core (19860)
suction accumulator (19C836)
connecting refrigerant lines
The ...
