Ford Mustang (1999-2004) Service Manual: Disconnect
1. Remove the A/C tube lock coupling clip (19E746), if equipped.
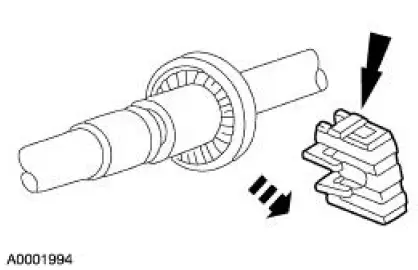
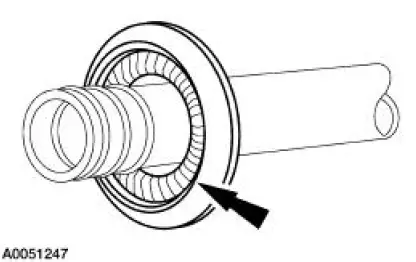
2. Fit the special tool to the spring lock coupling.
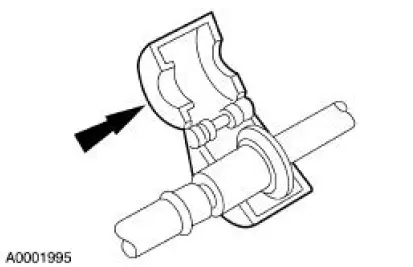
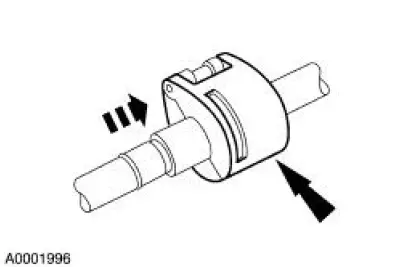
3. Push the tool into the cage opening to release the female fitting from the A/C tube lock coupling spring (19E576).
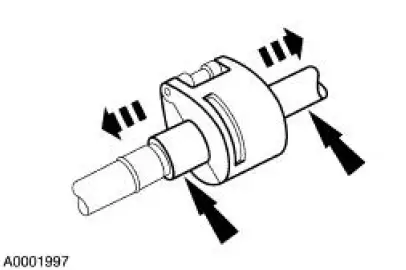
4. Pull the spring lock coupling fittings apart.
5. CAUTION: Do not use metal tools to remove the O-ring seals. They can cause axial scratches across the O-ring seal grooves, resulting in refrigerant leaks.
Remove the O-ring seals with a non-metallic tool.

6. CAUTION: Do not use a screwdriver or similar tool to remove the A/C tube lock coupling spring; this can cause axial scratches across the O-ring seal grooves resulting in refrigerant leaks.
Remove the A/C tube lock coupling spring with a small hooked wire.
 Spring Lock Coupling
Special Tool(s)
Remover, Refrigerant Coupling
Set
412-039 (T84L-19623-B)
...
 Cleaning
1. Fabricate a cleaning tool from a 1/8 inch diameter brazing rod.
2. Cut an abrasive pad from maroon colored 3M Scotch Brite with the
dimensions corresponding
to the coupling size.
3. Assemble th ...
Other materials:
Heated seats
WARNING: Persons who are unable to feel pain to the skin
because of advanced age, chronic illness, diabetes, spinal cord
injury, medication, alcohol use, exhaustion, or other physical conditions,
must exercise care when using the seat heater. The seat heater m ...
Hill start assist
WARNING: The hill start assist feature does not replace the
parking brake. When you leave the vehicle, always apply the
parking brake and shift the transmission into position P for automatic
transmission or position 1 for manual transmissions.
WARNING: You mus ...
Valve Cover RH
Removal and Installation
1. Remove the throttle body. For additional information, refer to
Section.
2. Disconnect the crankcase vent hose.
3. Remove the differential feedback exhaust gas recirculation (EGR) system
vacuum hoses and
the bracket bolts. Po ...
