Ford Mustang (1999-2004) Service Manual: Ignition Coil-On-Plug
Material
| Item | Specification |
| Silicone Brake Caliper Grease and Dielectric Compound D7AZ-19A331-A or equivalent | ESE-M1C171- A |
Removal and Installation
1. Disconnect the battery ground cable. For additional information, refer to Section.
2. Remove the air cleaner outlet pipe. For additional information, refer to Section.
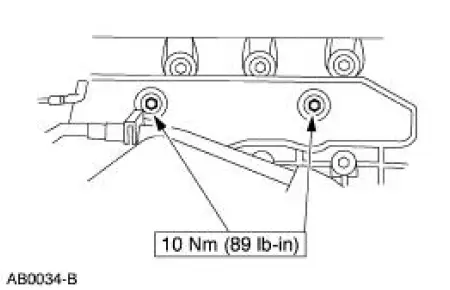
3. Remove the RH ignition coil cover bolts and the cover.
4. Remove the ignition coils.
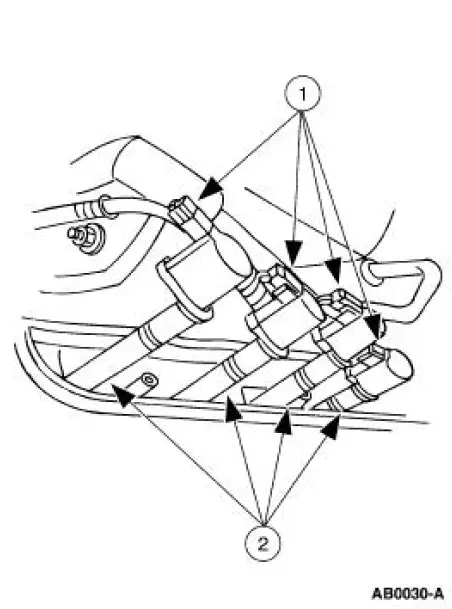
1. Disconnect the electrical connectors.
2. Remove the ignition coils.
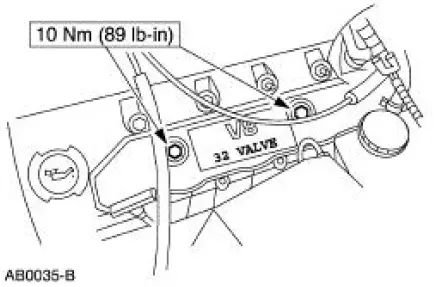
5. Remove the LH ignition coil cover bolts and the cover.
6. Remove the ignition coils.
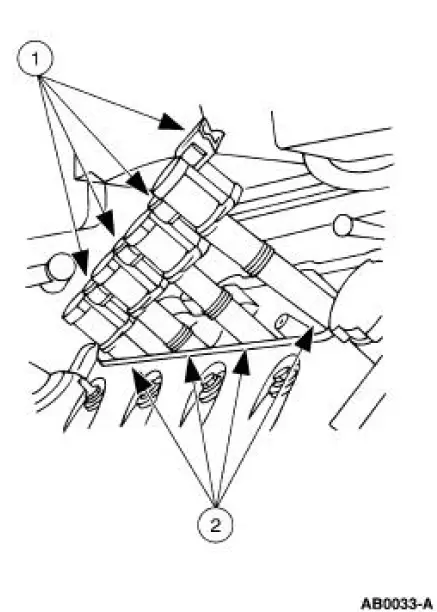
1. Disconnect the connectors.
2. Remove the ignition coils.
7. NOTE: Verify that the ignition coil spring is correctly located inside the ignition coil boot and that there is no damage to the tip of the boot.
To install, reverse the removal procedure.
- Apply a light coat of dielectric grease to the inside of the ignition coil boots.
 Engine Ignition (Description and Operation)
Eight separate ignition coils:
are controlled by the powertrain control module (PCM).
are mounted directly above each spark plug.
are controlled by the powertrain control module for correct fi ...
 Spark Plugs
Removal and Installation
1. Remove the ignition coil-on-plug. For additional information, refer to
Ignition Coil-On-Plug in this
section.
2. NOTE: Use compressed air to remove any foreign materi ...
Other materials:
Component Tests
Ball Joint Inspection
1. Raise and support the vehicle.
2. Prior to performing any inspection of the ball joints, inspect the wheel
bearings.
3. Position a safety stand beneath the front suspension lower arm (3079) to be
tested.
4. While an assistant pul ...
Information contained on the tire sidewall
Both U.S. and Canada Federal regulations require tire manufacturers
to place standardized information on the sidewall of all tires. This
information identifies and describes the fundamental characteristics of
the tire and also provides a U.S. DOT Tire Identifi ...
Brake Booster - Vacuum (Removal and Installation)
Removal
1. Disconnect the battery ground cable (14301).
2. Remove the air cleaner housing.
3. Remove the brake master cylinder nuts.
4. Position the brake master cylinder (2140) aside.
5. With the engine off, depress the brake pedal (2455) several t ...
