
Ford Mustang (1999-2004) Service Manual: Installation
1. CAUTION: Do not allow grease, oil, brake fluid or other contaminants to contact the pad lining material. Do not install contaminated pads.
NOTE: Install all hardware supplied with pad kits.
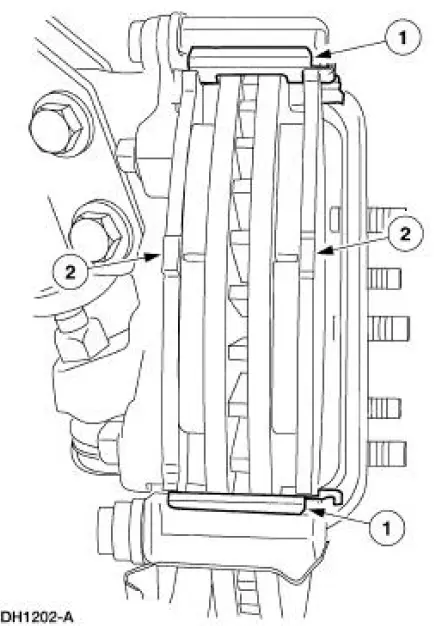
Install the pads.
1. Install the new pad slippers.
2. Install the pads.
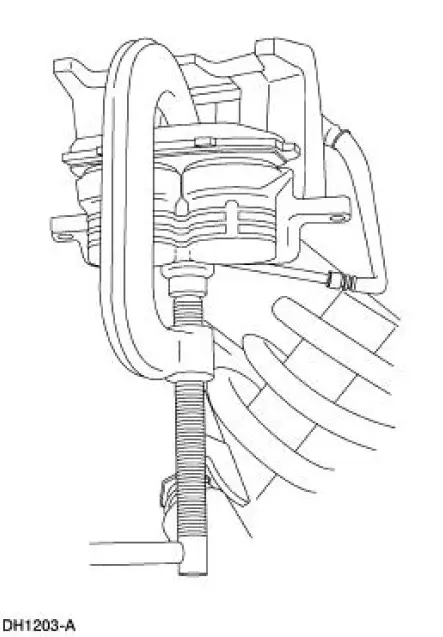
2. NOTE: Use a wood block or used pad to protect pistons and boots.
Compress the caliper pistons (2196).
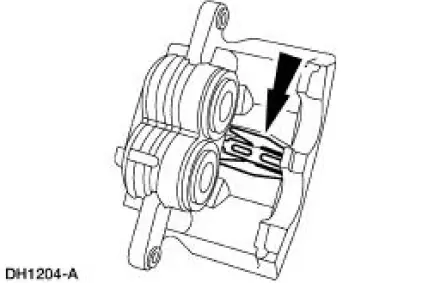
3. Make sure the anti-rattle spring is correctly positioned in the caliper.
4. CAUTION: Use care not to damage the bleeder screw or front brake disc shield.
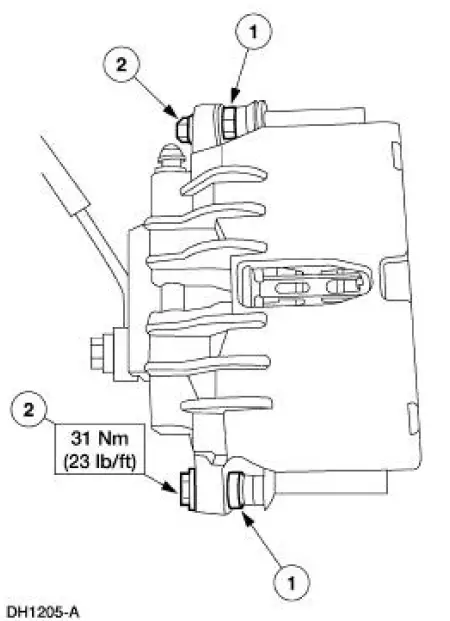
Install the disc brake caliper.
1. Hold the guide pins stationary.
2. Install the caliper bolts.
5. Install the wheel and tire assembly.
6. Lower the vehicle.
7. Fill the brake master cylinder reservoir with clean High Performance DOT 3 Brake Fluid C6AZ- 19542-AB or equivalent DOT 3 fluid meeting Ford specification ESA-M6C25-A. Install brake master cylinder filler cap.
8. Inspect brake operation.
 Removal
1. Remove brake master cylinder filler cap (2162). Check brake fluid
level in brake master cylinder
reservoir (2K478). Remove fluid until brake master cylinder reservoir is
half full.
2. Ra ...
 Brake Pads - Cobra
Removal
1. Remove brake fluid in the master cylinder reservoir until the
reservoir is half full.
2. Raise and support the vehicle.
3. Remove the tire and wheel assembly.
4. CAUTI ...
Other materials:
Fill
1. WARNING: Do not mix oil types, any mixture or any unapproved oil can
lead to seal
deterioration and leaks. A leak can ultimately cause loss of fluid, which can
result in a
loss of power steering assist.
Check the fluid level. If necessary, fill the reserv ...
Charging System (Diagnosis and Testing)
Refer to Wiring Diagrams Cell 12 , Charging System for schematic and
connector information.
Special Tool(s)
73III Automotive Meter
105-R0057 or equivalent
SABRE Premium Battery and
Electrical System Tester
010-00736 or equival ...
Unique Calibration
The Emissions/CAFE/CO2 Compliance Department is responsible for assigning
these calibration
numbers. Unique calibration identifications are assigned to cover similar
vehicles to differentiate tires,
drive configurations, final drive ratios and other calibrat ...
