Ford Mustang (1999-2004) Service Manual: Installation
1. NOTE: If the oil pan is not secured within four minutes, the sealant must be removed and the sealing area cleaned with metal surface cleaner. Allow to dry until there is no sign of wetness, or four minutes, whichever is longer. Failure to follow this procedure can cause future oil leakage.
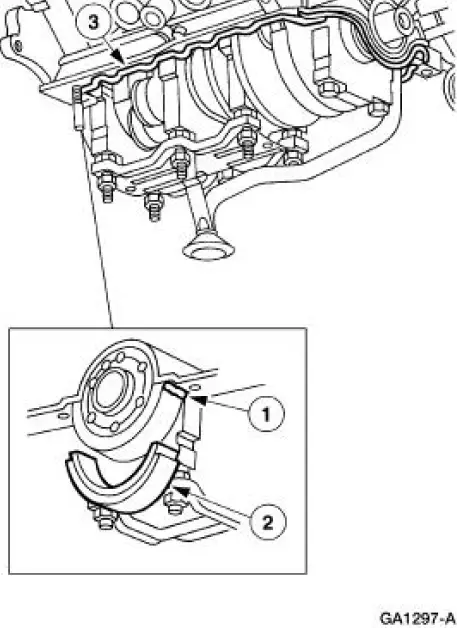
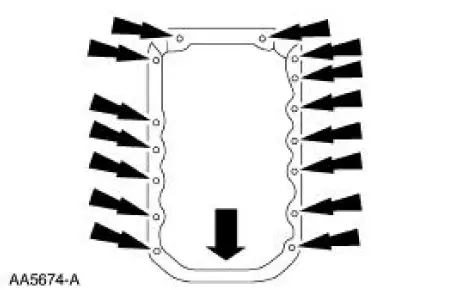
Clean and apply sealant to the oil pan sealing areas shown and install the oil pan rear seal.
1. Apply silicone gasket and sealant to the rear main bearing cap.
2. Install the oil pan rear seal.
3. Clean the oil pan mating surfaces with metal surface cleaner an apply silicone gasket and sealant to the oil pan mating surface.
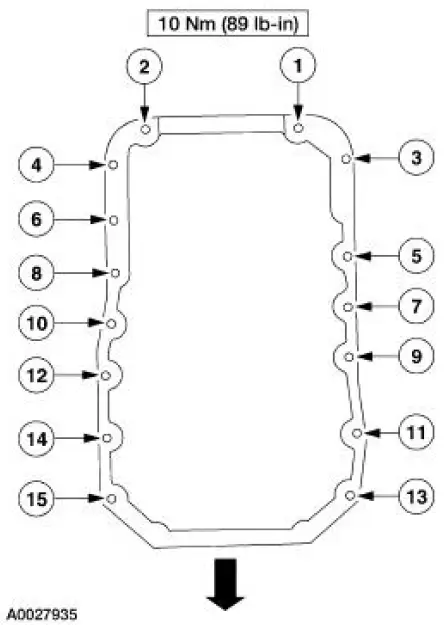
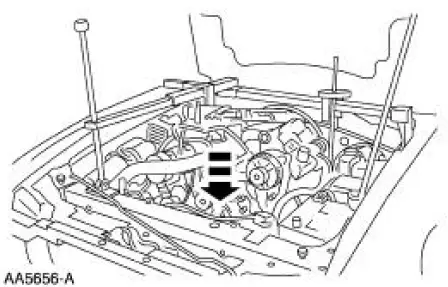
2. Position the oil pan and start the bolts.
3. Tighten the bolts in two stages in the sequence shown.
- Stage 1: Tighten to 5 Nm (44 lb-in).
- Stage 2: Tighten to 10 Nm (89 lb-in).
4. Install the transmission lower bolts.
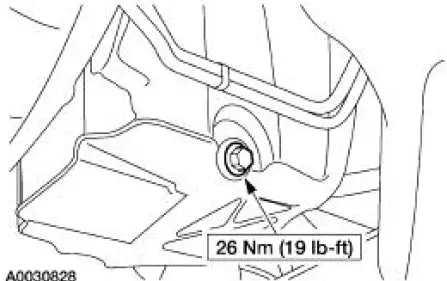
5. Install the oil pan drain plug.
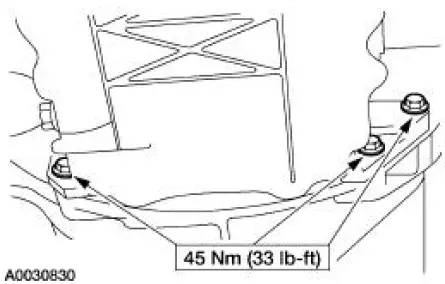
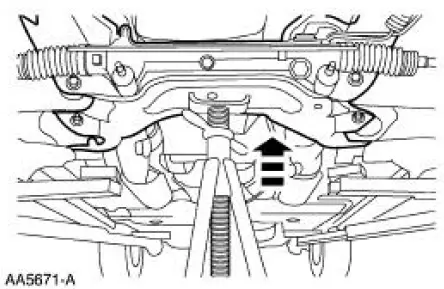
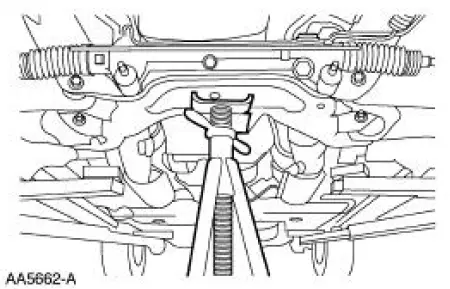
6. Raise the front subframe into position.
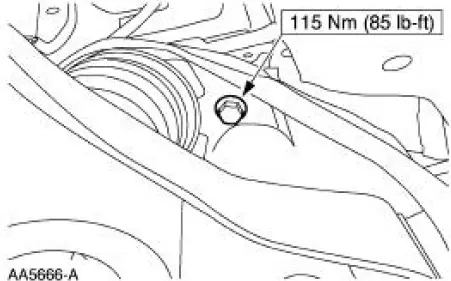
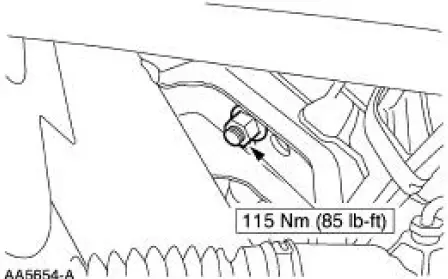
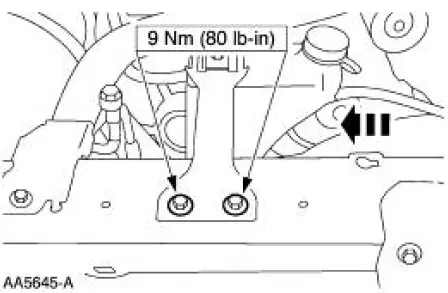
7. Tighten the two bolts.

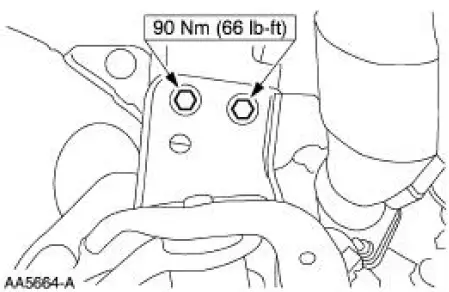
8. Install the two bolts.
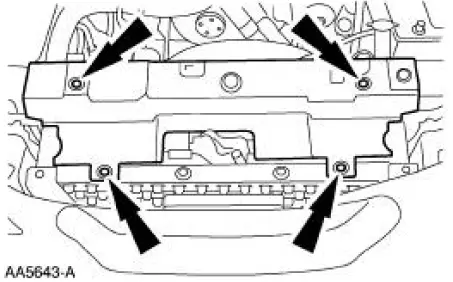
9. Install the four subframe lower bolts.
10. Remove the safety stand.
11. Install the bracket.
12. Install the starter motor.
13. Lower the vehicle.
14. Lower the engine.
15. Raise and support the vehicle.
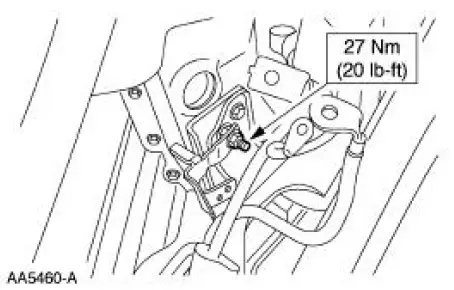
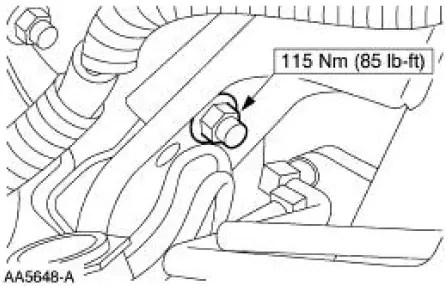
16. Install the RH engine mount nut.
17. Install the LH engine mount nut.
18. Lower the vehicle.
19. Remove the special tools.
20. Install the coolant recovery reservoir.
21. Install the radiator sight shield.
22. Install the air cleaner outlet pipe.
23. Connect the battery ground cable.
24. Fill the engine with clean engine oil.
25. CAUTION: Correct coolant bleeding is critical for correct engine cooling.
Fill and bleed the engine cooling system.
 Removal
1. Disconnect the battery ground cable.
2. Remove the air cleaner outlet pipe.
3. Remove the radiator sight shield.
4. Remove the coolant recovery reservoir.
1. Disconnect the hose.
2. R ...
 Oil Pan Baffle
Removal and Installation
1. Remove the oil pump screen cover and tube (6622). For additional
information, refer to Oil
Pump Screen and Pickup Tube in this section.
2. Remove the oil pan baffle ( ...
Other materials:
Engine (Assembly)
Special Tool(s)
Guides, Connecting Rod
303-442 (T93P-6136-A)
Installer, Crankshaft Vibration
Damper
303-102 (T74P-6316-B)
Installer, Front Cover Oil Seal
303-335 (T88T-6701-A)
Installer, Crankshaft Rear ...
Door Speaker - Upper
Removal and Installation
1. Remove the front door trim panels (239420). For additional
information, refer to Section
2. Remove the upper speaker access cover.
3. Remove the upper speaker housing.
1. Remove the screw.
2. Remove the upper spea ...
Installation
1. Lubricate the lip of the wheel bearing oil seal
Use Premium Long-Life Grease XG-1-C or equivalent meeting Ford
specification ESAM1C75-
B.
2. CAUTION: Do not damage the wheel bearing oil seal.
Install the two axle shafts.
3. CAUTION: Do not damage th ...
