Ford Mustang (1999-2004) Service Manual: Installation
1. CAUTION: Do not use metal scrapers, wire brushes, power abrasive discs or other abrasive means to clean the sealing surfaces. These tools cause scratches and gouges which make leak paths. Use a plastic scraping tool to remove all traces of old sealant.
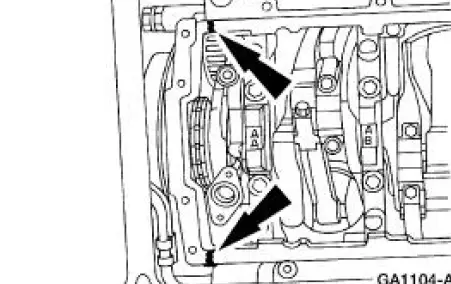
Clean and inspect the mating surfaces.
2. NOTE: If the oil pan is not secured within four minutes, the sealant must be removed and the sealing area cleaned with metal surface cleaner. Allow to dry until there is no sign of wetness, or four minutes, whichever is longer. Failure to follow this procedure can result in future oil leakage.
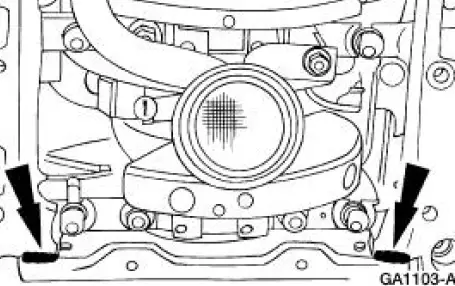
Apply the silicone gasket and sealant at the rear oil seal retainer-to-cylinder block sealing surface.
3. NOTE: If the oil pan is not secured within four minutes, the sealant must be removed and the sealing area cleaned with metal surface cleaner. Allow to dry until there is no sign of wetness, or four minutes, whichever is longer. Failure to follow this procedure can result in future oil leakage.
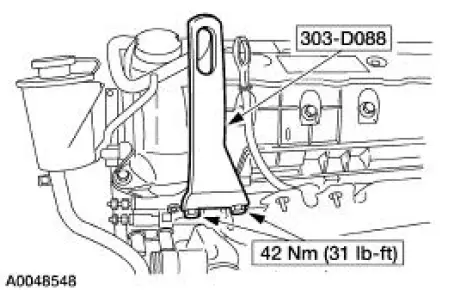
Apply the silicone gasket and sealant at the engine front cover-to-cylinder block mating surface.
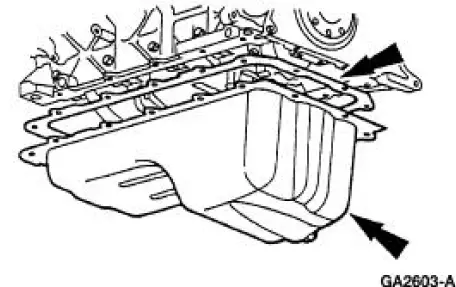
4. Install the oil pan and gasket and loosely install the bolts.
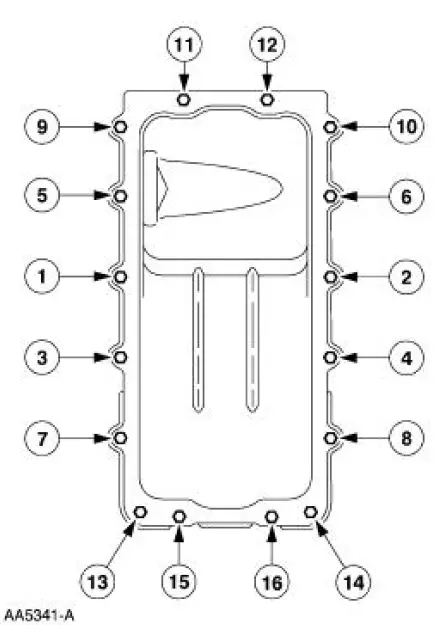
5. Tighten the bolts in the sequence shown in three stages.
- Stage 1: Tighten to 2 Nm (18 lb-in).
- Stage 2: Tighten to 20 Nm (15 lb-ft).
- Stage 3: Tighten an additional 60 degrees.
6. Install the oil pan drain plug.
7. Raise the front subframe into position.
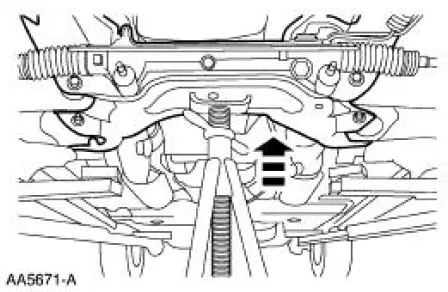
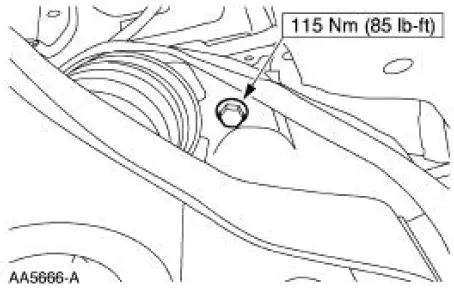
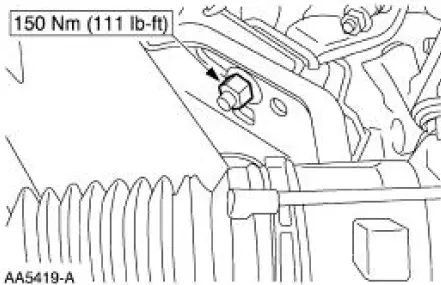
8. Install the two upper subframe bolts.
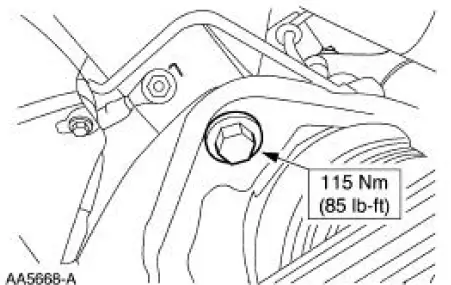
9. Install the two lower subframe bolts.
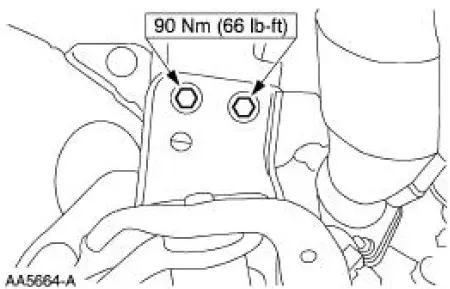
10. Install the engine mount bolts.
11. Position the safety stand aside.
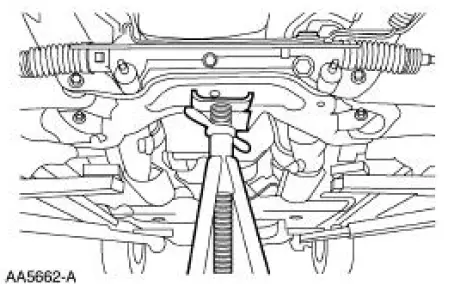
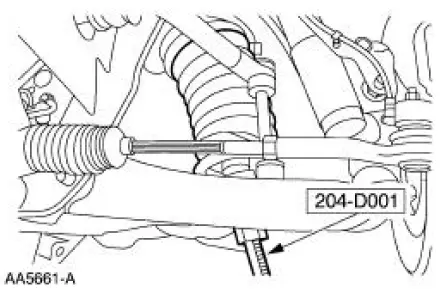
12. Using the special tool, release the tension from the front coil springs and remove the special tool.
13. Install the engine mount nuts.
14. Lower the vehicle.
15. Using the special tools, lower the engine and remove the special tool.
16. Remove the special tool.
17. Fill the engine crankcase with clean engine oil.
 Removal
1. Disconnect the battery ground cable.
2. Remove the air cleaner outlet tube. For additional information, refer to
Section.
3. Remove the radiator sight shield.
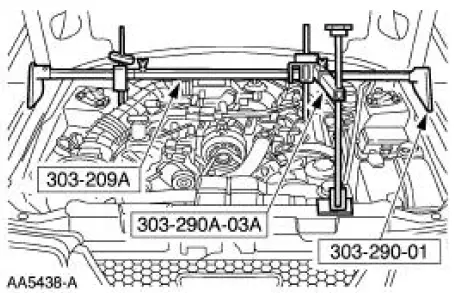
4. Install the special tool.
5. Us ...
 Flywheel
Removal
1. Remove the clutch components.
2. Remove the bolts and the flywheel.
Installation
1. To install, reverse the removal procedure.
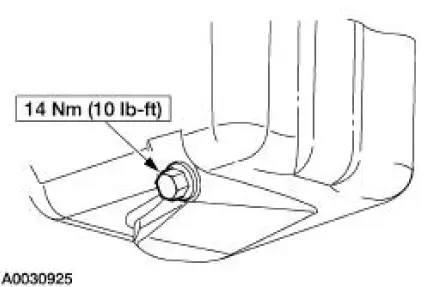
Tighten the bolts in the sequence shown.
...
Other materials:
Range Selection
The transmission has six range positions: P, R, N, (D), 2 and 1.
Park
In the PARK position:
there is no powerflow through the transmission.
the parking pawl locks the output shaft to the case.
the engine can be started.
the ignition key can ...
Exhaust Manifold - Inspection
Special Tool(s)
Straight Edge
303-D039 (D83L-4201-A) or
equivalent
1. Place a straight edge across the exhaust manifold flanges and check for
warping with a feeler
gauge.
Bearing -Inspection
1. Inspect bearings for the following defects. P ...
Engine Coolant Temperature (ECT) Sensor - 4.6L (2V)
Removal
1. Disconnect the battery ground cable. For additional information,
refer to Section.
2. Partially drain the cooling system. For additional information, refer
to Section.
3. Disconnect the engine coolant temperature (ECT) sensor (12A648) ...
