Ford Mustang (1999-2004) Service Manual: Instrument Cluster (Removal and Installation)
Removal and Installation
All vehicles
1. CAUTION: Electronic modules are sensitive to electrical charges. If exposed to these charges, damage may result.
Disconnect the battery ground cable. For additional information, refer to Section.
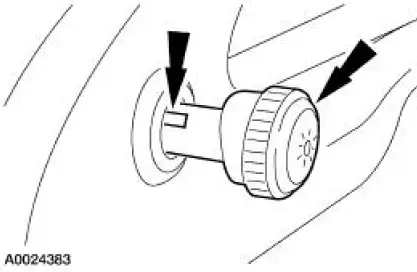
2. Remove the headlamp switch knob.
- Pull out the headlamp switch knob and insert a thin tool in the slot to release the knob from the shaft.
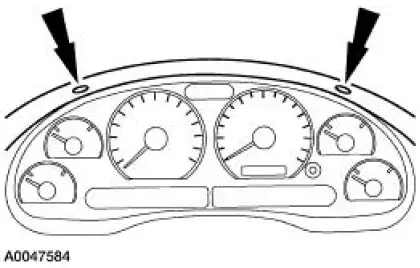
3. Remove the screws and remove the instrument cluster finish panel.
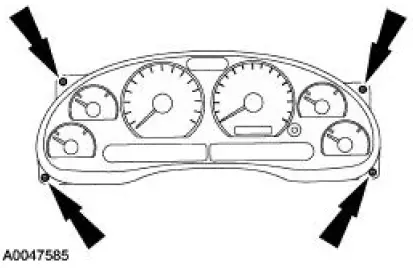
4. Remove the screws and pull the instrument cluster forward to expose the electrical connector.
Cobra only
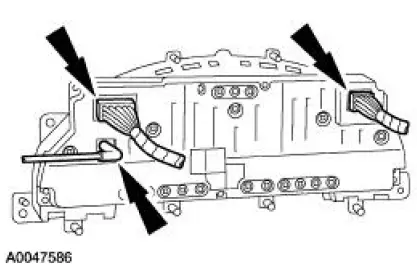
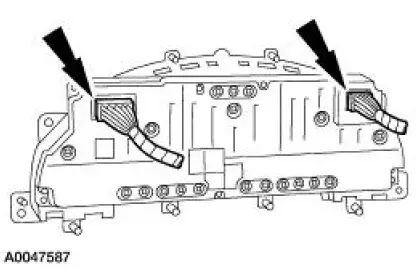
5. Disconnect the electrical connectors and boost pressure line and remove the instrument cluster.
Except Cobra
6. Disconnect the electrical connectors and remove the instrument cluster.
All vehicles
7. To install, reverse the removal procedure.

 Warning Indicator Bulb
Removal and Installation
1. Remove the instrument cluster. Refer to Instrument Cluster in this
section.
2. Remove the necessary instrument cluster bulbs by rotating one quarter
turn counter ...
Other materials:
Air Cleaner Outlet Pipe - 4.6L (4V)
Removal and Installation
Cobra
1. Disconnect the intake air temperature (IAT) sensor.
All vehicles
2. Disconnect the vacuum hose.
3. Disconnect the breather hose.
NOTE: Cobra shown, Mach I similar.
4. Loosen the clamps and remove the air cleaner outle ...
Pinion Seal
Special Tool(s)
Installer, Drive Pinion Oil Seal
205-133 (T79P-4676-A)
Removal
1. Remove the pinion flange (4851). For additional information, refer to
Drive Pinion Flange in this
section.
2. Force up the metal flange of the rear axle drive p ...
Power windows
WARNING: Do not leave children unattended in your vehicle
and do not let children play with the power windows. They may
seriously injure themselves.
WARNING: When closing the power windows, you should verify
they are free of obstructions and make sure that chi ...
