Ford Mustang (1999-2004) Service Manual: Jacking
WARNING: Never run the engine with one wheel off the ground, such as when changing a tire. The wheel still on the ground could cause the vehicle to move.
CAUTION: The jack (17080) provided with the vehicle is intended to be used in an emergency for changing a deflated tire. To avoid damage to the vehicle, never use the jack to lift the vehicle for any other purpose. Refer to the Owner Guide when using the jack supplied with the vehicle.
CAUTION: Under no circumstances should the vehicle ever be lifted by the suspension arm brackets, rear stabilizer or differential housing or convertible cross brace. Severe damage to the vehicle could result.
CAUTION: Do not attempt to use jack pressure on either the front bumper (17757) or the rear bumper (17906) of any vehicle. Damage to the bumper covers will occur.
Lift the vehicle using the Jacking Points procedure in this section.
Jacking Points
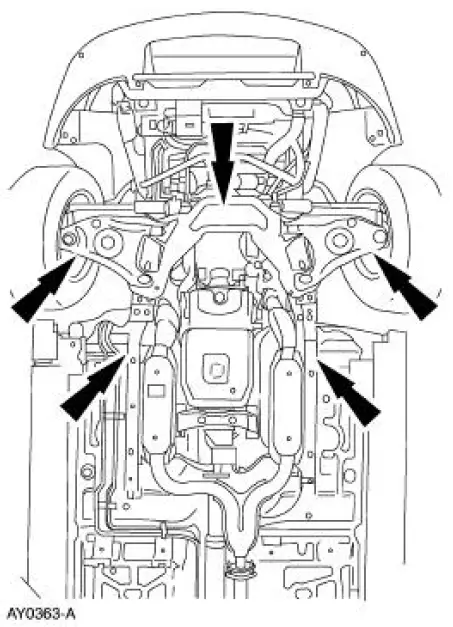
To lift the front or either side of the front end, position the floor jack under the front frame lift points.
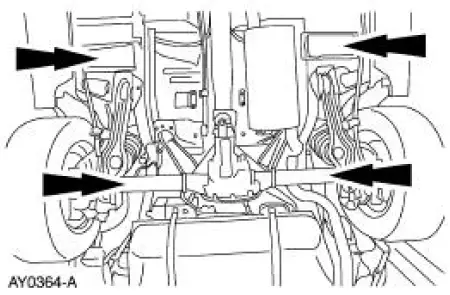
To lift the rear or either side of the rear end, position the floor jack under the rear lift points.

 Lifting
CAUTION: Do not allow the lift adapters to contact the steering
linkage, suspension arms,
stabilizer arms, or to compress the lower suspension arm stabilizer bar
insulator (5493).
Damage to the sus ...
Other materials:
Manual Transaxle/Transmission - T56
General Specifications
Torque Specifications
...
Rear Window Glass
Special Tool(s)
Rotunda Pneumatic Knife with
Offset Blade
107-R1511 or equivalent
The Pumper
164-R2459 or equivalent
Rotunda Interior Auto Glass
Cut-Out Knife Kit
164-R2450 or equivalent
...
Installation
1. Install the intake manifold and gaskets, tighten the bolts in the sequence
shown.
2. NOTE: The O-ring is to be installed on the top of the thermostat.
Install the water thermostat and the O-ring.
Install a new O-ring as necessary.
3. Install the wa ...
