Ford Mustang (2005-2014) Owners Manual: Power seats
WARNING: Never adjust the driver’s seat or seat back when the vehicle is moving.
WARNING: Before returning the seat back to its original position, make sure that cargo or any objects are not trapped behind the seat back.
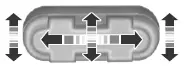
The power seat control is located on the outboard side of the seat.
Move the switch in the direction of the arrows to raise or lower the seat cushion or to move the seat forward, backward, up or down.
Power Lumbar (If Equipped)
The power lumbar control is located on the top of the driver’s seat side shield.

Press one side of the control to increase lower back firmness.
Press the other side of the control to decrease lower back firmness.
 Manual seats
WARNING: Do not adjust the driver’s seat or seatback while the
vehicle is moving.
WARNING: Rock the seat backwards and forwards after
releasing the lever to make sure that it is fully engaged.
Movi ...
 Heated seats
WARNING: Persons who are unable to feel pain to the skin
because of advanced age, chronic illness, diabetes, spinal cord
injury, medication, alcohol use, exhaustion, or other physical conditions,
must ...
Other materials:
Transmission (REMOVAL)
Special Tool(s)
Retainer, Torque Converter
307-346 (T97T-7902-A)
CAUTION: Whenever a transmission has been disassembled to install new
parts the
transmission fluid cooler tubes must be cleaned and backflushed. Use a suitable
torque
converter/ ...
Exhaust Manifold to Exhaust Gas Recirculation (EGR)
Valve Tube
Removal and Installation
NOTE: 3.8L shown, 4.6L (2V) similar.
1. With the vehicle in NEUTRAL, position it on a hoist.
2. Disconnect the exhaust gas recirculation (EGR) valve tube from the
exhaust manifold.
3. Remove the differential feedback exhaust ga ...
Antenna
Torque Specifications
Antenna
The antenna system consists of:
antenna mast
antenna base and cable
antenna lead-in cable
The radio antenna uses a two-piece coaxial cable to connect the audio
unit to the antenna. The front
antenna lead-i ...
