Ford Mustang (1999-2004) Service Manual: Removal
CAUTION: Suspension fasteners are critical parts because they affect performance of vital components and systems and their failure can result in major service expense. A new part with the same part number must be installed if installation becomes necessary. If substitution is necessary, the part must be of the same finish and property class. Torque values must be used as specified during reassembly to make sure of correct retention of these parts.
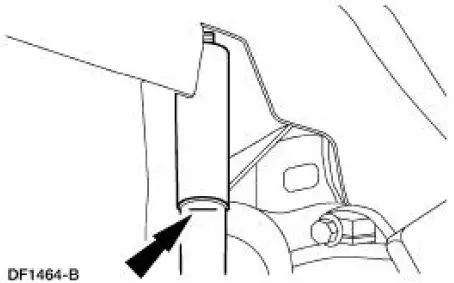
1. Mark the rear shock absorber (18125) relative to the protective sleeve with the vehicle in a static, level ground position (curb height).
2. Raise the vehicle on a hoist.
3. Support the differential housing with a jack stand.
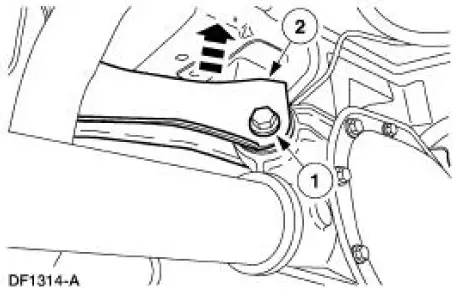
4. Disconnect the upper arm and bushing (5500) from the axle.
1. Remove and discard the nut and bolt.
2. Disconnect the arm and bushing from the axle.
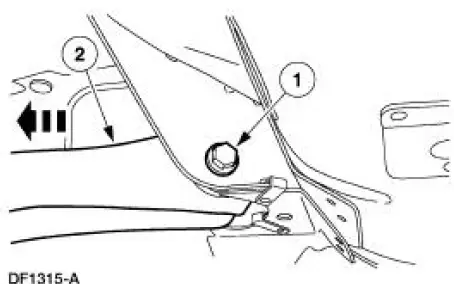
5. Remove the upper arm and bushing from the mounting bracket.
1. Remove and discard the nut and bolt.
2. Remove the arm and bushing.
 Upper Arm
...
 Installation
1. Install the upper arm and bushing to the mounting bracket.
1. Position the arm and bushing.
2. Install a new nut and bolt. Do not tighten at this time.
2. Connect the upper arm and bushing to ...
Other materials:
Ignition Lock Cylinder - Non-Functional
Removal and Installation
1. NOTE: Make sure the front wheels are in the straight-ahead
position.
Disconnect the battery ground cable (14301) and wait at least one minute
to allow the depletion
of the restraint system backup power supply. For addit ...
Vibrate Software
Vibrate Software (Rotunda tool number 215-00003) is a diagnostic aid which
will assist in pinpointing
the source of unacceptable vibrations. The engine's crankshaft is the point of
reference for vibration
diagnosis. Every rotating component will have an angu ...
Accelerator Cable - 3.8L
Removal and Installation
1. Push the accelerator cable nylon bushing out of the accelerator pedal and
shaft arm.
2. Remove the bolts retaining the accelerator cable to the dash panel.
3. Disconnect the accelerator cable from the throttle body by rotating ...
