
Ford Mustang (1999-2004) Service Manual: Reservoir
Removal
1. Remove the LF wheel and tire. Refer to Section.
2. Position the front portion of the LF inner splash shield aside.
3. WARNING: Windshield washer solution contains methanol, which is poisonous.
Observe all cautions and warnings indicated on label of washer solution container.
NOTE: To prevent spilling windshield washer fluid, drain the windshield washer reservoir before removal.
Position windshield washer reservoir aside.
1. Disconnect the electrical connector.
2. Remove the bolt.
3. Position windshield washer reservoir aside.
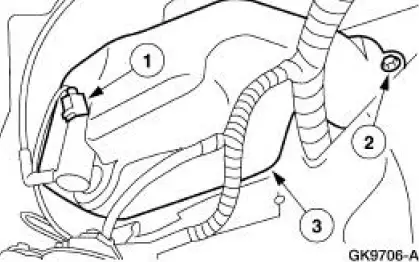
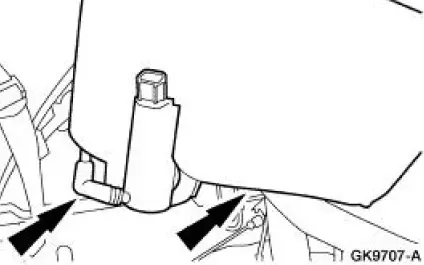
4. Remove the washer fluid reservoir.
- Disconnect the windshield washer pump hose.
Installation
1. WARNING: Windshield washer solution contains methanol, which is poisonous.
Observe all cautions and warnings indicated on label of washer solution container.
CAUTION: Do not operate the windshield washer pump prior to filling the windshield reservoir.
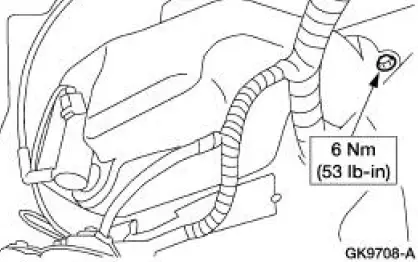
To install, reverse the removal procedure.
- Fill the windshield washer reservoir.
 Washer Pump
Removal
1. Remove the LF wheel and tire. Refer to Section.
2. Position the front portion of the LF inner splash shield aside.
3. WARNING: Windshield washer solution contains methanol, which is ...
 Convertible Top
General Specifications
Torque Specifications
...
Other materials:
Disassembly
1. NOTE: The index mark on the output shaft must be aligned with the
index mark on the output
shaft ring gear during the assembly procedure.
Remove the ring gear snap ring.
2. Separate the ring gear and output shaft.
3. Remove the three output shaft seal ...
Utilizing the mediation or arbitration program
(Canada only)
This pertains to vehicles delivered to authorized Canadian dealers.
In those cases, where you continue to feel that the efforts by Ford of
Canada and the authorized dealer to resolve a factory-related vehicle
service concern have been unsatisfactory, Ford of ...
Torque Converter (Disassembly and Assembly of Subassemblies)
1. A new or remanufactured torque converter must be installed if one or more
of the following
statements is true:
A torque converter malfunction has been determined based on complete
diagnostic
procedures.
Converter stud or studs, impeller hub or bushin ...
