Ford Mustang (1999-2004) Service Manual: Starter Motor - 3.8L
Removal
WARNING: When servicing starter motor (11002) or carrying out other underhood work in the vicinity of the starter motor, be aware that the heavy gauge battery input lead at the starter solenoid (11390) is "electrically hot" at all times. A protective cap or boot is provided over this terminal that must be installed after servicing. Be sure to disconnect the battery negative cable before servicing the starter. Failure to follow these instructions may result in personal injury.
WARNING: When working in area of the starter motor, be careful to avoid touching hot exhaust components. Failure to follow these instructions may result in personal injury.
NOTE: When working on the starter system, make sure the anti-theft system is deactivated (if equipped.)
1. Disconnect the battery ground cable. For additional information, refer to Section.
2. Raise and support the vehicle. For additional information, refer to Section.
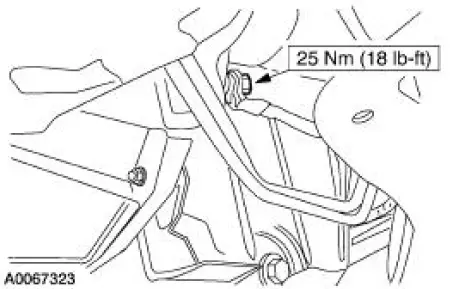
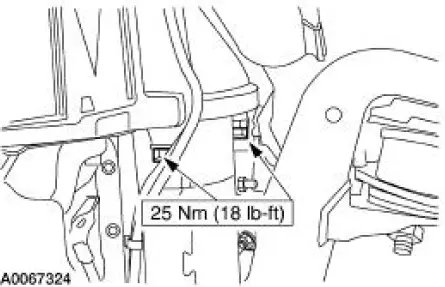
3. Remove the ground cable nut.
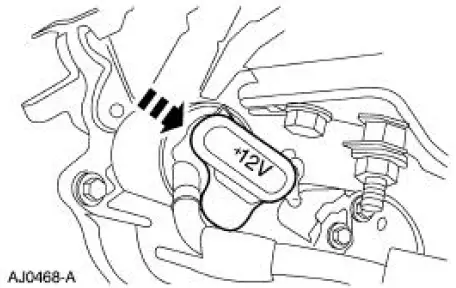
4. Remove the cap.
5. Remove the nuts and position aside the wires.
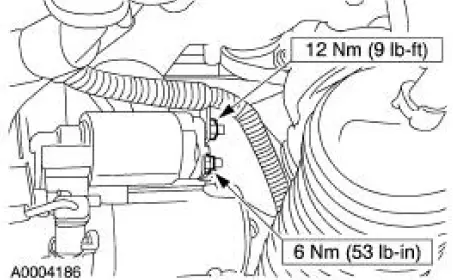
6. Remove the bolts and the starter motor.
Installation
1. To install, reverse the removal procedure.
 Relay Switch
1. Disconnect the battery ground cable. For additional information, refer
to Section.
2. Remove the power distribution box cover.
3. Remove the starter relay from the power distribution box.
I ...
 Starter Motor - 4.6L
Removal
WARNING: When servicing starter motor (11002) or carrying out other
underhood work in
the vicinity of the starter motor, be aware that the heavy gauge battery
input lead at the starter
...
Other materials:
Drive Pinion
Special Tool(s)
Adapter for 205-S127
205-105 (T76P-4020-A3)
Adapter for 205-S127
205-109 (T76P-4020-A9)
Adapter for 205-S127
205-110 (T76P-4020-A10)
Adapter for 205-S127
205-111 (T76P-4020-A11)
Adapter for 20 ...
Identification Tags
All vehicles are equipped with a Vehicle Certification Label, located
on the driver side door lock post.
For correct transmission identification, refer to the code in the space
marked TR.
For model, service ID level or build date information, refer ...
Interior luggage compartment release
WARNING: Keep vehicle doors and luggage compartment locked
and keep keys and remote transmitters out of a child’s reach.
Unsupervised children could lock themselves in the trunk and risk
injury. Children should be taught not to play in vehicles.
WARNING: Do ...
