Ford Mustang (2005-2014) Owners Manual: Sun visors
Slide-On-Rod
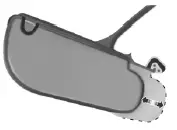
Rotate the visor toward the side window and extend it rearward for extra sunlight coverage.
Retract the visor before moving it back toward the windshield and storing it.
Illuminated Visor Vanity Mirror
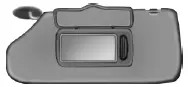
Lift the cover to switch on the lamp.
Flexible Visor Storage System
The system can accommodate various storage accessories. A sunglasses clip and multi-function clip are provided.
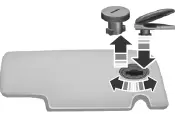
To attach one of the accessories, do the following:
1. Insert the provided removal tool
(on the accessory holder) or a coin
into the slot on the plug and rotate
one-quarter turn in either direction
to remove. It may be necessary to
rotate the visor until the plug drops
away from the opening. Place the
plug in the provided holder when
not in use.
2. Remove the accessory from the holder and insert the end of the
storage accessory into the visor opening. Rotate one-quarter turn in
either direction until the accessory snaps into place. Make sure the open
end of the accessory is facing away from the windshield.
3. Reverse the procedure to remove the accessory and replace the cap or
change to a different accessory.
Additional accessories are available from your authorized dealer. See the Accessories chapter for more information.
 Interior mirror
WARNING: Do not adjust the mirror when your vehicle is
moving.
Note: Do not clean the housing or glass of any mirror with harsh
abrasives, fuel or other petroleum or ammonia based cleaning products.
...
 Sunshade
Use the sunshade to cover the glass roof inside your vehicle.
Use the center-mounted cup handle
to slide the shade open or closed. ...
Other materials:
Weld Nut Repair - Stripped Weld Nut, Restraints
Control
Module (RCM)
WARNING: To avoid accidental deployment and possible personal
injury, the backup
power supply must be depleted before repairing or replacing any front or
side air bag
supplemental restraint system (SRS) components and before servicing,
replacing, ...
Spring
Special Tool(s)
Tie-Rod End Remover
211-001 (TOOL-3290-D) or
Equivalent
Coil Spring Compressor
204-D001 (D78P-5310-A) or
Equivalent
...
Engine - 4.6L (2V)
General Specifications
a - With installation of a new filter.
b - Distance front edge of bearing is installed below front face of cylinder
block.
c - Time necessary for plunger to leak down 1.6 mm of travel with 222 N force
and leak down fluid in
tap ...
