Ford Mustang (1999-2004) Service Manual: Synchronizers
Disassembly and Assembly
NOTE: This procedure applies to all synchronizer assemblies.
1. Scribe an alignment mark on the sliding sleeve and the hub for assembly reference.
2. Remove the sliding sleeve, then remove the synchronizer struts and the springs.
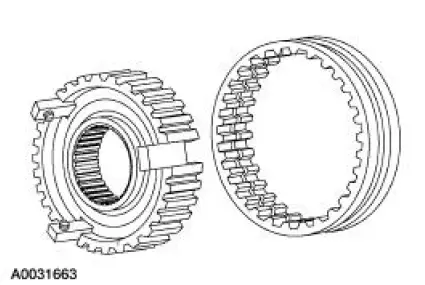
3. Install the synchronizer struts and the springs.
4. CAUTION: Match the alignment marks made during disassembly. The sleeve and the hub have an extremely close fit. Hold the sleeve and hub square to prevent jamming. Do not force the sleeve onto the hub.
Install the sliding sleeve.
 Countershaft Bearing
Special Tool(s)
Remover, Drive Pinion Bearing
Cone
205-D002 (D79L-4621-A) or
equivalent
Installer, Drive Pinion Bearing
Cone
205-011 (T57L-4621-B)
Disassembly and A ...
 Gearshift Rail Bushing
Special Tool(s)
Universal Puller Set
303-DS005 (D80L-100-A) or
equivalent
Installer, Shift Rail Bushing
308-244 (T96P-7025-F)
Slide Hammer
100-001 (T50T-100- ...
Other materials:
Cable and Conduit
Removal
NOTE: The RH rear is shown, the LH is similar.
1. CAUTION: If any component in the parking brake system requires
repair or if the
rear axle housing (4010) is removed, the cable tension must be released.
Release the cable tension. For additional ...
Unique Calibration
The Emissions/CAFE/CO2 Compliance Department is responsible for assigning
these calibration
numbers. Unique calibration identifications are assigned to cover similar
vehicles to differentiate tires,
drive configurations, final drive ratios and other calibrat ...
Mass Air Flow (MAF) Sensor - 3.8L
Removal
CAUTION: The mass air flow (MAF) sensor hot wire sensing
element and housing are
calibrated as a unit and must be repaired as a complete assembly. Do not
damage the sensing
element (internal to housing) or possible failure to the mass air f ...
