Ford Mustang (1999-2004) Service Manual: System Bleeding
1. If required, remove the hydraulic system from the vehicle. Refer to Hydraulic System, Lift Cylinder and Motor in this section.
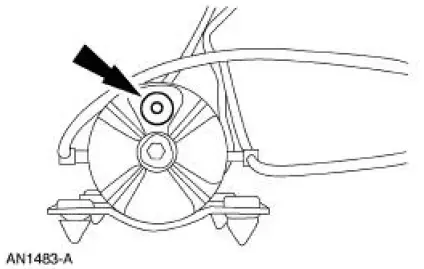
2. Remove the fill plug at the end of the hydraulic pump.
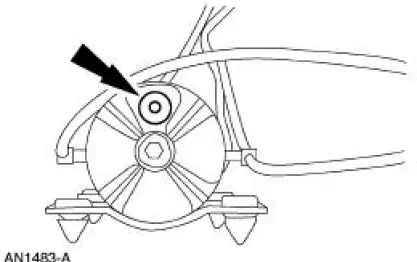
3. Fill the pump with Mercon Multi-Purpose Automatic Transmission Fluid XT-2-QDX or equivalent to the bottom of the fill hole and install the fill plug.
4. NOTE: Some noise squeal may be noticed due to the air in the system.
Connect a 12-volt power source to the motor connector and operate the motor until the cylinders are fully extended. Reverse the 12-volt connection to fully retract the cylinders. Repeat this procedure three times.
5. Remove the fill plug and check the fluid level. Fill the pump with MERCON Multi-Purpose Automatic Transmission Fluid XT-2-QDX or equivalent to the bottom of the fill hole.
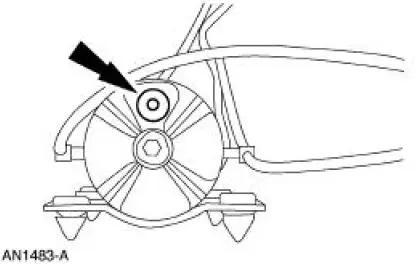
6. Install a fill plug.

7. Install the hydraulic system in the vehicle. Refer to Hydraulic System, Lift Cylinder and Motor in this section.
 Convertible Top (Diagnosis and Testing)
Refer to Wiring Diagrams Cell 103 , for schematic and connector
information.
Special Tool(s)
73 III Automotive Meter
105-R0057 or equivalent
Principles of Operation
The converti ...

Other materials:
Forward Clutch Cylinder
Special Tool(s)
Dial Indicator Gauge with
Holding Fixture
100-002 (TOOL-4201-C) or
equivalent
Compressor, Clutch Spring
307-096 (T81P-70235-A)
Protector, Transmission
Forward Clutch Outer Fluid
Seal
307-423
M ...
Rear Suspension
Torque Specifications
WARNING: All vehicles are equipped with gas pressurized shock absorbers
which will
extend unassisted. Do not apply heat or flame to the shock absorbers during
removal or
component servicing. Failure to follow these instructions can re ...
Charging System (Diagnosis and Testing)
Refer to Wiring Diagrams Cell 12 , Charging System for schematic and
connector information.
Special Tool(s)
73III Automotive Meter
105-R0057 or equivalent
SABRE Premium Battery and
Electrical System Tester
010-00736 or equival ...
