Ford Mustang (1999-2004) Service Manual: Thermostat - 3.8L
Material
| Item | Specification |
| Gasket Adhesive TA-6 or equivalent | WSS-M2G408- A |
| Motorcraft Premium Gold Engine Coolant VC-7-A (in Oregon VC-7-B) (yellow color) | WSS-M97B51- A1 |
Removal and Installation
1. Drain the engine coolant. For additional information, refer to Cooling System Draining, Filling and Bleeding in this section.
2. Disconnect the upper radiator hose from the coolant hose connection.
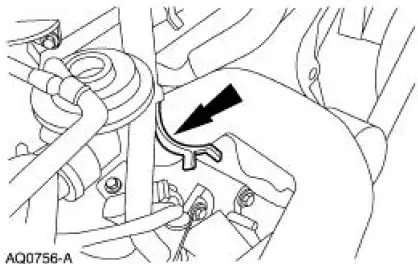
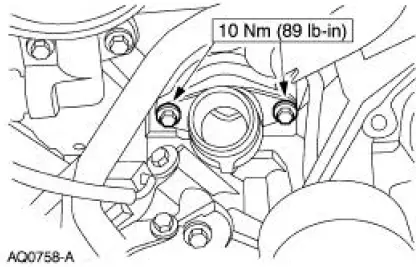
3. Remove the thermostat housing.
- Remove the bolts.
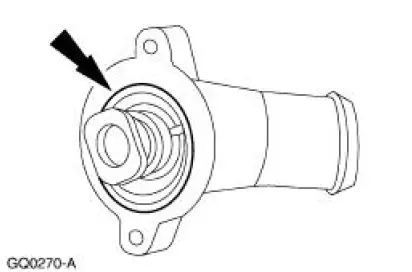
4. Remove the thermostat.
- Clean and inspect the water outlet connection.
- Discard the thermostat gasket, and clean and inspect the mating surface.
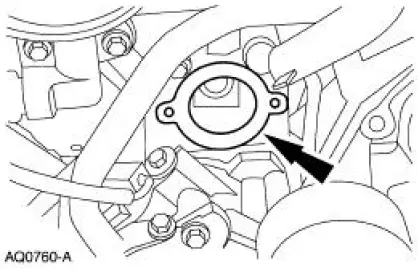
5. Clean and inspect the thermostat mating surface at the engine.
6. NOTE: The thermostat is indexed and must be returned to the original location.
NOTE: Coat the new thermostat gasket with gasket adhesive.
NOTE: Make sure the new O-ring gasket is secure around the thermostat.
To install, reverse the removal procedure.
7. Fill the cooling system. For additional information, refer to Cooling System Draining, Filling and Bleeding in this section.
 Heater Core Backflushing
Special Tool(s)
Flush Kit
164-R3658 or equivalent
Drain Kit
164-R3662 or equivalent
Material
Item
Specification
Motorcraft Premium Cooling
System Flush ...
 Thermostat - 4.6L(2V)
Material
Item
Specification
Motorcraft Premium Gold
Engine Coolant
VC-7-A (in Oregon VC-7-B)
(yellow color)
WSS-M97B51-
A1
Removal and Installation
1. Drain the engine coola ...
Other materials:
Disassembly
1. WARNING: To avoid risk of serious personal injury, follow all
warnings, cautions,
notes and instructions in the driver air bag removal and installation procedure.
Remove the steering column (3C529). For additional information, refer to Column
in this
s ...
Refrigerant Identification Testing
Special Tool(s)
Refrigerant Identifier with Air-
Radicator
198-00003 or equivalent
1. NOTE: An A/C refrigerant analyzer must be used to identify gas
samples taken directly from the
refrigeration system or storage containers prior to recoveri ...
Actuator - Door Lock
Removal
1. Remove the door trim panel (23942). For additional information,
refer to Section.
2. Remove the door latch (21812). For additional information, refer to
Latch-Door .
3. Remove the door ajar switch.
Release the locking tab.
4 ...
