Ford Mustang (1999-2004) Service Manual: Torque Converter Leak Check
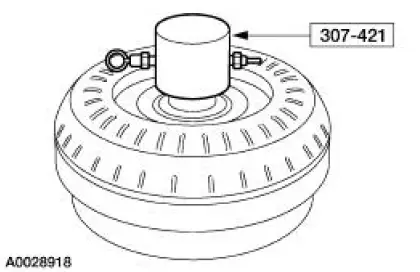
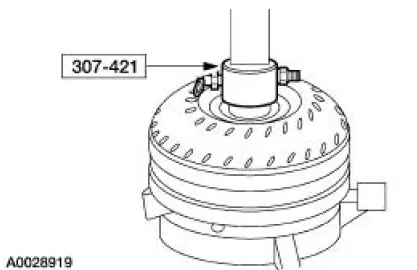
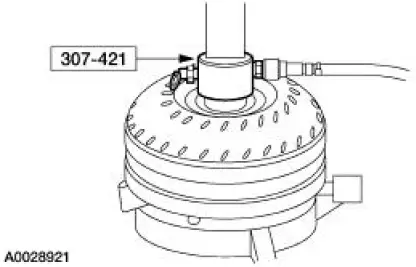
Special Tool(s)
 |
Leak Tester, Torque Converter 307-421 |
1. Clean the outside surface of the torque converter.
2. Install the special tool into the converter hub.
3. WARNING: Always follow correct safety procedures while using press. Failure to follow these instructions may result in personal injury.
Install the torque converter with the installed special tool into the arbor press.
Secure the press, apply enough force to seal the tool into the torque converter.
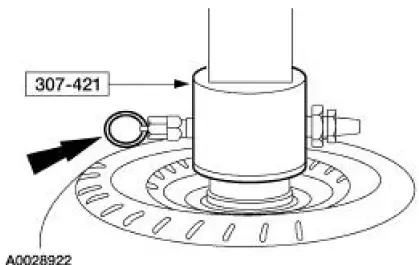
4. NOTE: Use clean dry shop air.
Apply air pressure to the valve on the special tool.
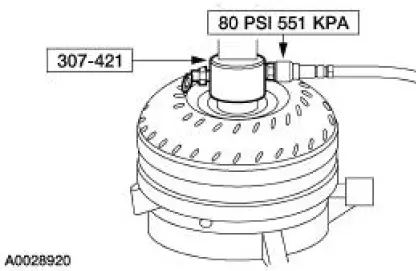
5. With air pressure applied to the valve, inspect for leaks at the converter hub, seams, drain plug and studs. A soap bubble solution may be applied around these areas to aid in diagnosis. If a leak is found around the drain plug, install a new drain plug and recheck the torque converter. If any other leaks are present, install a new or remanufactured torque converter.
6. Remove the air hose. Release pressure and then slowly release the press. Remove the torque converter. Remove the special tool.
 Torque Converter Cleaning And Inspection
Material
Item
Specification
MERCON V Automatic
Transmission Fluid
XT-5-QM, XT-5-DM
MERCON V
1. If a new torque converter is being installed, continue with Substep 2 of
Step 2.
...
 Torque Converter Impeller to Pump Stator Interference
Check
Torque Converter Impeller to Pump Stator Interference
Check
1. NOTE: Front pump support may remain in front pump support and gear
during this test.
Position the front pump support with the splines up.
2. Mount the torque converter on the front pump support wi ...
Other materials:
Engine Support Insulators
Special Tool(s)
3 Bar Engine Support Kit
303-F072
Engine Lift Bracket Set
303-D095 (D94L-6001-A) or
equivalent
...
Pinpoint Test B: LFC 21/DTC B1921 - RCM Bracket Ground Resistance High
Normal Operation
WARNING: The tightening torque of the restraints control module
(RCM) retaining bolts is
critical for proper air bag supplemental restraint system (SRS)
operation. Refer to Restraints
Control Module (RCM) in this section for correc ...
Analysis of Vibration
WARNING: A vehicle equipped with a Traction-Lok differential will
always have both
wheels driving. If only one wheel is raised off the floor and the rear axle is
driven by the engine,
the wheel on the floor could drive the vehicle off the stand or jack. Be s ...
