Ford Mustang (1999-2004) Service Manual: Tracer Dye Leak Detection
Special Tool(s)
 |
120 Watt 110 Volt UV Lamp 20C 164-R0721 or equivalent |
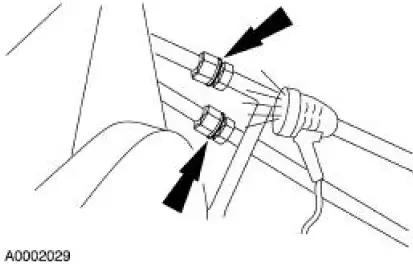
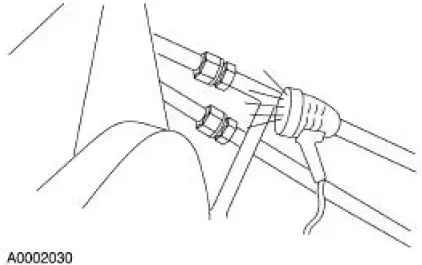
NOTE: Ford Motor Company vehicles are produced with a permanent leak tracer dye incorporated into the A/C system. The location of leaks can be pinpointed by the bright yellow-green glow of the tracer dye. Since more than one leak can exist, always inspect each component.
1. Check for leaks using a 120 Watt UV spot lamp.
- Scan all components, fittings and lines of the A/C system.
2. After the leak is repaired, remove any traces of tracer dye with a general purpose oil solvent.
3. Verify the repair by operating the system for a short time and inspect with the UV spot lamp.
 Electronic Leak Detection
Special Tool(s)
H10PM Refrigerant Leak
Detector With Battery
216-00001 or equivalent
CAUTION: Good ventilation is necessary in the area where electronic A/C
leak testing is to
be ca ...
 Air Conditioning (A/C) System Flushing
Special Tool(s)
A/C Flush and Purge Machine
219-00022 (part of 219-00023)
or equivalent
A/C Flush and Purge Fitting Kit
219-00024 (part of 219-00023)
or equivalent
WA ...
Other materials:
Information
Under the Information menu, you can access features such as Where Am
I? and Sirius Travel Link, view your calendar, see system information and
get basic system help.
Press the I (Information) hard button to access these features.
Where Am I?
Press the I butt ...
Removal
1. Remove the nuts and position the radio ignition interference capacitors
aside.
2. Remove the valve covers. For additional information, refer to Valve Cover
RH and Valve Cover
LH in this section.
3. Remove the cooling fan.
4. Remove the accessory drive ...
Steering System (Diagnosis and Testing)
Special Tool(s)
Dial Thermometer 0-220F
023-R0007 or Equivalent
Hand Held Automotive Meter
105-R0053 or Equivalent
Power Steering Analyzer
211-F001 (014-00207) or
Equivalent
Spring Scale
211-034 (T74P-3504-Y)
...
