Ford Mustang (1999-2004) Service Manual: Valve Cover LH
Material
| Item | Specification |
| Silicone Gasket and Sealant F7AZ-19554-EA or equivalent | WSE-M4G323-A4 |
Removal and Installation
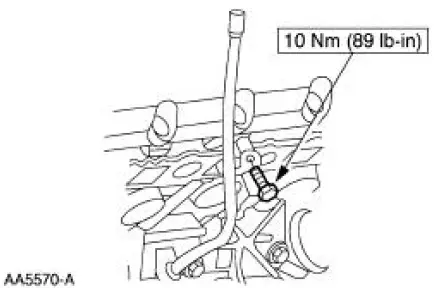
1. Position the oil level tube (6754) out of the way.
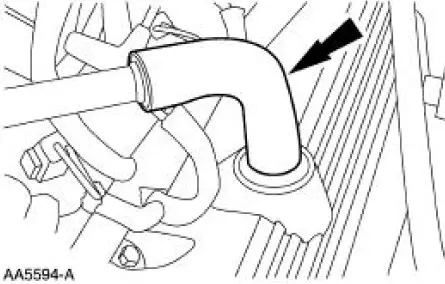
2. Disconnect the breather tube.
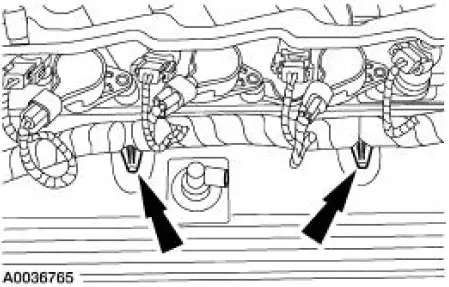
3. Separate the engine wiring harness in the locations shown.
4. Disconnect the engine wiring harness retainer and position it aside.

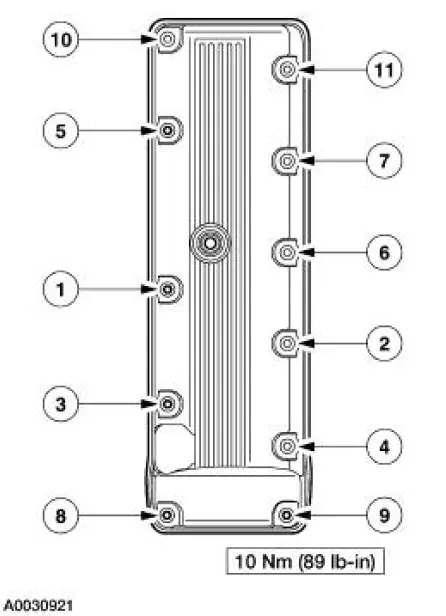
5. Remove the bolts, studs and the valve cover in the sequence shown.
- Inspect and clean the sealing surfaces.
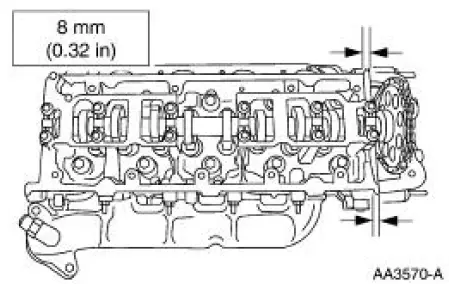
6. NOTE: Apply an eight millimeter bead of silicone gasket and sealant at the intersection of the engine front cover and the cylinder head.
To install, reverse the removal procedure.
 Valve Cover RH
Material
Item
Specification
Silicone Gasket and Sealant
F7AZ-19554-EA or equivalent
WSE-M4G323-A4
Removal and Installation
1. Remove the air cleaner outlet tube. For additional inf ...
 Crankshaft Pulley
Special Tool(s)
Remover, Crankshaft Vibration
Damper
303-009 (T58P-6316-D)
Installer, Crankshaft Vibration
Damper
303-102 (T74P-6316-B)
Material
Item
Specifica ...
Other materials:
Rear Subframe
Removal and Installation
CAUTION: Suspension fasteners are critical parts because they affect
performance of vital
components and systems and their failure can result in major service expense. A
new part with
the same part number must be installed if install ...
Principles of Operation
NOTE: A new instrument cluster must be reconfigured. Refer to
Section.
The instrument cluster is a hybrid electronic cluster (HEC). The
instrument cluster uses both hardwired
and the standard corporate protocol (SCP) communication network to transmit
a ...
Inspection and Verification
1. The interior lighting system is a generic electronic module (GEM)
controlled system.
2. Verify the customer concern by operating the interior lighting system.
3. Visually inspect for the following obvious signs of mechanical and
electrical damage.
...
