Ford Mustang (1999-2004) Service Manual: Removal
1. Remove the upper intake manifold. For additional information, refer to Intake Manifold-Upper in this section.
2. Disconnect the fuel line. For additional information, refer to Section.
3. Remove the coolant by-pass tube. For additional information, refer to Section.
4. Remove the generator. For additional information, refer to Section.
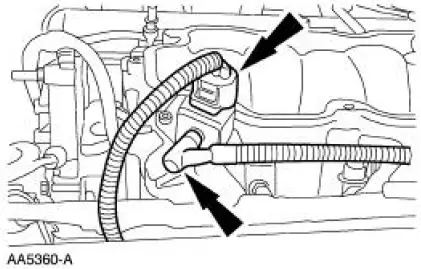
5. Disconnect the electrical connector and the vacuum line from the fuel pressure sensor.
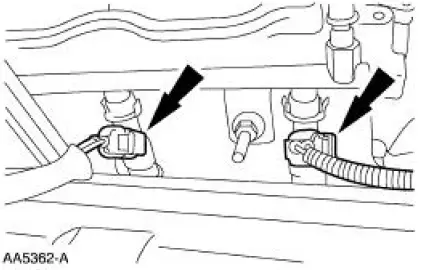
6. Disconnect the eight fuel injector electrical connectors.
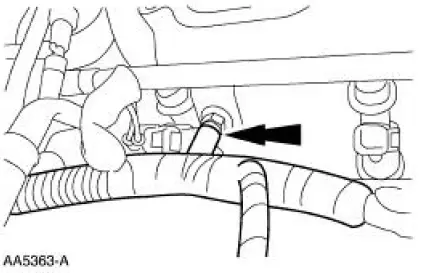
7. Separate the fuel charging wiring harness from the fuel injection supply manifold studs in three places.
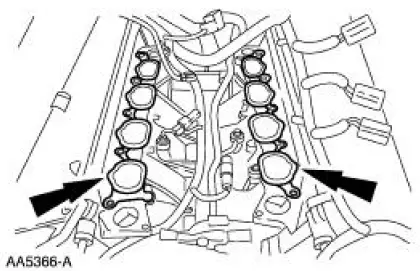
8. Remove the ten bolts in the sequence shown and raise the lower intake manifold slightly.

9. Disconnect the fuel charging wiring harness from the rear of the lower intake manifold and remove the manifold.
10. Remove the intake manifold gaskets.
- Clean and inspect the sealing surfaces.
 Intake Manifold - Lower
Material
Item
Specification
Metal Surface Cleaner
F4AZ-19A536-RA or equivalent
WSE-M5B392-A
...
 Installation
1. Install the lower intake manifold gaskets.
2. Connect the fuel charging wiring harness to the rear of the lower intake
manifold and install the
manifold.
3. Install the intake manifold fastener ...
Other materials:
Removal
WARNING: Always wear safety glasses when repairing an air bag
supplemental restraint
system (SRS) vehicle and when handling an air bag module. This will
reduce the risk of injury
in the event of an accidental deployment.
WARNING: Carry a live air ...
Principles of Operation
Evaporative Emission (EVAP) Canister Purge Valve
The EVAP canister purge valve is controlled by the powertrain control
module (PCM). The EVAP
canister purge valve controls the flow of fuel vapors from the EVAP canister
to the engine intake
manifold duri ...
A/C Compressor Pressure Relief Valve
An A/C compressor pressure relief valve is incorporated into the compressor
A/C manifold and tube to:
relieve unusually high refrigerant system discharge pressure buildups.
For specifications
regarding operating pressure(s), refer to Section.
prevent ...
