Ford Mustang (1999-2004) Service Manual: Transmission (Disassembly)
Special Tool(s)
|
|
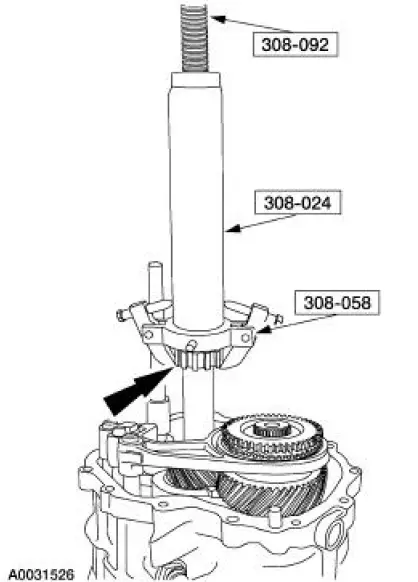
Remover, Mainshaft Bearing 308-058 (T77J-7025-H) |
|
|
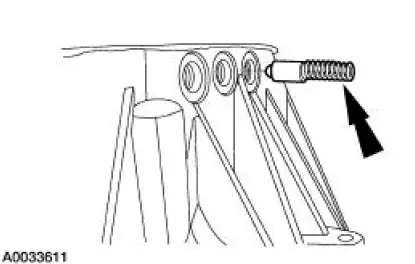
Screw, Bearing Removal tube 308-092 (T84T-7025-B) |
|
|
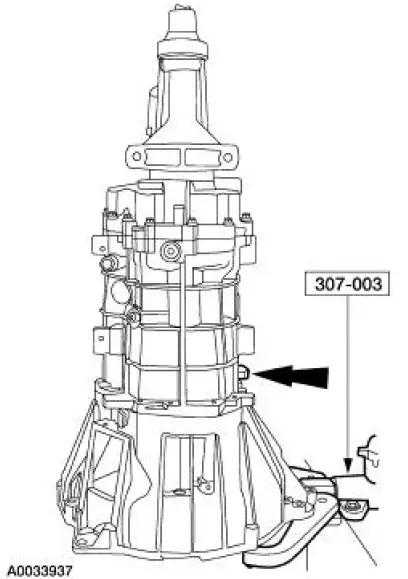
Holding Fixture, Transmission 307-003 (T57L-500-B) |
|
|
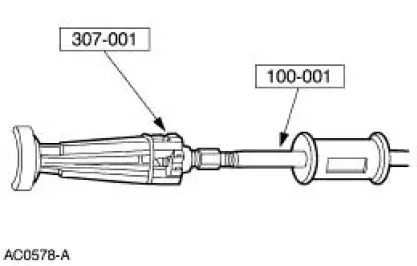
Remover, Bushing 307-001 (TOOL-1175-AC) |
|
|
Remover/Installer, Bearing Tube 308-024 (T75L-7025-B) |
Disassembly
NOTE: During disassembly, if any roll pins, retaining rings or bearings are removed, install new components. Install bearings and bearing cups as a set.
1. Remove the clutch release hub and bearing and the clutch release lever. For additional information, refer to Section.
2. WARNING: Make sure protective eye wear is in place.
Clean the transmission exterior with solvent and dry with compressed air. During disassembly, clean all components with solvent and dry with compressed air.
3. Attach the transmission to the special tool.
4. NOTE: Position a drain pan under the transmission.
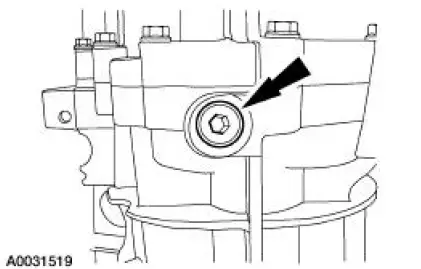
Remove the case plug, then rotate the transmission to a horizontal position.
5. Using the special tools, remove the extension housing fluid seal.
6. NOTE: Rotate the transmission to a vertical position.
NOTE: Position the gearshift lever in NEUTRAL.
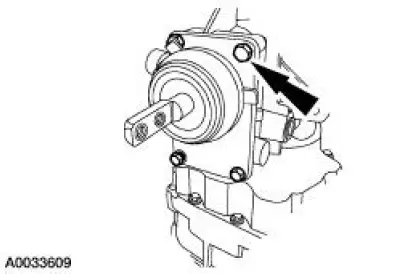
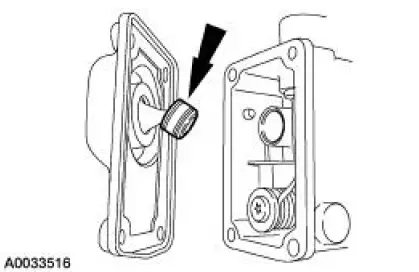
7. Inspect the gearshift offset lever insert and O-ring for wear or damage. Install a new insert as necessary.
8. NOTE: If necessary, remove the spring and plate for disassembly.
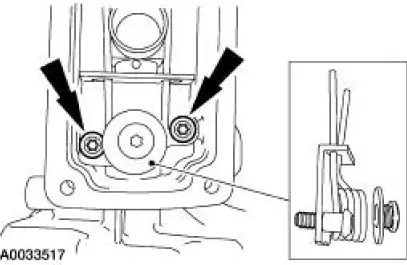
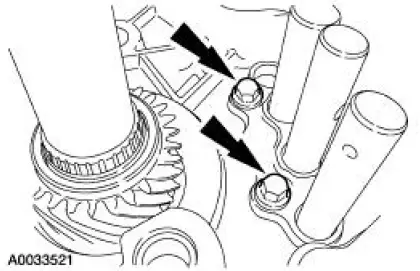
Remove the bolts and the shift spring and plate.
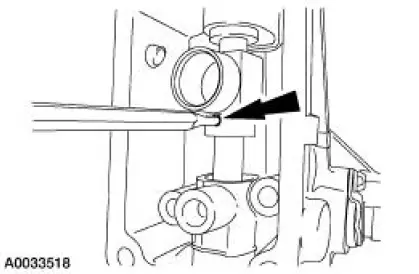
9. Using a 5/32-inch drift and a hammer, drive the split pin downward
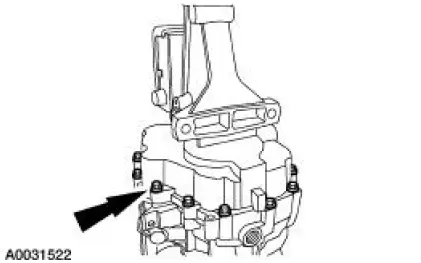
10. Remove the 12 bolts.
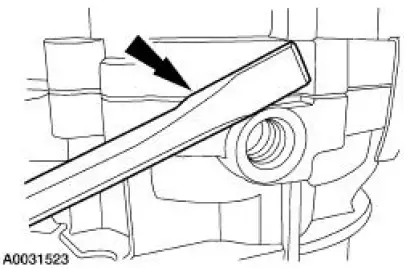
11. Using a flat-blade screwdriver, separate the extension housing, then remove the gearshift offset lever from the transmission case.
- Remove and discard the split pin from the gearshift offset lever during removal.
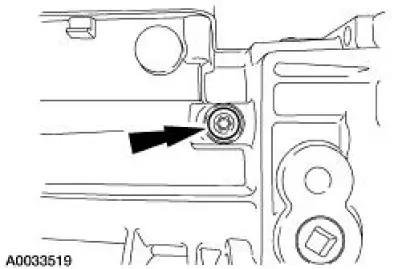
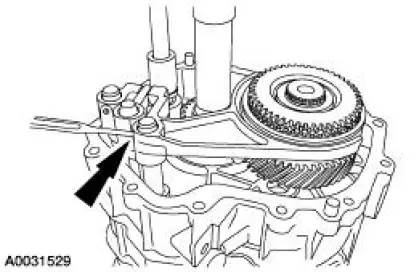
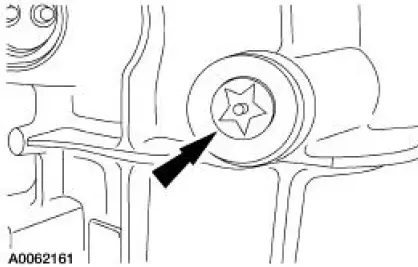
12. Remove the fifth/reverse gear lockout bolt.
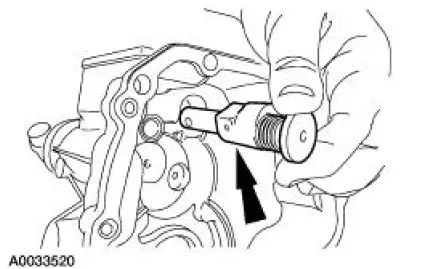
13. Remove the fifth/reverse gear lockout.
14. Remove the shipping seal.
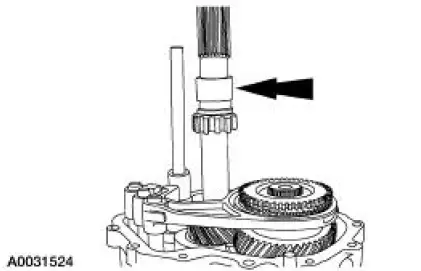
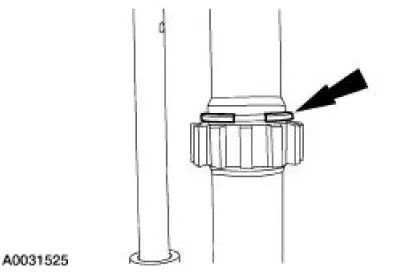
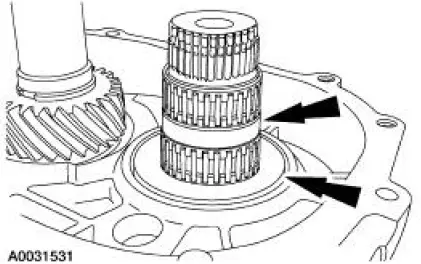
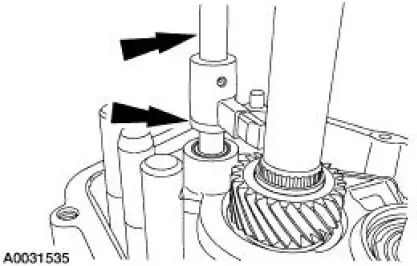
15. Remove the OSS sensor tone wheel retaining ring.
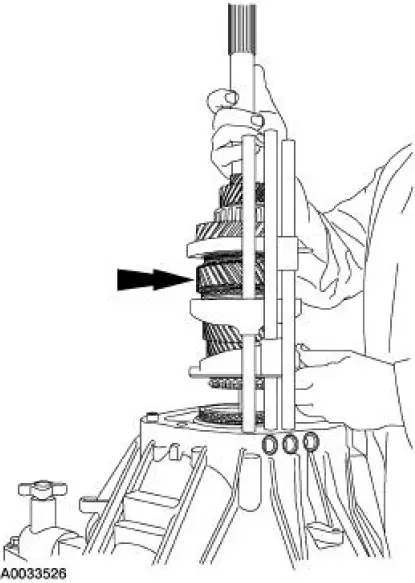
16. Using the special tools, remove the OSS sensor tone wheel.
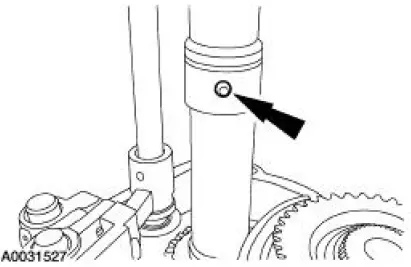
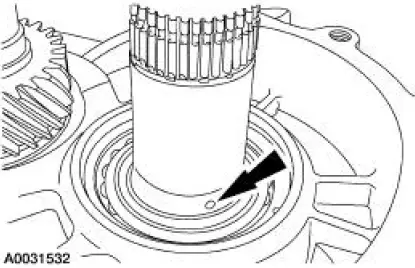
17. Remove the OSS sensor tone wheel check ball.
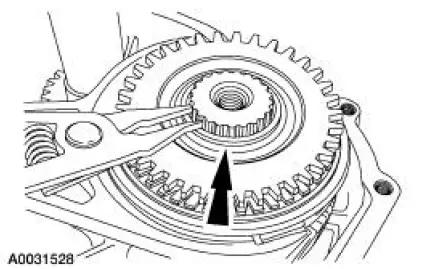
18. Remove and discard the fifth gear synchronizer retaining ring.
19. Using a 5/32-inch drift and a hammer, remove and discard the pin from the fifth gear shift fork.
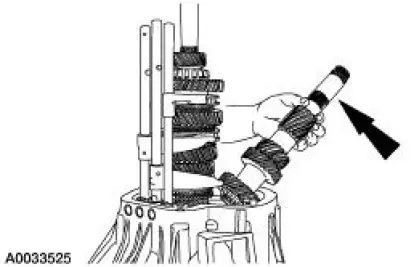
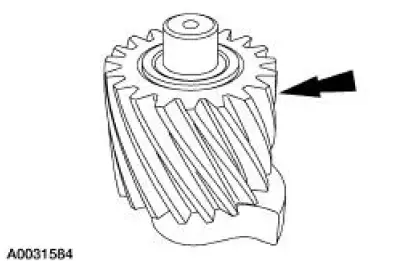
20. Remove the fifth gear shift fork, synchronizer assembly, synchronizer cone and the fifth gear as an assembly.
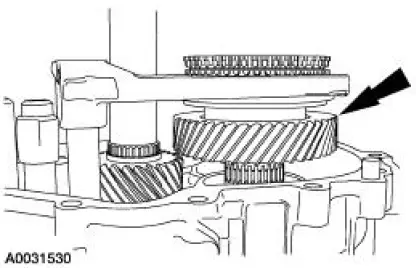
21. Remove the fifth gear clutch cone.

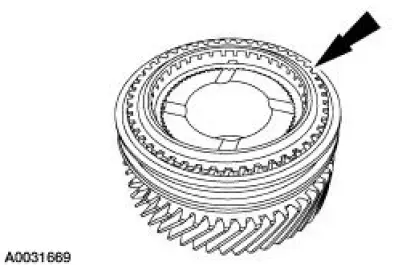
22. Remove the fifth gear synchronizer blocking ring.
- Inspect the blocking ring for wear or damage. Install new blocking rings as necessary.
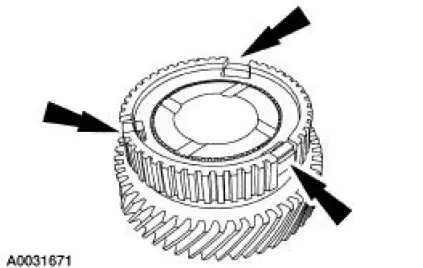
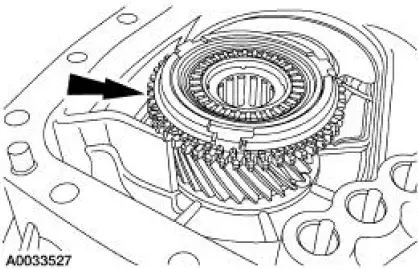
23. Remove the fifth gear synchronizer sleeve from the synchronizer hub.

24. Remove the synchronizer inserts and the springs.
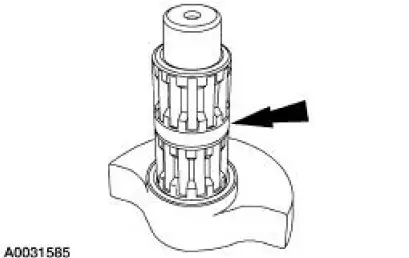
25. Remove the needle bearings and the thrust washer.
- The fifth gear needle bearing is three separate pieces: bearing, spacer, bearing
- Inspect the needle bearing for wear or damage. Install new bearings as necessary.
26. Remove the check ball.
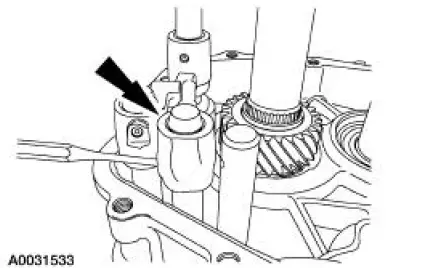
27. Using a 5/32-inch drift and a hammer, drive out the split pin, then remove the third/fourth shift finger. Discard the split pin.
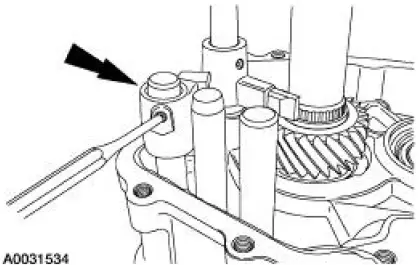
28. Using a 5/32-inch drift and a hammer, drive out the split pin, then remove the first/second shift finger. Discard the split pin.
29. Remove the main shift rail and the plastic spacer.
30. Remove the bolts and the shift interlock plate.
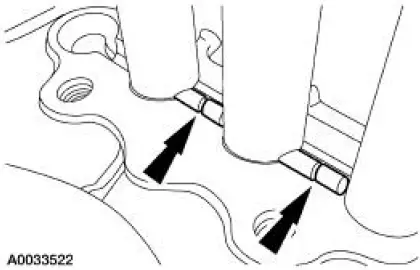
31. Using a magnet, remove the interlock pins.
- One lock pin in the center rail, two between the rails.
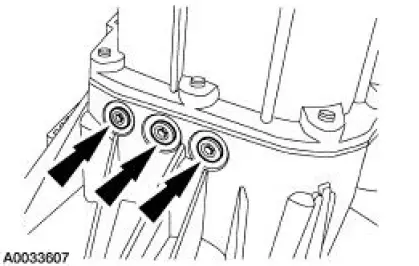
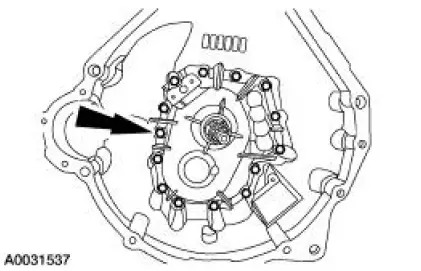
32. Remove the three detent plugs, springs and the detents.
33. CAUTION: Do not remove all the bolts while in the horizontal position.
Remove the bolts.
- Rotate the transmission to a horizontal position. Remove 12 bolts, leaving two opposing bolts in. Rotate the transmission to a vertical position, then remove the remaining two bolts.
34. Carefully pry the clutch housing from the transmission main case.
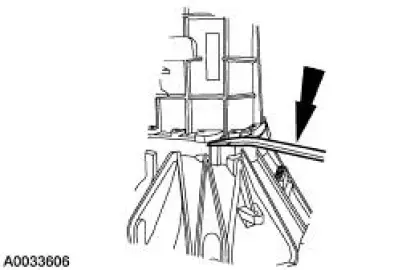
35. Remove the transmission main case from the clutch housing.
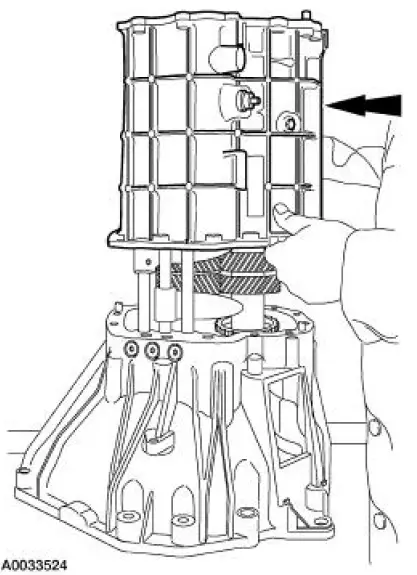
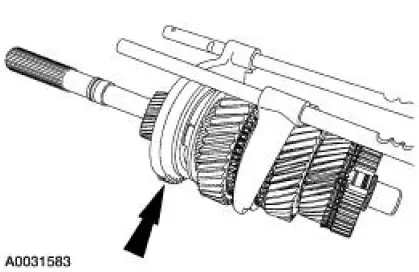
36. Lift the mainshaft 13 mm (0.50 in) upward, tilt the countershaft outward and remove the countershaft.
37. Remove the mainshaft and shift assembly.
38. Remove the input shaft. For input shaft disassembly, refer to Input Shaft and Bearing in this section.
39. Remove the shift rails and shift forks from the main shaft. For gearshift rail and fork disassembly, refer to Gearshift Rail and Fork in this section.
40. Remove the reverse idler shaft bolt. Remove and discard the seal.
41. Remove the reverse idler gear assembly.
42. Remove the reverse idler gear from the shaft.
- Inspect the gear for wear or damage. Install a new gear as necessary.
43. Remove the reverse idler gear bearing.
- The reverse idler gear is three separate pieces: bearing, spacer, bearing.
- Inspect the bearing for wear or damage. Install new bearings as necessary.
44. Disassemble the clutch housing.
1. Remove the countershaft bearing cup and shim.
2. Remove the input shaft bearing cup and shim.
3. Remove the input shaft seal.
- Carefully pry out from the inside of the case.
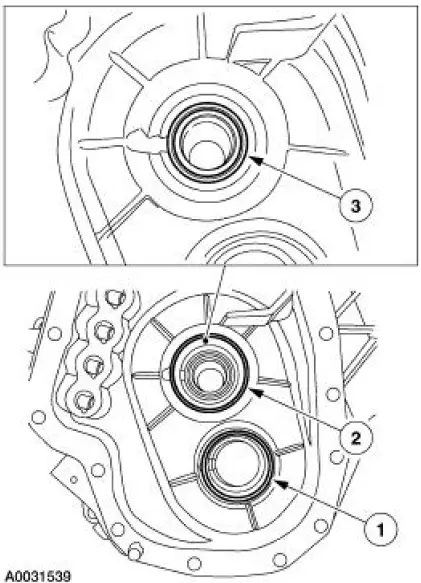
45. Remove the rear countershaft bearing.
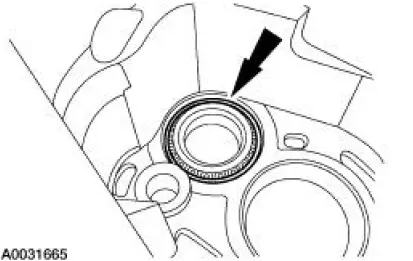
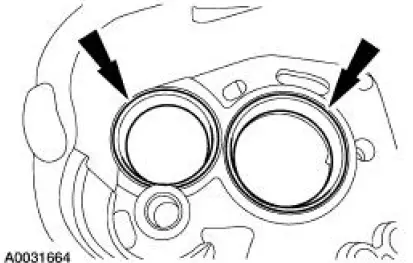
46. Remove the rear countershaft bearing cup and the rear output shaft bearing cup.
 Transmission (Removal)
1. Disconnect the battery ground cable. For additional information, refer to
Section.
2. Remove the gearshift lever knob.
3. Remove the console panel gearshift plate. Lift the gearshift lever boot ...
 Input Shaft and Bearing
Special Tool(s)
Remover, Driver Pinion
Bearing Cone
205-D002 (D79L-4621-A) or
equivalent
Installer, Drive Pinion Bearing
Cone
205-011 (T57L-4621-B)
Remover ...
Other materials:
Closing the convertible top
Note: The convertible top will not operate unless the vehicle is
stationary or traveling under 3 mph (5 kmh).
Note: Make sure that the latch handles are pulled down and in the fully
opened position before the top makes contact with the windshield
header. This ...
Inspection and Verification
1. Verify customer concern by running the engine.
2. Inspect the drive belt for chunking, fraying and wear.
3. Check the drive belt for correct routing.
Drive Belt Cracking/Chunking/Wear
V Ribbed Serpentine Drive Belt With Cracks Across Ribs
The accessory ...
Auxiliary Power Points
WARNING: Do not plug optional electrical accessories into the
cigarette lighter socket (if equipped). Improper use of the lighter
can cause damage not covered by your warranty, and can result in fire
or serious injury.
Note: If used when the engine is not runn ...
