Ford Mustang (1999-2004) Service Manual: Accessory Drive Belt Idler Pulley - 4.6L (2V) and (4V)
Removal and Installation
Mach I
1. Remove the air intake scoop. For additional information, refer to Section.
Cobra
2. Remove the supercharger drive belt cover.
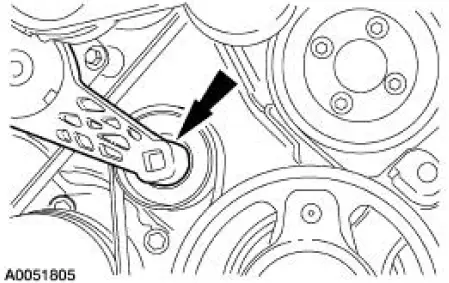
3. Rotate the supercharger belt tensioner clockwise and remove the supercharger belt.
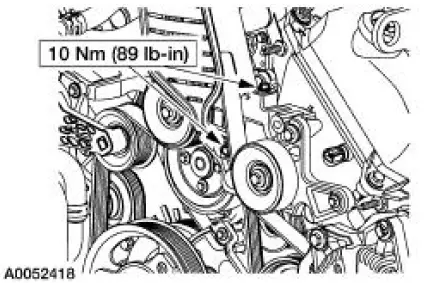
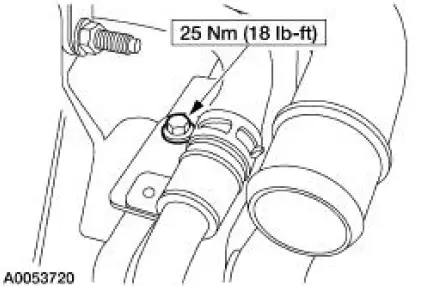
4. Remove the coolant hose mounting bolt.
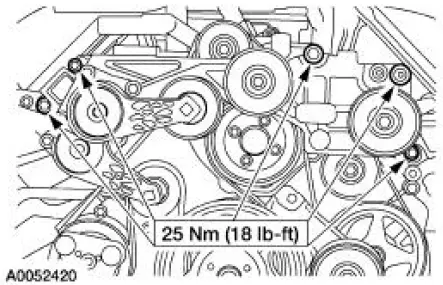
5. Remove the belt idler support bracket assembly.
All engines
6. Rotate the belt tensioner and position the accessory drive belt aside.
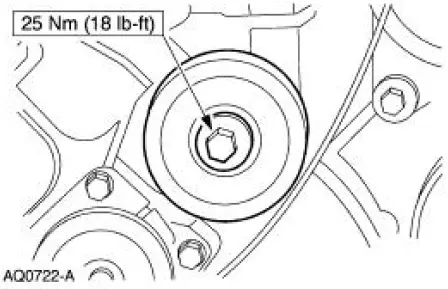
7. NOTE: The procedure listed below can be carried out on any of the 4.6L engine accessory drive belt idler pulleys.
Remove the bolt and the belt idler pulley.
8. To install, reverse the removal procedure. Refer to Accessory Drive or Accessory Drive-Cobra in this section, for accessory belt routing.
 Accessory Drive Belt Idler Pulley - 3.8L
Removal and Installation
1. Remove the drive belt. For additional information, refer to Accessory
Drive Belt-3.8L in this
section.
2. Remove the belt idler pulley.
Remove the bolt.
3. To instal ...
 Supercharger Belt Idler Pulley
Removal and Installation
1. Remove the supercharger drive belt cover.
2. Rotate the supercharger belt tensioner clockwise and remove the
supercharger belt.
3. Remove the bolt and the supercharger ...
Other materials:
Crankshaft Pulley
Special Tool(s)
Remover, Crankshaft Vibration
Damper
303-009 (T58P-6316-D)
Installer, Crankshaft Vibration
Damper
303-102 (T74P-6316-B)
Material
Item
Specification
Silicone Gasket and Sealant
F7AZ-19554-EA or eq ...
Disassembly
1. Inspect the clutch cylinder thrust surfaces, piston bore and clutch plate
serrations for scores or
burrs. Minor scores or burrs may be removed with crocus cloth. Install a new
clutch cylinder if it
is badly scored or damaged.
2. Check the fluid passage i ...
Touchscreen climate controls
Press the CLIMATE hard button to access your climate control features.
Depending on your vehicle line and option package, your climate screen
may look different from the screen shown here.
Climate Control Voice Commands
If you are not viewing the climate co ...
