Ford Mustang (1999-2004) Service Manual: Caliper (DISASSEMBLY AND ASSEMBLY)
Disassembly
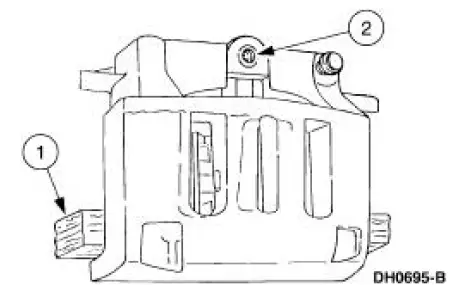
1. Remove the disc brake caliper (2B120). For additional information, refer to Caliper in this section.
2. Drain the remaining brake fluid from disc brake caliper.
3. Apply low air pressure to the fluid port in the disc brake caliper.
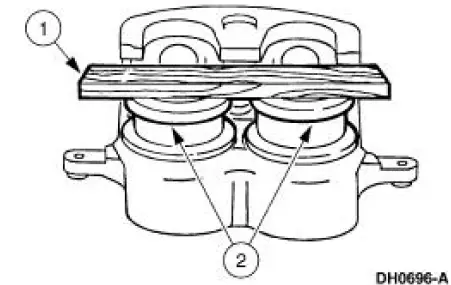
1. Place a block of wood between the caliper bridge and the caliper pistons (2196).
2. Apply low air pressure to the fluid port in the disc brake caliper and force out the caliper pistons to the block of wood.
4. Remove the caliper pistons.
1. Remove the block of wood.
2. Remove the caliper pistons.
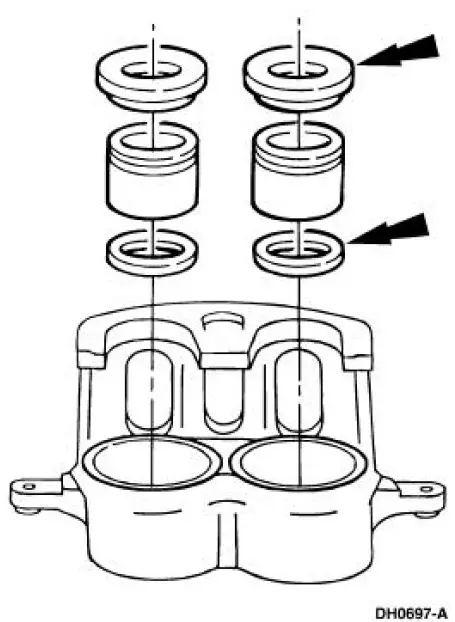
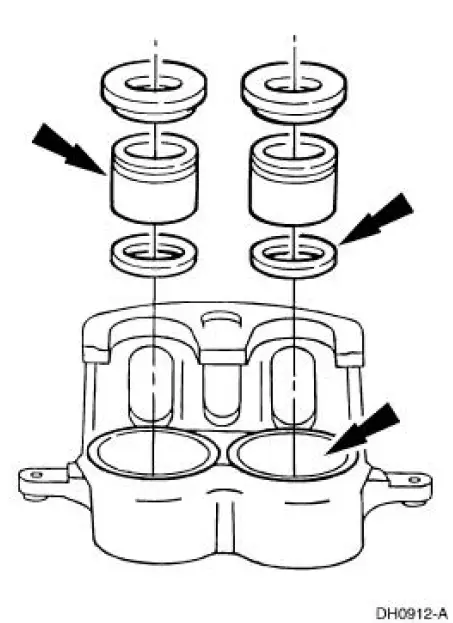
5. Remove and discard the piston seals and boots.
6. Remove and discard the bleed screw and cap.
Assembly
1. CAUTION: Do not hone the caliper bores. Caliper pistons are not available for honed caliper bores.
Clean and inspect the caliper pistons and the disc brake caliper.
- Remove dirt and debris.
- Examine the caliper pistons for surface irregularities, scoring or wear. Damaged caliper pistons should be installed new.
- Clean the caliper bores with Metal Brake Parts Cleaner F3AZ-19579-SA or equivalent meeting Ford specification.
- If the caliper bores are corroded or excessively scored, install a new disc brake caliper.
- Lubricate the caliper pistons and piston seals before assembly.
2. CAUTION: Never reuse piston seals and dust boots.
NOTE: Never reuse brake fluid that has been drained from the hydraulic system or has been allowed to stand in an open container for an extended period of time.
Lubricate the caliper piston, piston seal and caliper bores with clean High Performance DOT 3 Brake Fluid C6AZ-19542-AB or equivalent DOT 3 fluid meeting Ford specification ESA-M6C25- A.
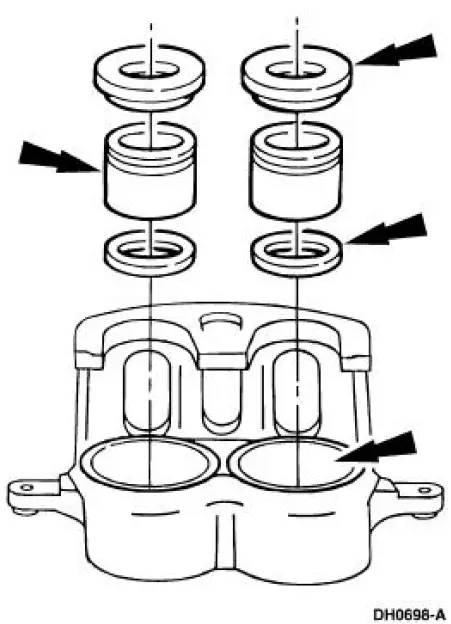
3. Install the caliper piston.
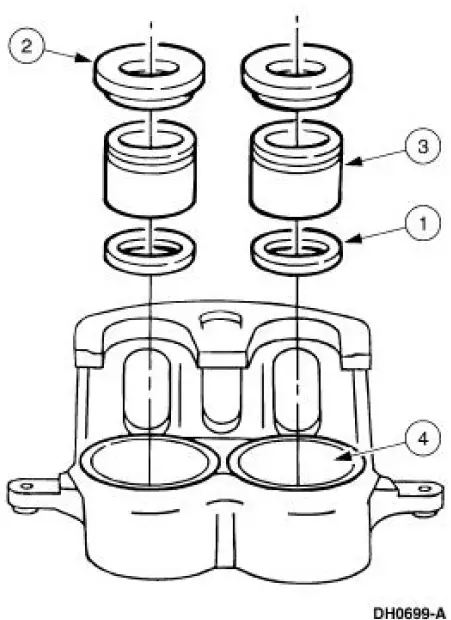
1. Install the piston seal.
2. Install the piston boot on the piston.
3. CAUTION: Be careful not to damage or dislodge the piston seal. Insert the caliper piston.
4. CAUTION: Be careful not to cock the caliper piston. Press the caliper piston into the bore.
4. Install a new bleed screw and cap.
5. Install the disc brake caliper. For additional information, refer to Caliper in this section.
 Shield
Removal
1. Remove the brake disc (1125). For additional information, refer to
Disc in this section.
2. Remove the brake disc shield (2K004).
1. Drill out three brake disc shield rivets.
...
 Rear Disc Brake
General Specifications
Torque Specifications
...
Other materials:
Toe Adjustment - Rear
1. Loosen the nuts.
To prevent damage to the ball joints, hold the tie-rod ends while
loosening the nuts.
2. Rotate the toe link to the correct toe setting.
3. Tighten the nuts.
To prevent damage to the ball joints, hold the tie-rod ends wh ...
Disconnect
1. Remove the A/C tube lock coupling clip (19E746), if equipped.
2. Fit the special tool to the spring lock coupling.
3. Push the tool into the cage opening to release the female fitting from the
A/C tube lock coupling
spring (19E576).
4. Pull the sprin ...
Refrigerant Lines
The condenser to evaporator tube (19835) contains the high pressure liquid
refrigerant upstream of the
evaporator core orifice.
The A/C manifold and tube (19D734) is attached to the A/C compressor, is sealed
with O-ring seals,
and has the following features ...
