Ford Mustang (1999-2004) Service Manual: Child Safety Seat Belt - Tether Anchor
Removal and Installation
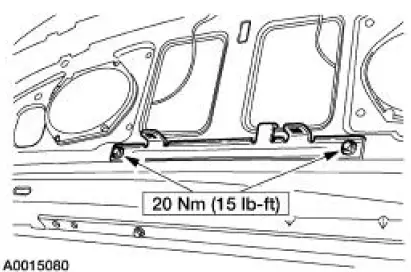
Hard top only
1. Remove the package tray. For additional information, refer to Section.
2. Remove the bolts and the tether anchor bracket.
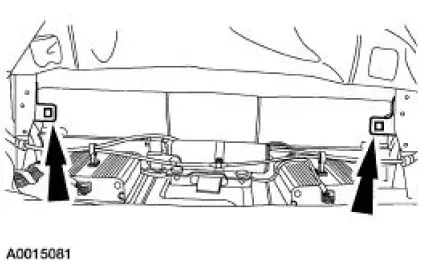
Convertible only
3. NOTE: Rework the sheet metal to its original condition and structural integrity.
The convertible model tether anchors are part of the sheet metal.
- These are accessed through the trunk by removing the trunk front trim.
Hard top only
4. NOTE: Rework the sheet metal to its original condition and structural integrity.
To install, reverse the removal procedure.
Hard top and convertible
5. Check the restraint system for correct operation.
 Retractor - Rear Seat Safety Belt, Convertible
Special Tool(s)
Torx Bit, Safety Belt Bolt
501-010 (T77L-2100-A)
Removal
1. Remove the rear seat cushion.
2. Remove the luggage compartment front lining board (45444).
3. Release the ...
 Safety Belt Buckle - Front Seat
Removal
Driver and passenger seat
1. Remove the front seat. For additional information, refer to Section.
2. Remove the nut and the safety belt buckle.
Driver seat only
3. Disconnect the safety bel ...
Other materials:
Wipers and Washers (Diagnosis and Testing)
Refer to Wiring Diagrams Cell 59 , Generic Electronic Module for
schematic and connector
information.
Refer to Wiring Diagrams Cell 81 , Interval Wiper/Washer for schematic
and connector information.
Special Tool(s)
Alternator, Regulato ...
Ignition Coil-On-Plug
Material
Item
Specification
Silicone Brake Caliper Grease
and Dielectric Compound
D7AZ-19A331-A or equivalent
ESE-M1C171-
A
Removal and Installation
1. Disconnect the battery ground cable. For additional information, refer
to Section ...
Removal
1. Raise and support the vehicle.
2. Remove the wheel and tire assembly.
3. Remove the rear brake disc (2C026).
4. Remove the differential housing cover (4033) and drain the lubricant. For
additional information,
refer to Differential Housing Cover in t ...
