Ford Mustang (1999-2004) Service Manual: Retractor - Rear Seat Safety Belt, Convertible
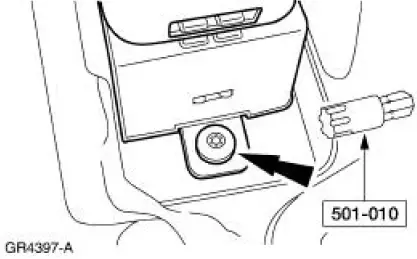
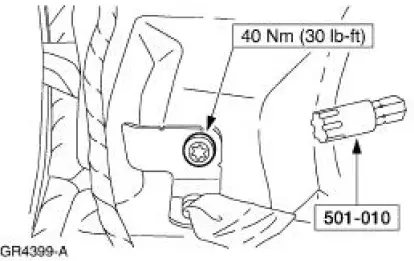
Special Tool(s)
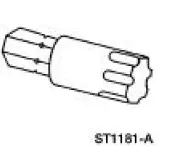 |
Torx Bit, Safety Belt Bolt 501-010 (T77L-2100-A) |
Removal
1. Remove the rear seat cushion.
2. Remove the luggage compartment front lining board (45444).
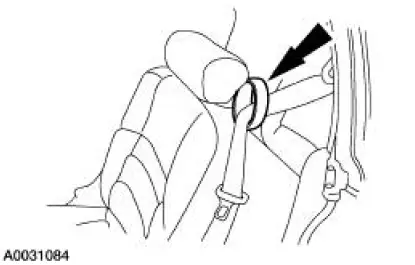
3. Release the safety belt guide.
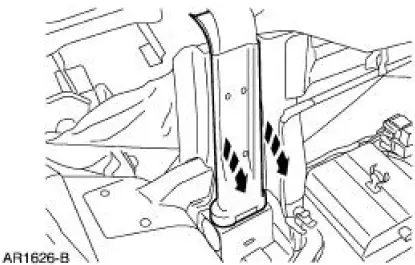
4. Using the special tool, remove the safety belt anchor bolt.
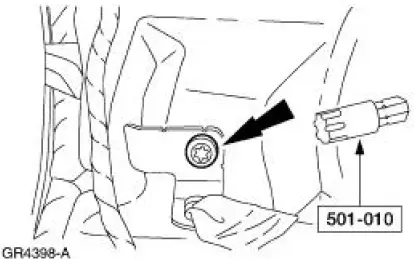
5. Using the special tool, remove the bolt and the rear safety belt retractor.
Installation
NOTE: Make sure the safety belt is not twisted when inserting it in the quarter trim panel.
1. Using the special tool, install the bolt and the rear safety belt retractor.

2. Using the special tool, install the safety belt anchor bolt.
3. Install the safety belt guide.
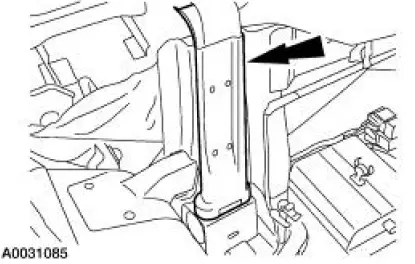
4. Install the luggage compartment front lining board.
5. Install the rear seat cushion.
6. Make sure the shoulder belt passes through the belt holder on the top of the seatback.
7. Check the active restraint system for correct operation.
 Retractor - Rear Seat Safety Belt, Coupe
Special Tool(s)
Torx Bit, Safety Belt Bolt
501-010 (T77L-2100-A)
Removal
1. Remove the quarter trim panel (31012) and the angel wing trim. For
additional information, refer
to Section ...
 Child Safety Seat Belt - Tether Anchor
Removal and Installation
Hard top only
1. Remove the package tray. For additional information, refer to Section.
2. Remove the bolts and the tether anchor bracket.
Convertible only
3. NOTE: Rework ...
Other materials:
Under hood overview
3.7L V6 Engine
A. Battery
B. Engine oil dipstick
C. Engine oil filler cap
D. Brake fluid reservoir
E. Air filter assembly
F. Engine coolant reservoir
G. Windshield washer fluid reservoir
H. Power distribution box
5.0L V8 Engine
A. Battery
B. Engine oil fille ...
Installation
1. Install the intake manifold and gaskets, tighten the bolts in the sequence
shown.
2. NOTE: The O-ring is to be installed on the top of the thermostat.
Install the water thermostat and the O-ring.
Install a new O-ring as necessary.
3. Install the wa ...
Anti-Lock Control - Traction Control (Diagnosis and Testing)
Refer to Wiring Diagrams Cell 42, Anti-Lock Brake System for schematic and
connector information.
Special Tool(s)
Worldwide Diagnostic System
(WDS)
418-F224,
New Generation STAR (NGS)
Tester
418-F052, or equivalent scan
tool
73 Di ...
