Ford Mustang (1999-2004) Service Manual: Crankshaft Front Oil Seal
Special Tool(s)
 |
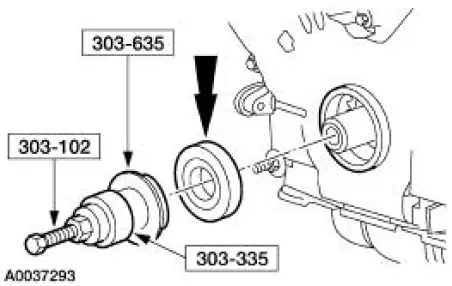
Crankshaft Seal Installer/Aligner 303-335 (T88T-6701-A) |
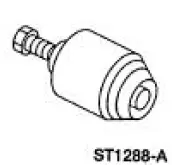 |
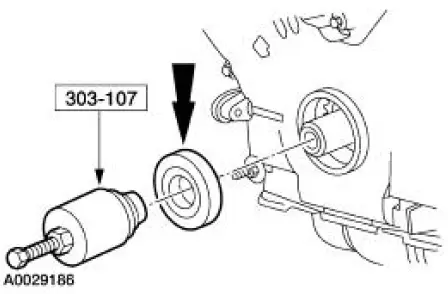
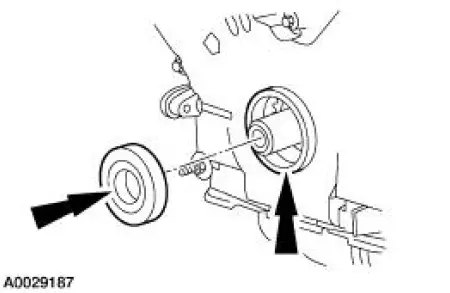
Front Cover Seal Remover 303-107 (T74P-6700-A) |
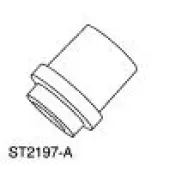 |
Crankshaft Seal Installer 303-635 |
 |
Crankshaft Damper Replacer 303-102 (T74P-6316-B) |
Material
| Item | Specification |
| Super Premium SAE 5W-20 Engine Oil XO-5W20-QSP or equivalent | WSS-M2C153- H |
Removal
1. Remove the crankshaft pulley. For additional information, refer to Crankshaft Pulley in this section.
2. Using the special tool, remove the crankshaft front oil seal.
Installation
1. Lubricate the engine front cover and the crankshaft front oil seal inner lip with clean engine oil.
2. Using the special tools, install the crankshaft front oil seal into the engine front cover.
3. Install the crankshaft pulley. For additional information, refer to Crankshaft Pulley .
 Crankshaft Pulley
Special Tool(s)
Remover, Crankshaft Vibration
Damper
303-009 (T58P-6316-D)
Installer, Crankshaft Vibration
Damper
303-102 (T74P-6316-B)
Material
Item
Specifica ...
 Engine Front Cover
Material
Item
Specification
Silicone Gasket and Sealant
F7AZ-19554-EA or equivalent
WSE-M4G323-
A4
Super Premium SAE 5W-20
Motor Oil
XO-5W20-QSP or equivalent
WSS-M2C153 ...
Other materials:
Camshaft
Special Tool(s)
Holding Tool, Camshaft
303-446 (T93P-6256-AHR)
Material
Item
Specification
Super Premium SAE 5W-20
Engine Oil
XO-5W20-QSP or equivalent
WSS-M2C153-
H
...
Fuel Injection Supply Manifold and Fuel Injector
Material
Item
Specification
SAE 5W-20 Premium Synthetic
Blend Motor Oil
XO-5W20-QSP
WSS-M2C153-
H
Removal and Installation
WARNING: Do not smoke or carry lighted tobacco or open flame of any
type when
working on or near any fuel relat ...
Differential Pressure Feedback Exhaust Gas Recirculation
(EGR) System
Removal and Installation
1. NOTE: The 4.6L (2V) is shown. The 4.6L (4V) and 3.8L are
similar.
NOTE: Bolts may be used in place of nuts on some applications.
Remove the differential pressure feedback EGR.
1. Disconnect the connector.
2. Remove the ...
