Ford Mustang (1999-2004) Service Manual: Door Window Glass Adjustment - Height Stop Adjustment
1. Close the front door.
2. Loosen the screws.
3. Raise the door window glass to the desired height.
4. Tighten the screws.
Door Window Glass Adjustment -Stabilizer
1. Raise the door window glass to the full up position.
2. Loosen the bolts.
3. Push the door window glass inner stabilizers firmly against the door window glass.
4. Tighten the bolts.
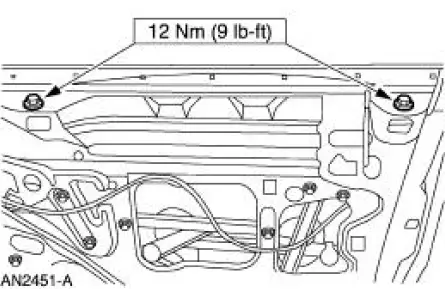
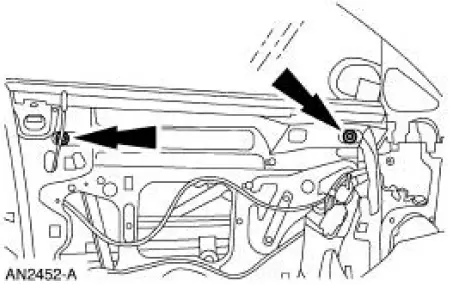
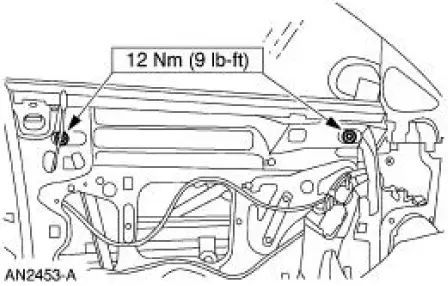
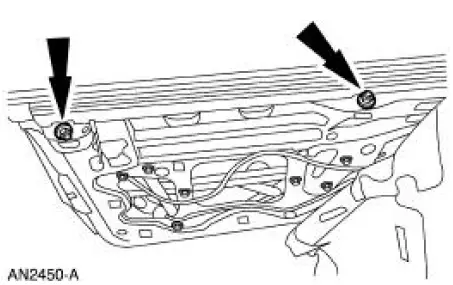
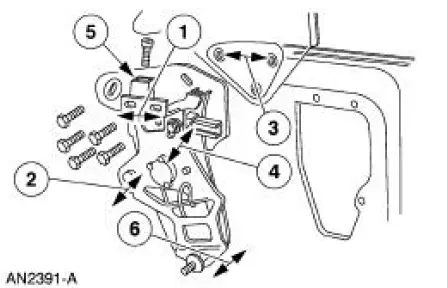
Rear Quarter Window Glass Adjustment -Convertible
1. Adjust the quarter window glass for correct fit.
1. horizontal adjustment
2. regulator plate tilt
3. glass to regulator tilt
4. front high/low up stop
5. rear high/low/tilt channel stop
6. inboard/outboard tilt
 Lead Terminal Repair
Special Tool(s)
Heat Gun
107-R0300 or equivalent
Material
Item
Specification
Rear Window Defroster Repair
D8AZ-19562-AA
WSB-M4J58-B
1. NOTE: The rear window glass m ...
 Switch - Window Regulator Control
Removal
1. CAUTION: Use a shop towel or similar material between the
tool and the door trim
panel or damage to the door trim panel may occur.
Position the window regulator switch plate aside. ...
Other materials:
Handles, Locks, Latches and Mechanisms
General Specifications
Torque Specifications
LOCK REPAIR/REPLACEMENT SPECIFICATIONS
...
Transmission (Removal)
1. Disconnect the battery ground cable. For additional information, refer
to Section.
2. Lift up on the clutch pedal and secure it in place.
3. Remove the gearshift lever knob (7213).
4. Remove the console panel gearshift plate. Lift the gearshift leve ...
Pilot Bearing
Special Tool(s)
Puller with Slide Hammer
308-001 (T58L-101-B)
1. Remove the clutch disc and the clutch pressure plate. For additional
information, refer to Disc
and Pressure Plate-3.8L and 4.6L (2V) Engines or Disc and Pressure Plate-4.6L
(4V ...
