Ford Mustang (1999-2004) Service Manual: Switch - Window Regulator Control
Removal
1. CAUTION: Use a shop towel or similar material between the tool and the door trim panel or damage to the door trim panel may occur.
Position the window regulator switch plate aside.
1. Pull at the service notch.
2. Lift to release the clip at the rear edge.
2. Remove the window regulator control switch.
1. Remove the screws.
2. Disconnect the connectors.
Installation
1. To install, reverse the removal procedure.
Rear Window Defrost Switch
Removal and Installation
1. Remove the instrument panel center finish panel. For additional information, refer to Section.
2. Release the clips and remove the rear window defrost switch.
3. To install, reverse the removal procedure.
 Door Window Glass Adjustment - Height Stop Adjustment
1. Close the front door.
2. Loosen the screws.
3. Raise the door window glass to the desired height.
4. Tighten the screws.
Door Window Glass Adjustment -Stabilizer
1. Raise the door window ...
 Rear Window Glass
Special Tool(s)
Rotunda Pneumatic Knife with
Offset Blade
107-R1511 or equivalent
The Pumper
164-R2459 or equivalent
Rotunda Interior Auto Glass
Cut-Out Knif ...
Other materials:
Road Test
NOTE: It may be necessary to have the customer ride along or drive the
vehicle to point out the
concern. During the road test, take into consideration the customer's driving
habits and the driving
conditions. The customer's concern just may be an acceptable ...
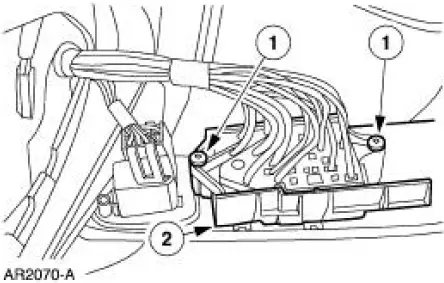
Pinpoint Tests
CAUTION: Be careful when probing the CJB, battery junction box (BJB)
or any
connectors. Damage will result to the connector receptacle if the probe or
terminal being used
is too large.
CAUTION: Electronic modules are sensitive to static electrical char ...
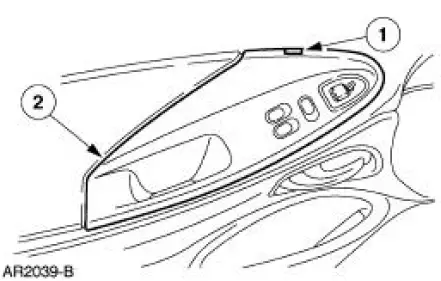
Window Glass - Quarter, Convertible
Removal
1. Remove the quarter trim panel. For additional information, refer
to Section.
2. Disconnect the connectors and remove the screw.
3. Remove the screw.
4. Remove the screw and the speaker.
5. Disconnect the electrical connector.
6. Remo ...
