Ford Mustang (1999-2004) Service Manual: Evaporative Emission Canister Purge Valve
Removal and Installation
1. WARNING: The evaporative emission system contains fuel vapor and condensed fuel vapor. Although not in large quantities, it still presents the danger of explosion or fire. Disconnect the battery ground cable from the battery to minimize the possibility of an electrical spark occurring, possibly causing a fire or explosion if fuel vapor or fuel liquid is present in the area. Failure to follow these instructions may result in personal injury.
Disconnect the battery ground cable. For additional information, refer to Section.
2. Raise and support the vehicle. For additional information, refer to Section.
3. Remove the RH front wheel. For additional information, refer to Section.
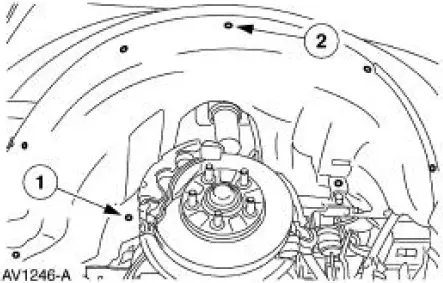
4. Remove the right front splash shield.
1. Remove the three screws.
2. Remove the five pin-type retainers.
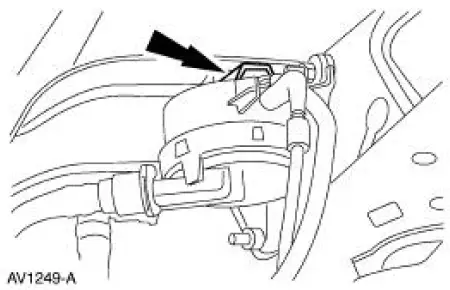
5. Disconnect the connector.
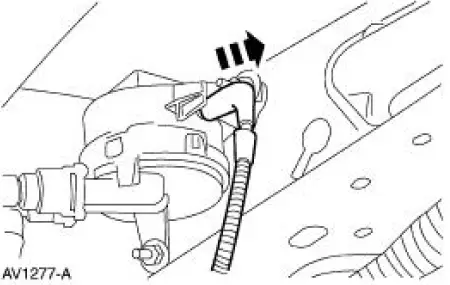
6. Disconnect the main emission vacuum control connector.
7. WARNING: Do not smoke or carry lighted tobacco or open flame of any type when working on or around any fuel-related component. Highly flammable mixtures are always present and may be ignited. Failure to follow these instructions may result in personal injury.
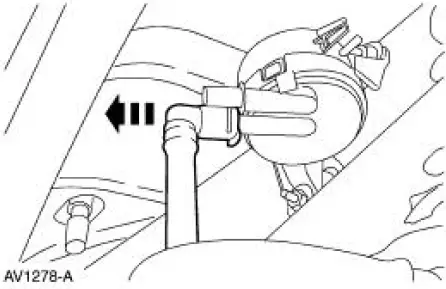
Disconnect the evaporative emission (EVAP) canister purge outlet tube.
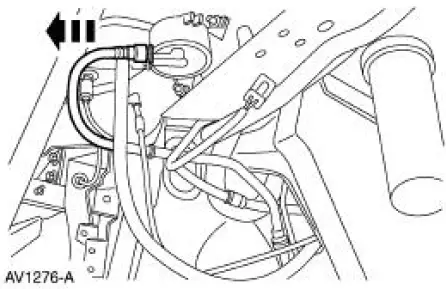
8. Disconnect the EVAP return tube.
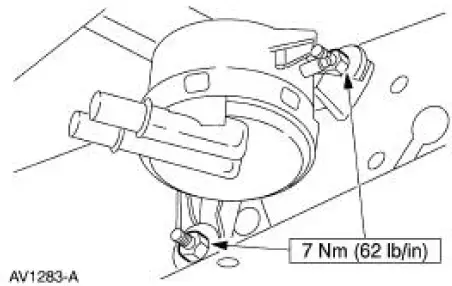
9. Remove the nuts and the EVAP canister purge valve.
10. To install, reverse the removal procedure.
- Leak test the system. For additional information, refer to Evaporative Emission System Leak Test in this section.
- Carry out the evaporative emission repair verification drive cycle. For additional information, refer to Evaporative Emission Repair Verification Drive Cycle in this section.
Fuel Vapor Vent Valve
Removal and Installation
1. NOTE: The fuel vapor vent valve is repaired along with the fuel vapor control valve and the inline fuel tank pressure sensor as a fuel vapor control valve tube assembly.
For removal and installation of the fuel vapor vent valve, refer to Fuel Vapor Control Tube Assembly Valve in this section.
 Evaporative Emission Canister
Removal and Installation
1. WARNING: The evaporative emission system contains fuel vapor
and condensed
fuel vapor. Although not in large quantities, it still presents the
danger of explosion ...
 Fuel Vapor Control Tube Assembly Valve
Removal and Installation
1. Remove the fuel tank. For additional information, refer to
Section.
2. Remove the retainers.
3. NOTE: The fuel vapor vent valve, fuel vapor control valve and the ...
Other materials:
Extension Housing Seal and Gasket
Special Tool(s)
Slide Hammer
100-001 (T50T-100-A)
Installer, Transmission
Extension Housing Fluid Seal
308-002 (T61L-7657-A)
Remover, Transmission Fluid
Seal
307-048 (T74P-77248-A)
Removal
1. Drain the transmiss ...
General information
WARNING: Extended idling at high engine speeds can produce
very high temperatures in the engine and exhaust system,
creating the risk of fire or other damage.
WARNING: Do not park, idle, or drive your vehicle on dry grass
or other dry ground cover. The emissio ...
Supercharger Cooling (Description and Operation)
CAUTION: Some vehicle cooling systems are filled with Motorcraft
Premium Engine
Coolant VC-4-A (in Oregon VC-5, in Canada CXC-10) or equivalent meeting Ford
specification
ESE-M97B44-A (green color). Others are filled with Motorcraft Premium Gold
Engine Cool ...
