Ford Mustang (1999-2004) Service Manual: Gearshift Rail and Fork
Disassembly and Assembly
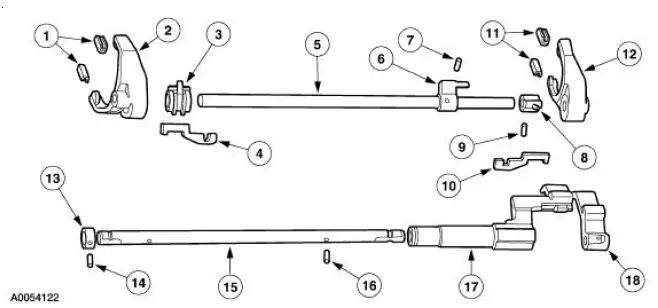
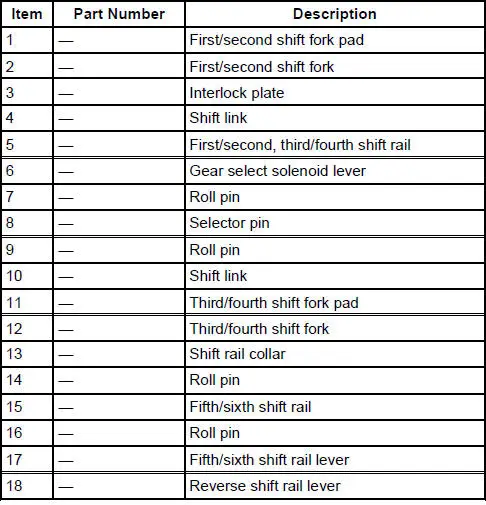
1. Disassemble the first/second and third/fourth shift rail as follows:
- Rotate the interlock plate until it is opposite of the shift links.
- Slide off the third/fourth shift fork and shift link. Separate the link from the fork.
- Slide off the first/second shift fork and shift link. Separate the link from the fork.
- Remove the interlock plate.
- Using a 5/32-inch drift and a hammer, remove and discard the roll pins. Slide the gear select solenoid lever and the selector pin from the shift rail.
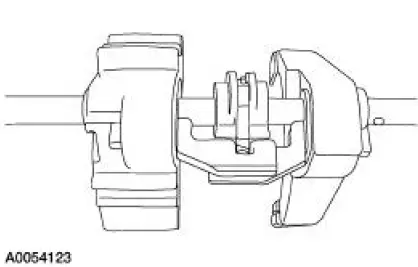
2. Disassemble the fifth/sixth and reverse shift rail as follows:
- Using a 5/32-inch drift and a hammer, remove and discard the roll pins. Slide the collar and the reverse shift lever from the shift rail.
- Slide off the fifth/sixth shift lever and shift link.
3. Inspect the shift rail components.
- Check the rails, shift forks, shift levers and shift links for wear or damage. Install new components as necessary.
- Check the shift fork pads for wear. Install new pads as necessary.
4. To assemble, reverse the disassembly procedure.
- Install new roll pins.
 Synchronizers
Disassembly and Assembly
NOTE: This procedure applies to all synchronizer assemblies.
1. NOTE: Synchronizer components are not interchangeable. During
disassembly, mark each
individual synchronizer f ...
 Extension Housing
Special Tool(s)
Installer, Bearing Cup
204-039 (T77F-1217-B)
Adapter for 303-224 (Handle)
205-153 (T80T-4000-W)
Disassembly and Assembly
1. Remove the bolt and ...
Other materials:
Installation
CAUTION: The upper suspension arm and bushing nuts must be tightened
with the
suspension at curb height. Failure to do so can result in bushing failure,
resulting in poor ride
and handling.
NOTE: If installing a new upper suspension arm and bushing, mark the ...
Door Speaker - Lower
Removal and Installation
1. Remove the front door trim panel (239420). For additional
information, refer to Section
2. Remove the speaker (18808).
1. Remove the screws.
2. Disconnect the electrical connector.
3. Remove the speaker.
3. ...
Deactivation
WARNING: Always wear safety glasses when repairing an air bag
supplemental restraint
system (SRS) vehicle and when handling an air bag module. This will
reduce the risk of injury
in the event of an accidental deployment.
WARNING: Carry a live air ...
