Ford Mustang (1999-2004) Service Manual: Installation
1. NOTE: LH shown; RH similar.
Install the camshafts.
- Lubricate the camshafts with clean engine oil.

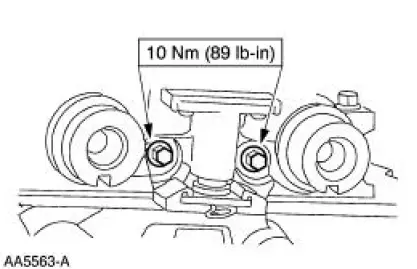
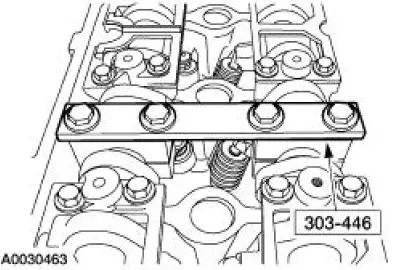
2. Install the camshaft bearing cap assemblies and tighten the bolts in the sequence shown.
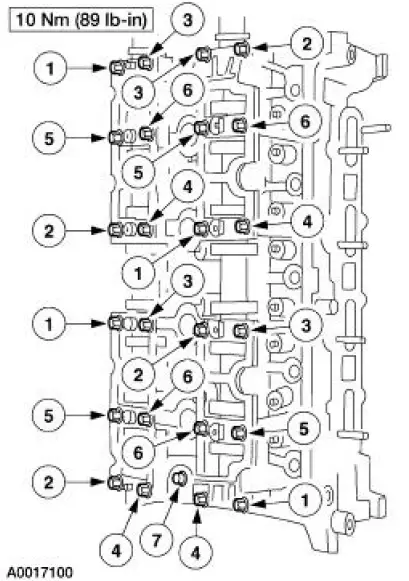
3. Install the bolts.
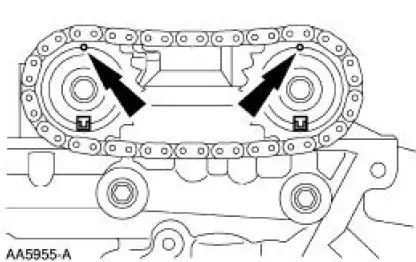
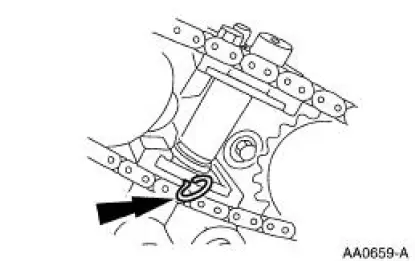
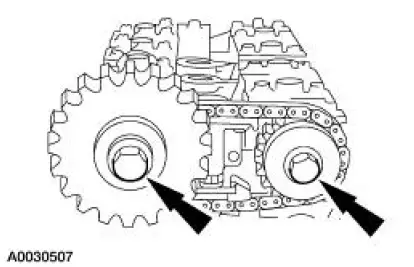
4. CAUTION: Timing marks must be at 12 o'clock and indexed at 6 o'clock.
Install the camshaft sprockets and the chain as an assembly.
5. Remove the lockpin from the chain tensioner.
6. Install the special tool.
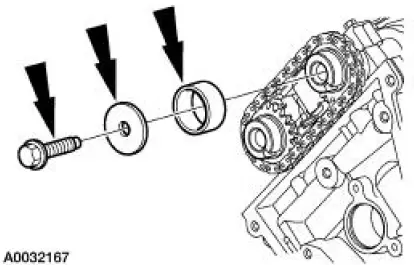
7. Install the camshaft spacer, washer and bolt and hand-tighten the bolt.
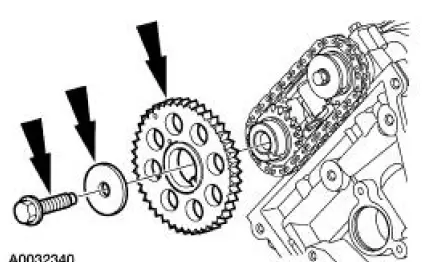
8. Install the camshaft sprocket, washer and bolt, and hand-tighten the bolt.
9. Tighten the bolts in two stages:
- Stage 1: Tighten to 40 Nm (30 lb-ft).
- Tighten an additional 90 degrees.
10. Remove the special tool.
11. Install the left timing chain for the left side or both timing chains for the right side. For additional information, refer to Timing Drive Components in this section.
12. Install the roller followers. For additional information, refer to Roller Followers in this section.
 Removal
1. Remove the roller followers. For additional information, refer to Roller
Followers in this section.
2. Remove the LH timing chain for the LH side and both timing chains for the RH
side. For
addi ...
 Exhaust Manifold RH
Removal and Installation
1. Disconnect the battery ground cable. For additional information, refer to
Section.
2. Raise the vehicle. For additional information, refer to Section.
3. Remove the dual ...
Other materials:
Transmission Electronic Control System
The powertrain control module (PCM) and its input/output network
control the following transmission
operations:
Shift timing
Line pressure (shift feel)
Torque converter clutch
The transmission control is separate from the engine control s ...
Fuel Line Fittings - Push Connect
Special Tool(s)
Disconnect Tool, Spring Lock
Coupling
310-S039 (T90T-9550-S)
Material
Item
Specification
SAE 5W-20 Super Premium
Blend Motor Oil
XO-5W20-QSP or equivalent
WSS-M2C153-
H
Disconnect
WARNING: Do not smoke ...
Input Shaft and Bearing
Special Tool(s)
Plate, Bearing/Oil Seal
205-090 (T75L-1165-B)
Puller, Bearing
205-D064 (D84L-1123-A)
Installer, Drive Pinion Bearing
Cone
205-004 (T53T-4621-B)
Adapter Set, Step Plate
205-DS011 (D80L-630 ...
