Ford Mustang (1999-2004) Service Manual: Removal
1. Remove the roller followers. For additional information, refer to Roller Followers in this section.
2. Remove the LH timing chain for the LH side and both timing chains for the RH side. For additional information, refer to Timing Drive Components in this section.
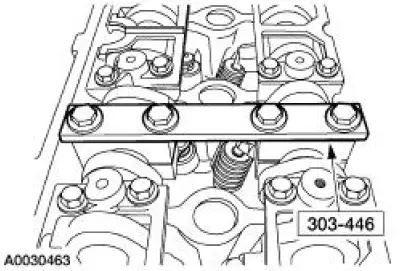
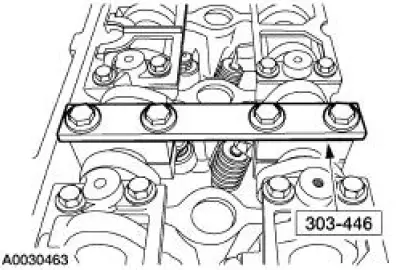
3. Install the special tool.
4. Remove the exhaust camshaft sprocket and the intake camshaft bolt, washer and spacer.

5. Remove the special tool.
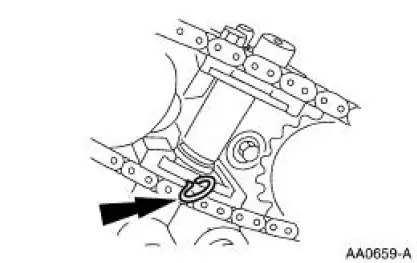
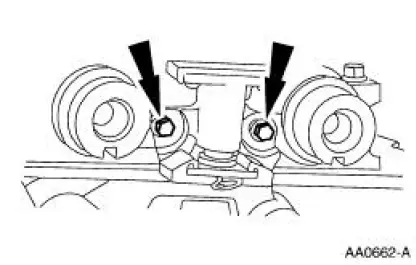
6. Compress the tensioner and install a lock pin.
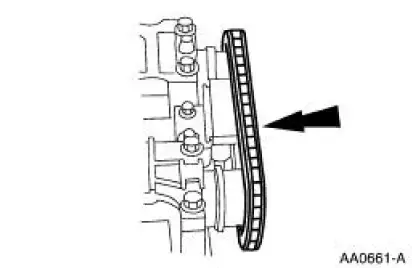
7. Remove the timing chain, the sprocket, and intake camshaft sprocket spacer.
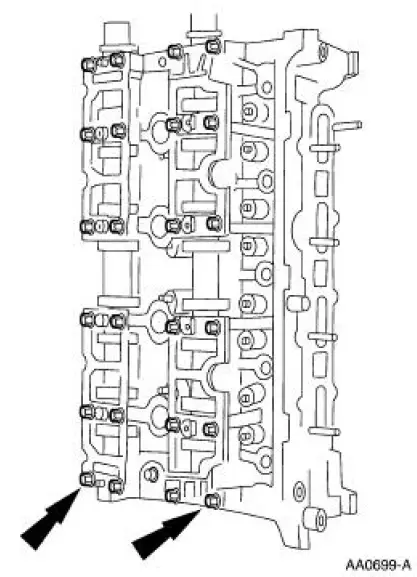
8. NOTE: LH shown; RH similar.
Remove the bolts.
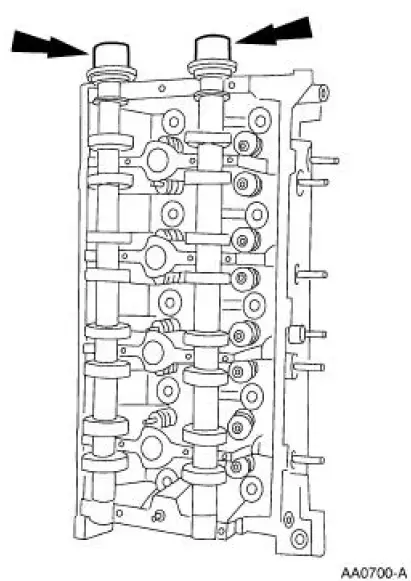
9. CAUTION: The outer bolts on the outer cam bearing cap (exhaust) are longer and must be returned to the same location or engine damage may occur.
NOTE: Identify the camshaft to cylinder head location. Caps are not interchangeable.
Remove the bolts and the camshaft bearing cap assemblies.
10. Remove the camshafts.
 Camshaft
Special Tool(s)
Holding Tool, Camshaft
303-446 (T93P-6256-AHR)
Material
Item
Specification
Super Premium SAE 5W-20
Engine Oil
XO-5W20-QSP or equivalent
WSS-M2C153-
...
 Installation
1. NOTE: LH shown; RH similar.
Install the camshafts.
Lubricate the camshafts with clean engine oil.
2. Install the camshaft bearing cap assemblies and tighten the bolts in the
sequence shown.
...
Other materials:
Front End Body Panels
Torque Specifications
Front End Body Panels
The front end body panel components consist of the following:
air deflectors
cowl grille
fenders
fender splash shields
hood
hood hinges
hood weatherstrip
radiator grille opening panel
...
Installation
All vehicles
1. NOTE: If the valve cover is not secured within four minutes, the sealant
must be removed and
the sealing area cleaned with metal surface cleaner. Allow to dry until there is
no sign of
wetness, or four minutes, whichever is longer. Failure to ...
Engine and Radiator Flushing
Special Tool(s)
Coolant System
Drain/Flush/Fill
164-R3673 or equivalent
Flush Kit
164-R3658 or equivalent
Drain Kit
164-R3662 or equivalent
Material
Item
Specification
Motorcraft Premium Cooling
...
